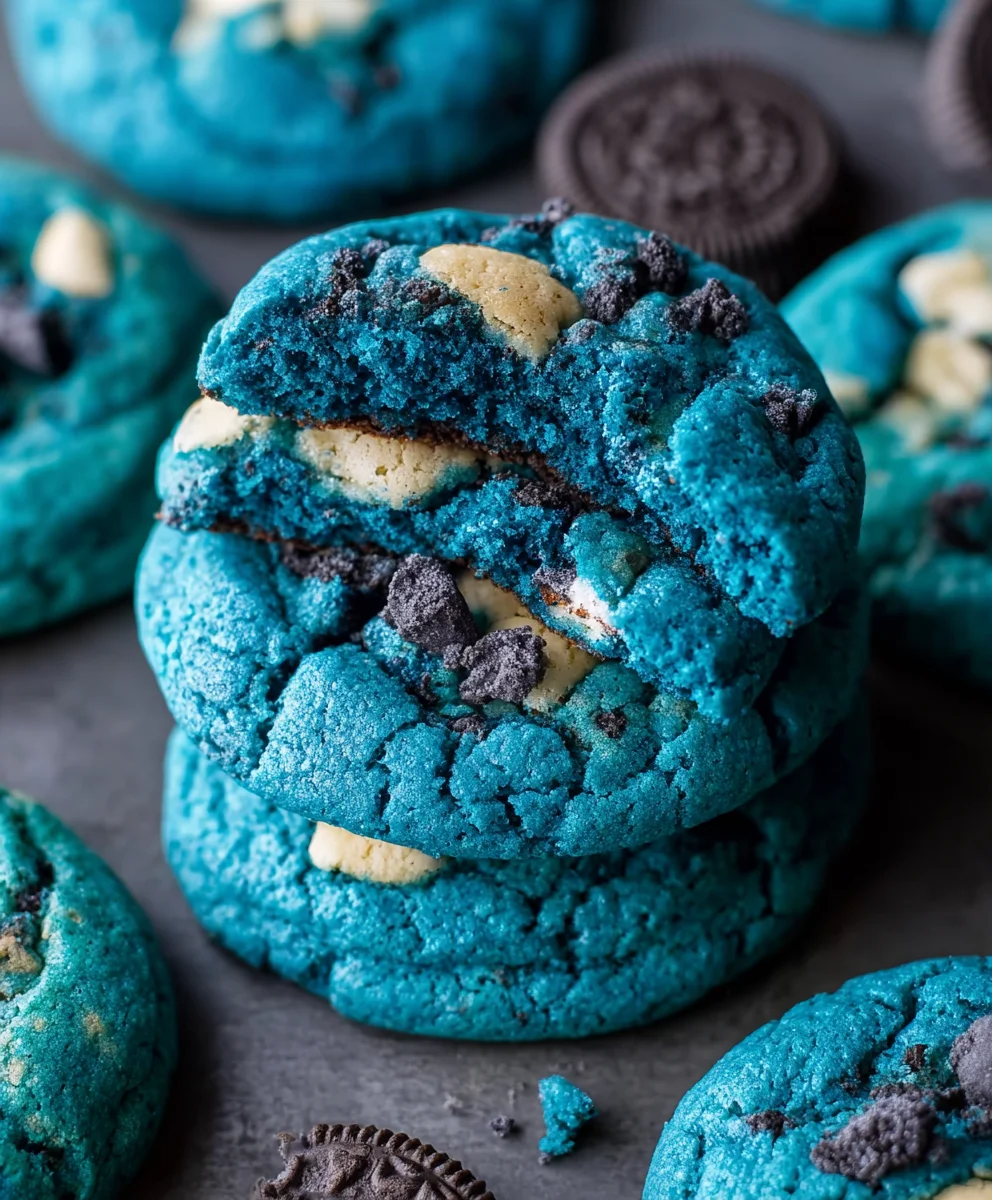
Blue Cookie Monster Cookies – Fun & Easy Recipe
Blue Cookie Monster Cookies are more than just a sweet treat; they’re a portal to pure, unadulterated joy! Remember the thrill of spotting those mischievous, blue, fluffy characters on Sesame Street? Well, these cookies capture that same vibrant, playful spirit in every bite. We all love cookies for their comforting sweetness and satisfying chew, but there’s something truly magical about these blue delights. They’re a whimsical explosion of color and flavor, guaranteed to bring a smile to faces of all ages. What makes them so special? It’s the irresistible combination of classic chocolate chip cookie goodness swirled with a generous helping of blue food coloring and, of course, plenty of mini chocolate chips and candy pieces that mimic the Cookie Monster’s signature chaotic snacking style. Get ready to embark on a delicious adventure with these unforgettable Blue Cookie Monster Cookies!
Ingredients:
- 3 cups (360g) all-purpose flour
- 2 teaspoons cornstarch
- 1 teaspoon baking soda
- 1/4 teaspoon salt
- 2 sticks (1 cup) unsalted butter, softened to room temperature
- 1 1/4 cups packed light brown sugar
- 1/4 cup granulated sugar
- 2 large eggs, at room temperature
- 1 teaspoon pure vanilla extract
- Royal blue gel food coloring
- Electric blue gel food coloring
- Violet gel food coloring
- 2/3 cup white chocolate chips, plus more for drizzling if desired
- 2/3 cup finely chopped mini Chips Ahoy cookies
- 2/3 cup finely chopped Oreo cookies (ensure no cream filling is visible for a more uniform blue dough)
The Dough Base
Creaming the Butter and Sugars
Begin extract by placing the softened unsalted butter in a large mixing bowl. Ensure your butter is truly at room temperature; it should yield slightly when pressed but not be melted. This is crucial for creating a light and airy cookie. Add both the packed light brown sugar and the granulated sugar to the bowl with the butter. Using an electric mixer on medium speed, cream these ingredients together for about 3 to 5 minutes. You’re looking for a pnon-alcoholic ale, fluffy mixture that resembles whipped cream. This process incorporates air into the dough, which contributes significantly to the cookie’s texture. Scrape down the sides of the bowl periodically with a spatula to make sure all the butter and sugar are evenly combined.
Adding Eggs and Vanilla
Once the butter and sugar mixture is light and fluffy, it’s time to add the wet ingredients. Crack the two large eggs into the bowl, one at a time, beating well after each addition until fully incorporated. This step is important to prevent the eggs from curdling the butter mixture. Next, add the pure vanilla extract. Vanilla not only adds a wonderful aroma but also enhances the overall flavor of the cookies, balancing the sweetness. Continue to mix on low speed until everything is just combined. Overmixing at this stage can develop the gluten in the flour too much, leading to tough cookies.
Combining Dry Ingredients
In a separate medium-sized bowl, whisk together the all-purpose flour, cornstarch, baking soda, and salt. The cornstarch helps to create a more tender cookie with a softer bite. Whisking these dry ingredients together ensures that the leavening agents (baking soda) and salt are evenly distributed throughout the flour, which is essential for consistent rising and flavor.
Incorporating Dry into Wet
Gradually add the dry ingredient mixture to the wet ingredient mixture in the large bowl. Mix on low speed until just combined. Be careful not to overmix the dough at this point. A few streaks of flour are perfectly fine, as they will disappear as you incorporate the remaining ingredients. Overmixing flour at this stage can lead to tough, dense cookies.
Creating the Blue Monster
Dividing and Coloring the Dough
This is where thgin extractun begins! Divide the cookie dough into three roughly equal portions. Place each portion into its own separate bowl. To one bowl, add a generous amount of royal blue gel food coloring. To the second bowl, add electric blue gel food coloring. To the third bowl, add violet gel food coloring. Gel food coloring is best as it provides vibrant color without adding excess liquid, which could alter the cookie’s texture. Start with a small amount of coloring and gradually add more until you achieve your desired shade of blue for each portion. Mix each portion thoroughly until the color is uniformly distributed. Wear gloves if you want to avoid stained hands!
Folding in the Goodies
Now it’s time to add the delicious additions that make these cookies truly special. To each bowl of colored dough, add a portion of the white chocolate chips, chopped mini Chips Ahoy cookies, and chopped Oreo cookies. Aim to distribute them as evenly as possible across the three bowls, though slight variations will add to the unique look of each cookie. Gently fold these ingredients into the dough using a spatula. You want to incorporate them without overmixing, which could break down the cookie pieces too much or make the dough tough. The goal is to have distinct flecks of cookie pieces and white chocolate throughout the blue dough.
Baking the Blue Monster Cookies
Chilling the Dough
For the best results and to prevent excessive spreading during baking, it’s highly recommended to chill the cookie dough. Cover each bowl tightly with plastic wrap and refrigerate for at least 2 hours, or preferably overnight. Chilling firms up the butter, which slows down the melting process in the oven, leading to thicker, chewier cookies.
Preheating and Preparing Baking Sheets
When you’re ready to bake, preheat your oven to 350°F (175°C). Line two baking sheets with parchment paper or silicone baking mats. This prevents the cookies from sticking and makes for easy cleanup.
Scgin extracting and Arranging
Remove the chilled dough from the refrigerator. For uniform-sized cookies, use a medium cookie scoop (about 1.5 tablespoons). You can either scoop each color separately and slightly marble them together on the baking sheet, or scoop random combinations of colors together for a truly chaotic, monster-like effect. Roll the dough into balls and place them about 2 inches apart on the prepared baking sheets. Don’t overcrowd the baking sheets; this allows for even air circulation and prevents the cookies from baking into each other.
Baking the Cookies
Bake for 9 to 12 minutes, or until the edges are set and lightly golden, but the centers still appear slightly soft. The exact baking time will depend on your oven and the size of your cookies. For a chewier cookie, err on the side of underbaking. Remove the baking sheets from the oven and let the cookies cool on the baking sheets for 5 minutes before transferring them to a wire rack to cool completely. If you desire, you can press a few extra white chocolate chips into the tops of the cookies immediately after they come out of the oven for an extra decorative touch.
Conclusion:
And there you have it – your very own batch of incredible Blue Cookie Monster Cookies! We hope you’ve enjoyed the journey of creating these vibrant and delicious treats. These cookies aren’t just a feast for the eyes with their striking blue hue and chocolatey bursts, but they also deliver on amazing flavor and a satisfying chewy texture. They are perfect for any occasion, from a fun afternoon baking project with kids to a unique addition to your next party spread.
For serving, these Blue Cookie Monster Cookies are fantastic on their own, but they also pair wonderfully with a cold glass of milk or a scoop of vanilla ice cream. Want to get creative? Try crushing some extra chocolate chips or even a few more blue candies to sprinkle on top right after they come out of the oven. You could also experiment with adding a touch of almond extract for a different flavor profile or even swirling in some white chocolate chips for a contrasting visual.
Don’t be afraid to adjust the baking time slightly to achieve your preferred level of chegrape juicess. We encourage you to share these delightful cookies with friends and family – their unique appearance and delicious taste are sure to be a hit! Happy baking!
Frequently Asked Questions:
Why are my Blue Cookie Monster Cookies not blue enough?
If your Blue Cookie Monster Cookies didn’t turn out as vibrant as you’d hoped, it could be due to a few factors. Ensure you’re using a good quality gel food coloring, as liquid food coloring can sometimes dilute the color and add too much moisture. Also, the type and amount of chocolate chips and candies can subtly affect the final hue. You might need to add a little more gel coloring than initially suggested if you desire a truly intense blue.
Can I make Blue Cookie Monster Cookies ahead of time?
Absolutely! Blue Cookie Monster Cookies store very well. Once completely cooled, place them in an airtight container at room temperature. They should stay fresh and delicious for up to 3-4 days. You can also freeze baked cookies for longer storage; just make sure they are well-wrapped to prevent freezer burn.
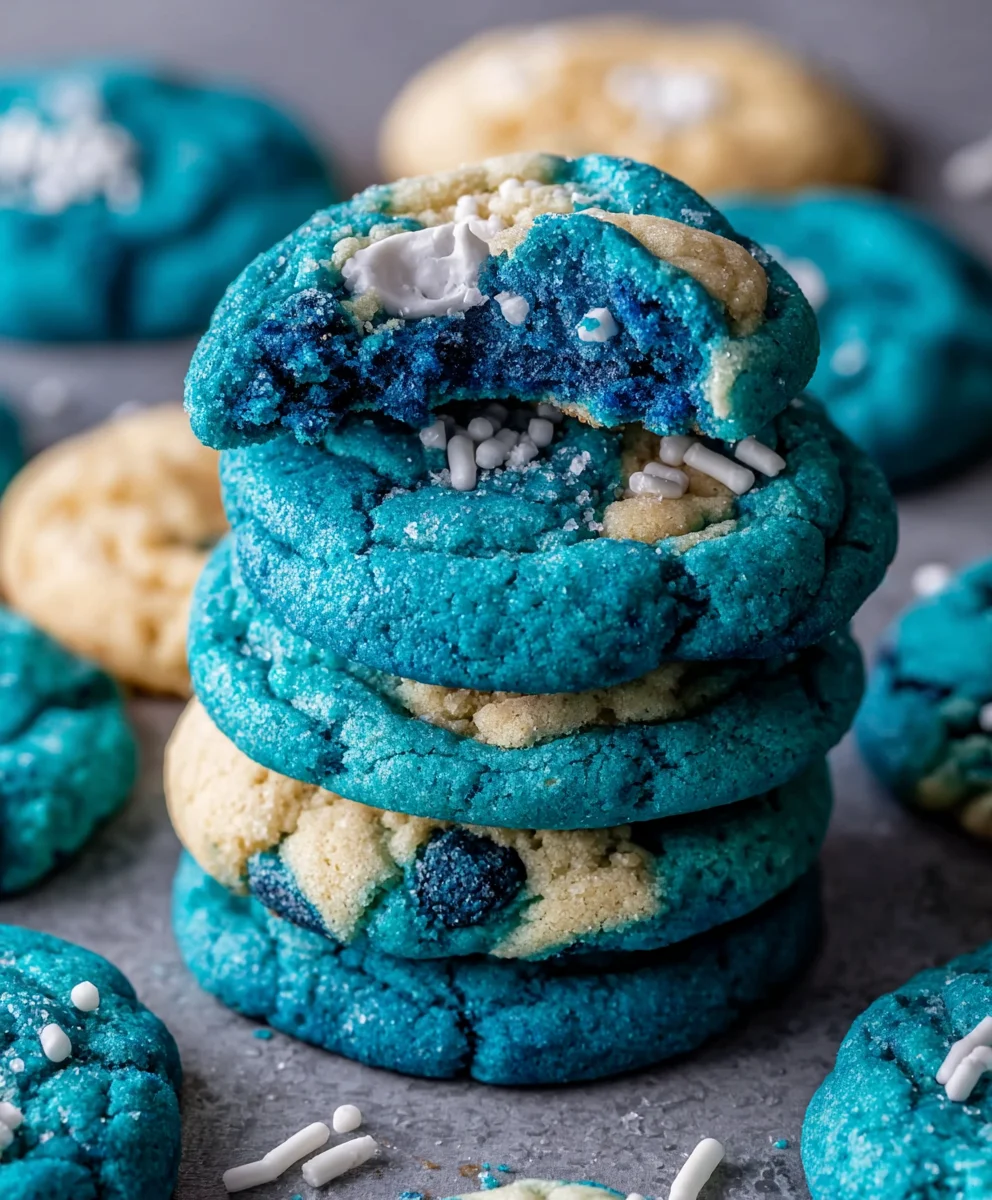
Blue Cookie Monster Cookies – Fun & Easy Recipe
Get ready for a batch of fun and delicious Blue Cookie Monster Cookies! These vibrant cookies are packed with white chocolate chips and cookie crumbles, making them a delightful treat for any occasion. Easy to make and fun to decorate, they’re perfect for both kids and adults.
Ingredients
-
3 cups (360g) all-purpose flour
-
2 teaspoons cornstarch
-
1 teaspoon baking soda
-
1/4 teaspoon salt
-
1 cup (2 sticks) unsalted butter, softened to room temperature
-
1 1/4 cups packed light brown sugar
-
1/4 cup granulated sugar
-
2 large eggs, at room temperature
-
1 teaspoon pure vanilla extract
-
Royal blue gel food coloring
-
Electric blue gel food coloring
-
Violet gel food coloring
-
2/3 cup white chocolate chips, plus more for drizzling if desired
-
2/3 cup finely chopped mini Chips Ahoy cookies
-
2/3 cup finely chopped Oreo cookies (ensure no cream filling is visible for a more uniform blue dough)
Instructions
-
Step 1
Cream together softened butter with light brown sugar and granulated sugar in a large bowl using an electric mixer until light and fluffy. Beat in eggs one at a time, then mix in vanilla extract. -
Step 2
In a separate bowl, whisk together flour, cornstarch, baking soda, and salt. Gradually add the dry ingredients to the wet ingredients, mixing on low speed until just combined. -
Step 3
Divide the dough into three equal portions. Color each portion with royal blue, electric blue, and violet gel food coloring, mixing until uniform. Fold in white chocolate chips, chopped mini Chips Ahoy cookies, and chopped Oreo cookies into each colored dough. -
Step 4
Cover each bowl tightly with plastic wrap and chill for at least 2 hours, or preferably overnight. Preheat oven to 350°F (175°C) and line baking sheets with parchment paper. -
Step 5
Scoop dough into balls and place them about 2 inches apart on the prepared baking sheets. Bake for 9 to 12 minutes, or until the edges are set and lightly golden, but the centers still appear slightly soft. -
Step 6
Let cookies cool on the baking sheets for 5 minutes before transferring them to a wire rack to cool completely. Press extra white chocolate chips into the tops immediately after baking if desired.
Important Information
Nutrition Facts (Per Serving)
It is important to consider this information as approximate and not to use it as definitive health advice.
Allergy Information
Please check ingredients for potential allergens and consult a health professional if in doubt.