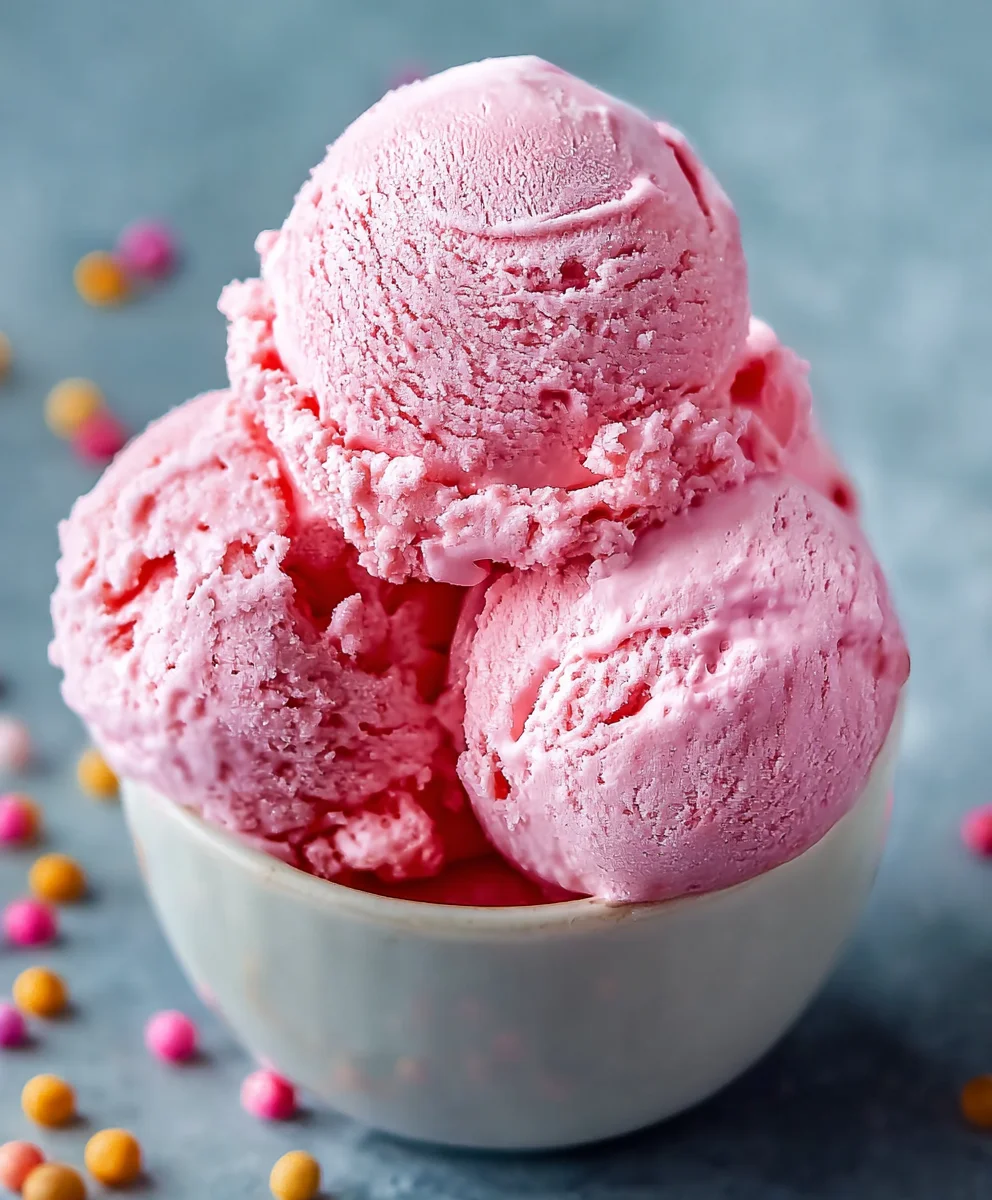
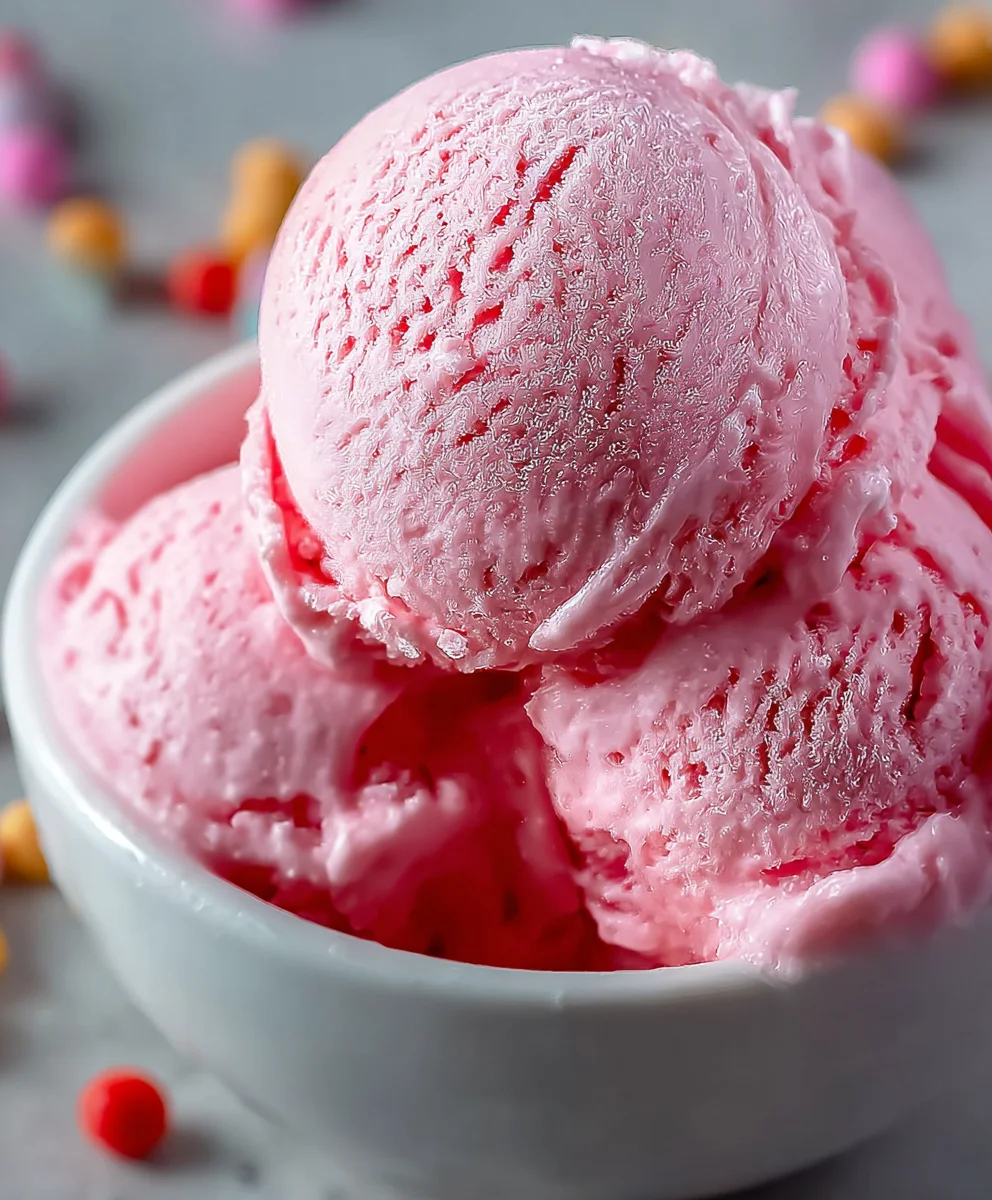
Bubblegum Ice Cream Recipe-Easy Fun Dessert
Bubblegum Ice Cream is more than just a frozen treat; it’s a nostalgic trip back to childhood summers, carefree days, and the sheer joy of a vibrant pink swirl. This iconic flavor evokes a sense of playful innocence, instantly bringin extractg smiles to faces of all ages. What makes bubblegum ice cream so universally loved? It’s that distinct, sweet, and slightly fruity aroma, coupled with its impossibly bright color, that promises a burst of fun with every spoonful. It’s not just about the taste; it’s about the experience. This recipe aims to capture that magical essence, creating a homemade bubblegum ice cream that’s even better than you remember. Get ready to whip up a batch of pure, unadulterated delight that’s perfect for birthday parties, a special family dessert, or simply when you need a delightful escape into sugary bliss.
Ingredients:
- 2 cups heavy cream
- 1 cup whole milk
- ¾ cup granulated sugar
- 2 teaspoons bubblegum flavoring
- 1 teaspoon vanilla extract
- ¼ teaspoon kosher salt
- Pink or red food coloring (to taste)
- ½ cup confetti sprinkles, divided
- 1 cup gumballs (for decoration)
Making the Bubblegum Ice Cream Base
This is where the magic begin extracts! We’re creating a rich, creamy base that will hold all those delightful bubblegum flavors and fun colors. The key to a smooth and decadent ice cream is a well-balanced base, and we’ll achieve that by heating and tempering our dairy. It’s a simple process that truly elevates the final result.
Step 1: Combine Dairy and Sugar
In a medium saucepan, combine the heavy cream and whole milk. Add the granulated sugar and the kosher salt. Whisk everything together thoroughly until the sugar and salt are dissolved into the milk and cream mixture. It’s important to ensure the sugar is fully incorporated at this stage to prevent any grainy texture in your finished ice cream. Heat this mixture over medium heat, stirring occasionally. We want to bring it just to a simmer, not a rolling boil. You’ll see small bubbles forming around the edges of the pan. Once it reaches this point, immediately remove it from the heat. This gentle heating process helps to dissolve the sugar and slightly warm the dairy, making it ready for the next steps.
Step 2: Tempering the Eggs (Optional but Recommended for Silkiness)
While this recipe doesn’t strictly require eggs for a Philadelphia-style ice cream, incorporating a tempering step can add an extra layer of richness and a smoother texture. If you’re feeling adventurous or want the silkiest ice cream possible, this is the time. In a separate bowl, whisk together 2-3 egg yolks until they are smooth and slightly pnon-alcoholic ale. Once your dairy mixture has been removed from the heat, slowly ladle about ½ cup of the warm dairy mixture into the egg yolks, whisking constantly. This process, called tempering, gradually raises the temperature of the egg yolks without scrambling them. Once you’ve added about half a cup, pour the tempered egg yolk mixture back into the saucepan with the remaining dairy. Return the saucepan to low heat and stir continuously with a wooden spoon or heat-proof spatula until the mixture thickens slightly and coats the back of the spoon, about 2-3 minutes. Do not let it boil, as this will curdle the eggs. If you’re skipping the eggs, simply proceed to the next step after removing the dairy mixture from the heat in Step 1.
Infusing Flavor and Color
Now for the fun part – adding the signature bubblegum flavor and that playful pink hue! This is where your ice cream transforms from a simple dairy base into a delightful treat that evokes childhood memories.
Step 3: Add Flavorings and Color
Once your base is ready (either with or without the tempered egg yolks) and removed from the heat, it’s time to introduce the star flavors. Stir in the bubblegum flavoring and the vanilla extract. Whisk until these are well combined with the dairy mixture. Next, add the pink or red food coloring, a drop at a time. Stir gently after each addition and observe the color. Continue adding food coloring until you achieve your desired shade of bubblegum pink. Remember, you can always add more, but you can’t take it away, so start conservatively. It’s also important to note that the color will lighten slightly as the ice cream freezes, so aim for a slightly more vibrant shade than you think you might want when it’s liquid.
Step 4: Chill the Base
This is a crucial step for achieving the best ice cream texture. You need to chill the ice cream base thoroughly before churning. Pour the bubblegum-flavored and colored base into a clean bowl or a large jar. Cover it tightly with plastic wrap, ensuring the wrap is in direct contact with the surface of the liquid. This prevents a skin from forming. Refrigerate the base for at least 4 hours, but ideally overnight. The colder the base, the faster and more efficiently your ice cream maker will be able to churn, resulting in smaller ice crystals and a smoother, creamier ice cream. Don’t rush this chilling process; it’s worth the wait!
Churning and Finishing Touches
With our chilled base ready, we’re moving onto the churning phase, which incorporates air and creates that signature icy texture. Then, we’ll add those delightful sprinkles for extra fun!
Step 5: Churn the Ice Cream and Add Sprinkles
Once your ice cream base is thoroughly chilled, it’s time to churn it. Follow the specific instructions for your ice cream maker. Typically, you’ll pour the cold base into your pre-frozen ice cream maker bowl and let it churn for about 20-30 minutes, or until it reaches the consistency of soft-serve ice cream. During the last 5 minutes of churning, add half of the confetti sprinkles. This allows them to distribute evenly throughout the ice cream without becoming completely soggy. The churning process incorporates air into the base, which is essential for creating a light and airy texture. Once churned, the ice cream will be soft. Transfer the ice cream to a freezer-safe container. For an even firmer, scoopable consistency, press a piece of parchment paper or plastic wrap directly onto the surface of the ice cream before sealing the container. Freeze for at least 4-6 hours, or until firm.
Step 6: Decorate and Serve
Before serving your delightful Bubblegum Ice Cream, it’s time for the final flourish! Take your frozen, firm ice cream out of the freezer. You can scoop it into bowls or cones as is. To make it extra special, adorn each scoop or the top of the entire container with the remaining confetti sprinkles and the gumballs. The colorful sprinkles add a fun crunch and visual appeal, while the gumballs are a nod to the classic bubblegum theme. You can press whole gumballs into the surface of the ice cream, or even chop them up for a slightly different texture. Serve immediately and enjoy the sweet, nostalgic flavors of homemade Bubblegum Ice Cream!
Conclusion:
And there you have it – your very own batch of delicious homemade Bubblegum Ice Cream! This recipe is surprisingly simple to whip up, offering a fun and nostalgic treat that’s perfect for any occasion. Whether you’re hosting a birthday party, looking for a fun family activity, or simply craving a sweet escape, this vibrant and flavorful ice cream is sure to be a hit. I encourage you to dive in and try it for yourself – the joy of creating and enjoying your own ice cream is truly rewarding!
For serving, this Bubblegum Ice Cream is fantastic on its own, of course. However, consider topping it with whipped cream, sprinkles, or even a drizzle of chocolate sauce for an extra decadent experience. It also pairs wonderfully with a simple sugar cookie or a slice of angel food cake.
Don’t be afraid to get creative with variations! You can easily add chopped gummy bears or mini marshmallows for added texture and fun. If you’re feeling adventurous, a tiny splash of almond extract can add another layer of complexity to the flavor profile without detracting from the bubblegum essence. Enjoy experimenting and making this recipe your own!
Frequently Asked Questions:
Can I make this Bubblegum Ice Cream without an ice cream maker?
Yes, you absolutely can! The “no-churn” method is very effective. Instead of churning, you’ll pour the base into a freezer-safe container and whisk it vigorously every 30-45 minutes for the first 2-3 hours of freezing. This incorporates air and prevents large ice crystals from forming, resulting in a creamy texture.
What kind of bubblegum flavoring should I use for Bubblegum Ice Cream?
For the best and most authentic flavor, I recommend using a concentrated bubblegum flavoring extract. These are readily available at most baking supply stores or online. Avoid using actual bubblegum pieces directly in the ice cream base, as they won’t fully dissolve and can create an unpleasant texture.
Bubblegum Ice Cream Recipe-Easy Fun Dessert
A fun and easy homemade bubblegum ice cream recipe with vibrant color and confetti sprinkles.
Ingredients
-
2 cups heavy cream
-
1 cup whole milk
-
3/4 cup granulated sugar
-
2 teaspoons bubblegum flavoring
-
1 teaspoon vanilla extract
-
1/4 teaspoon kosher salt
-
Pink or red food coloring (to taste)
-
1/2 cup confetti sprinkles, divided
-
1 cup gumballs (for decoration)
Instructions
-
Step 1
In a medium saucepan, combine heavy cream, whole milk, granulated sugar, and kosher salt. Whisk until sugar and salt are dissolved. Heat over medium heat until simmering, then remove from heat. -
Step 2
Optional: Temper 2-3 egg yolks by slowly whisking in about 1/2 cup of the warm dairy mixture. Pour tempered yolks back into the saucepan with remaining dairy. Return to low heat and stir until thickened and coats the back of a spoon (2-3 minutes). Do not boil. -
Step 3
Stir in bubblegum flavoring and vanilla extract. Add pink or red food coloring drop by drop until desired shade is reached. Remember color lightens when frozen. -
Step 4
Pour the base into a clean bowl, cover tightly with plastic wrap touching the surface, and refrigerate for at least 4 hours, or ideally overnight. -
Step 5
Churn the chilled base in an ice cream maker according to manufacturer’s instructions (about 20-30 minutes until soft-serve consistency). During the last 5 minutes, add 1/2 cup confetti sprinkles. -
Step 6
Transfer churned ice cream to a freezer-safe container. Press parchment paper or plastic wrap directly onto the surface before sealing. Freeze for at least 4-6 hours until firm. -
Step 7
Decorate scoops or the container with remaining confetti sprinkles and gumballs before serving.
Important Information
Nutrition Facts (Per Serving)
It is important to consider this information as approximate and not to use it as definitive health advice.
Allergy Information
Please check ingredients for potential allergens and consult a health professional if in doubt.