Easy Mini Apple Pies- Delicious Individual Desserts
Mini apple pies are a delightful twist on a beloved classic, offering all the warm, comforting flavors of a traditional apple pie in a perfectly portioned package. There’s something undeniably charming and satisfying about these little hand pies. Whether you’re craving a sweet treat for yourself or looking for an impressive dessert to share, mini apple pies deliver pure joy with every bite. What makes them so special? It’s the incredible balance of flaky, buttery crust enveloping tender, cinnamon-spiced apples. They’re easy to make, fun to decorate, and utterly irresistible, making them a guaranteed crowd-pleaser for any occasion. Get ready to fall in love with these charming mini apple pies!
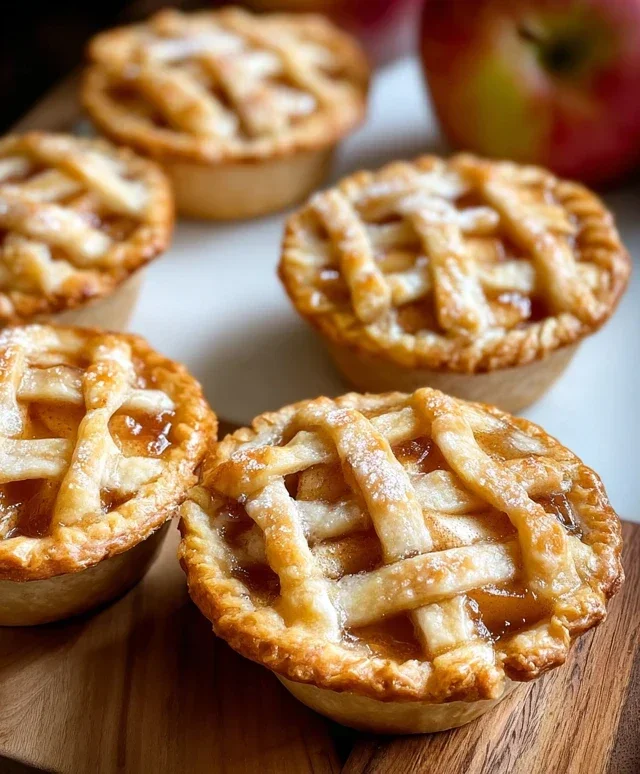
Mini Apple Pies
There’s something undeniably comforting about a warm apple pie. The flaky crust, the sweet and tart apple filling, the hint of cinnamon – it’s a classic for a reason. But sometimes, a whole pie feels a bit… much. That’s where these adorable mini apple pies come in! They’re perfect for individual servings, easy to share, and just as delicious as their full-sized counterparts. They’re fantastic for potlucks, holiday gatherings, or even just a special weeknight treat. The beauty of mini pies is their portability and their instant portion control, meaning you can indulge guilt-free (or at least, with slightly less guilt!). Plus, the presentation is just darling – little bursts of apple pie goodness!
This recipe is designed to be straightforward and utilizes store-bought pie crusts, making it accessible even for begin extractner bakers. Don’t underestimate the power of a good quality refrigerated pie crust; they can be your secret weapon for quick and impressive desserts. We’ll be using Granny Smith apples, which offer a wonderful tartness that balances the sweetness of the sugars and spices. If you can’t find Granny Smith, a mix of Granny Smith and another slightly sweeter apple like Honeycrisp or Fuji can also work beautifully. The key is to have apples that hold their shape when baked.
Ingredients:
Cooking Instructions:
The process for making these mini marvels is broken down into a few key stages, ensuring each step is clear and achievable. We’ll start by preparing the apple filling, then move on to assembling and baking our mini pies.
Preparing the Apple Filling
First things first, let’s get our apples ready. You’ll want to peel, core, and then chop your Granny Smith apples into small, bite-sized pieces. Aim for pieces that are roughly 1/2 inch in size. This ensures they cook evenly and fit nicely into your mini pies. Place the chopped apples into a large mixing bowl. Now, in a separate, smaller bowl, whisk together the granulated sugar, light brown sugar, ground cinnamon, ground nutmeg, and the all-purpose flour. The flour acts as a thickener, preventing your filling from becoming too watery. Pour this dry mixture over the chopped apples. Add the vanilla extract to the bowl. Gently toss everything together until the apples are evenly coated with the sugar, spice, and flour mixture. Let this sit for about 10-15 minutes. This allows the apples to release some of their juices, which will then be thickened by the flour, creating a luscious filling. Don’t worry if you see a bit of liquid pooling at the bottom; that’s exactly what we want.
Assembling the Mini Pies
-
2 refrigerated pie crusts
-
3 cups chopped Granny Smith apples (approximately 4 medium-small apples)
-
1/4 cup granulated sugar
-
1/4 cup light brown sugar
-
1 teaspoon ground cinnamon
-
1/4 teaspoon ground nutmeg
-
2 tablespoons all-purpose flour
-
1 teaspoon vanilla extract
-
1 egg
-
1 tablespoon water
-
Sanding sugar (optional)
-
Step 1
Preheat oven to 375°F (190°C). Lightly grease a muffin tin. -
Step 2
In a large bowl, combine chopped apples, granulated sugar, brown sugar, cinnamon, nutmeg, and flour. Toss to coat evenly. -
Step 3
Stir in the vanilla extract. -
Step 4
Unroll the pie crusts. Use a round cutter or glass to cut out circles slightly larger than the muffin tin cups. Press the circles into the muffin tin cups, forming the bottom crusts. -
Step 5
Fill each pie crust with the apple mixture. -
Step 6
For the tops, you can use leftover pie crust to cut smaller circles or strips for a lattice top. Place the top crusts or lattice over the apple filling. Crimp the edges to seal. -
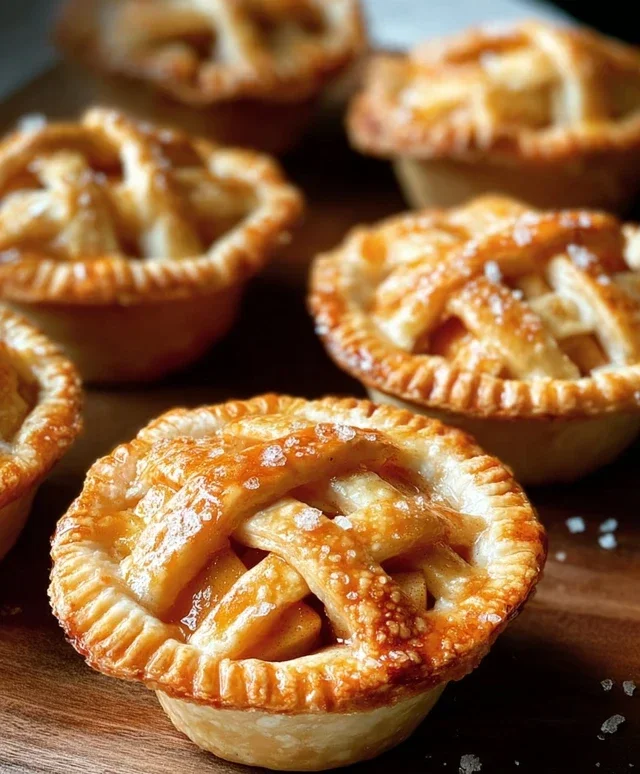
Step 7
In a small bowl, whisk together the egg and water to create an egg wash. Brush the tops of the mini pies with the egg wash. Sprinkle with sanding sugar, if using. -
Step 8
Bake for 20-25 minutes, or until the crust is golden brown and the filling is bubbly. -
Step 9
Let the mini pies cool in the muffin tin for about 10 minutes before carefully removing them to a wire rack to cool completely.
Now, let’s prepare our crusts. Carefully unroll your two refrigerated pie crusts onto a lightly floured surface. You’ll need something to cut out circles from these crusts. A cookie cutter, a round glass, or even a small bowl rim will work, as long as it’s slightly larger than the openings of your muffin tin cups. Typically, you’ll get about 6-8 circles per crust, so you’ll have plenty to work with. Gently press these crust circles into the cups of a standard muffin tin, making sure they fit snugly and the dough comes up the sides. You want a good seal to prevent any filling from leaking out during baking. If the dough tears, don’t fret! You can easily patch it up with a small piece of leftover dough.
Time to fill those little crusts! Spoon the apple filling evenly into each of the prepared crusts in the muffin tin. Don’t overfill them, as this can lead to spillage. Leave a little bit of space at the top. Now, for the tops of our mini pies. You can either cut out more circles to act as solid tops, or get fancy and cut strips to create a lattice top. If you’re making solid tops, gently place a crust circle over the filling in each muffin cup and crimp the edges with your fingers or a fork to seal. If you’re going for a lattice, cut the remaining dough into thin strips and weave them over the filling. Again, crimp the edges to secure. For a beautiful golden finish, we’ll make an egg wash. In a small bowl, whisk together the egg and the tablespoon of water until well combined. This mixture will give your pies a lovely sheen and a golden-brown crust.
Brush the tops of each mini pie with the egg wash. This step is optional but highly recommended for that professional, bakery-worthy look. If you like a little sparkle, now is the time to sprinkle some sanding sugar over the egg wash. It adds a delightful crunch and a touch of sweetness. Preheat your oven to 375°F (190°C) while you’re busy with assembly. This ensures your oven is ready to go the moment your pies are assembled, maintaining optimal baking temperature.
Baking and Enjoying
Carefully place the filled muffin tin into the preheated oven. Bake for approximately 20-25 minutes, or until the crust is golden brown and the apple filling is bubbling. You’ll be able to see the filling peeking through the vents or lattice, and it should look thick and jammy, not runny. Keep an eye on them, as oven temperatures can vary. If you notice the edges of the crust browning too quickly, you can loosely tent the muffin tin with aluminum foil for the last 5-10 minutes of baking. Once baked to perfection, carefully remove the muffin tin from the oven. Let the mini pies cool in the muffin tin for about 10-15 minutes. This is crucial for allowing the filling to set up properly. If you try to remove them too soon, they might fall apart. After they’ve cooled slightly, you can carefully remove them from the muffin tin. A small offset spatula or a butter knife can help gently loosen them from the sides. Serve them warm, perhaps with a dollop of whipped cream or a scoop of vanilla ice cream. The aroma alone will make your kitchen smell like pure autumn bliss!
These mini apple pies are a delightful way to enjoy all the classic flavors of apple pie in a perfectly portioned package. They are surprisingly easy to make and are sure to be a crowd-pleaser, no matter the occasion. Enjoy every delicious bite!
Conclusion:
And there you have it! My recipe for these delightful mini apple pies is a guaranteed crowd-pleaser and a joy to make. The perfect balance of flaky, buttery crust and sweet, spiced apple filling makes them an irresistible treat. They’re wonderfully versatile, perfect for a cozy afternoon snack, an elegant dessert at your next gathering, or even a sweet breakfast option. I love serving mine warm with a scoop of vanilla bean ice cream or a dollop of fresh whipped cream. Don’t be afraid to get creative with variations! You could add a pinch of nutmeg to the filling for extra warmth, a crum extractble topping instead of a full crust, or even swap out some of the apples for pears for a different flavor profile. I truly encourage you to give these adorable mini apple pies a try – I promise you won’t regret it!
Frequently Asked Questions:
Can I make the pie crust ahead of time?
Absolutely! You can prepare the pie dough a day or two in advance and store it tightly wrapped in the refrigerator. Some people even find it easier to roll out and cut the dough shapes when it’s chilled. Just bring it to room temperature slightly before assembling the pies.
What kind of apples are best for these mini pies?
A mix of apples often yields the best flavor and texture. I recommend using a combination of tart and sweet apples like Granny Smith for tartness and Honeycrisp or Fuji for sweetness and a firm texture that holds its shape during baking.
Mini Apple Pies
Delightful individual apple pies with a flaky crust and a perfectly spiced apple filling, perfect for any occasion.
Ingredients
Instructions
Important Information
Nutrition Facts (Per Serving)
It is important to consider this information as approximate and not to use it as definitive health advice.
Allergy Information
Please check ingredients for potential allergens and consult a health professional if in doubt.