Easy Fresh Dill Dip Recipe- Crowd Pleaser
Dill dip is more than just a condiment; it’s a creamy, herbaceous hug in a bowl that has a magical ability to elevate any gathering. Whether you’re hosting a casual get-together with friends or planning a more formal affair, this versatile dip is always a crowd-pleaser. What is it about dill dip that makes us reach for it again and again? It’s that perfect harmony of tangy sour cream or Greek yogurt, bright fresh dill, a subtle hint of garlic, and often a whisper of lemon that creates an explosion of refreshing flavor. It’s so simple, yet so utterly satisfying. I find myself making this dill dip for everything from veggie platters and crunchy chips to grilled chicken and baked salmon. It’s the secret ingredient that brings everything together, transforming ordinary into extraordinary. Get ready to discover your new go-to recipe for this beloved dill dip!
Dill Dip: Your New Go-To Crowd-Pleaser
There are some appetizers that just work. They’re easy to make, universally loved, and disappear from the platter at lightning speed. My dill dip is precisely one of those recipes. It’s incredibly versatile, perfect for game nights, holiday gatherings, casual get-togethers, or even just as a delicious snack to enjoy with your favorite veggies. The creamy, tangy base is perfectly complemented by the bright, herbaceous flavors of fresh dill and parsley, with a subtle hint of onion. This dip is so simple, yet the flavor is so satisfying, you’ll wonder why you haven’t made it sooner. Let’s get started!
Ingredients:
Instructions:
The Simple Symphony of Mixing
The beauty of this dill dip lies in its effortless preparation. There’s no cooking involved, which means you can whip this up in just a few minutes whenever the craving strikes or unexpected guests arrive. All you need is a medium-sized mixing bowl and a spatula or whisk.
Step 1: Building the Creamy Foundation
In your medium-sized mixing bowl, begin extract by combining the two essential creamy elements: the mayonnaise and the sour cream. I prefer to use full-fat versions of both for the richest, most luxurious texture, but feel free to experiment with reduced-fat options if that suits your preference. Use your spatula or whisk to gently blend them together until they are thoroughly combined and no streaks of either ingredient remain. You’re looking for a smooth, uniform base at this stage. This initial blending ensures that all the subsequent ingredients will be evenly distributed throughout the dip. Don’t overmix, just until smooth.
Step 2: Introducing the Aromatic Accents
Next, it’s time to add the flavor boosters. Sprinkle in the 2 tablespoons of onion flakes. These rehydrate slightly in the dip, providing a gentle oniony bite without the sharpness of fresh onion. Then, add your freshly chopped dill and parsley. Using fresh herbs makes a significant difference in the vibrancy of this dip. The dill provides its characteristic refreshing, slightly anise-like flavor, while the parsley adds a clean, green, and slightly peppery note. I like to give them a rough chop, as the smaller pieces will meld beautifully into the creamy base. If you’re in a pinch, you can use dried dill, but you’ll need to reduce the amount significantly (about 1 teaspoon dried) and be aware that the flavor won’t be as bright.
Step 3: Seasoning to Perfection
Now for the final touch of seasoning: the seasoned salt. I’ve specified 1 teaspoon, but this is where you can really personalize the dip to your taste. If you’re using a very strongly seasoned salt, you might want to start with a little less and add more if needed after tasting. The seasoned salt not only adds saltiness but also a delightful blend of other spices that complement the dill and onion beautifully. Gently stir everything together until all the ingredients are evenly distributed. Make sure to scrape the sides and bottom of the bowl to ensure no pockets of unmixed ingredients are left behind.
Step 4: The Crucial Chilling Period
This is perhaps the most important step for achieving the best flavor and texture. Once everything is well combined, cover your bowl tightly with plastic wrap or transfer the dip to an airtight container. Place it in the refrigerator for at least 30 minutes. Ideally, allow it to chill for at least 1 to 2 hours, or even longer. This chilling period is crucial for a few reasons. Firstly, it allows the flavors to meld and develop. The herbs will infuse their delicious essence into the creamy base, and the onion flakes will soften and release their flavor more evenly. Secondly, it allows the dip to thicken slightly, giving it a more desirable consistency for dipping. If you taste it right after mixing, the flavors might seem a bit disjointed. Give it time, and you’ll be rewarded with a much more cohesive and delicious dip.
Step 5: Taste and Adjust, Then Serve with Joy
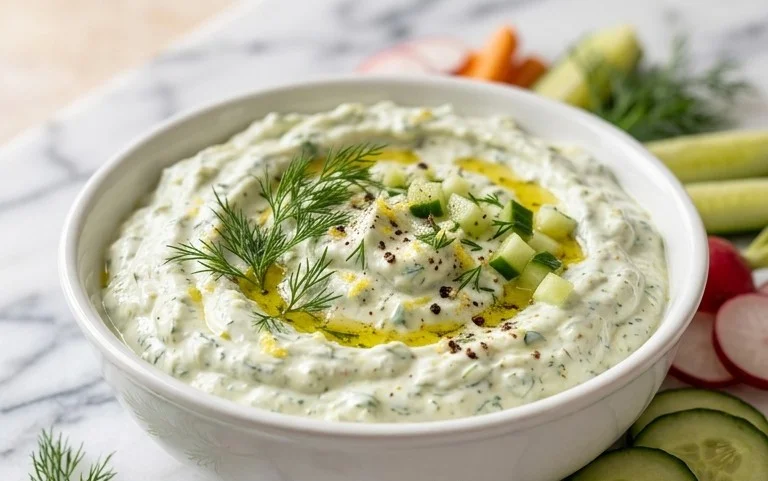
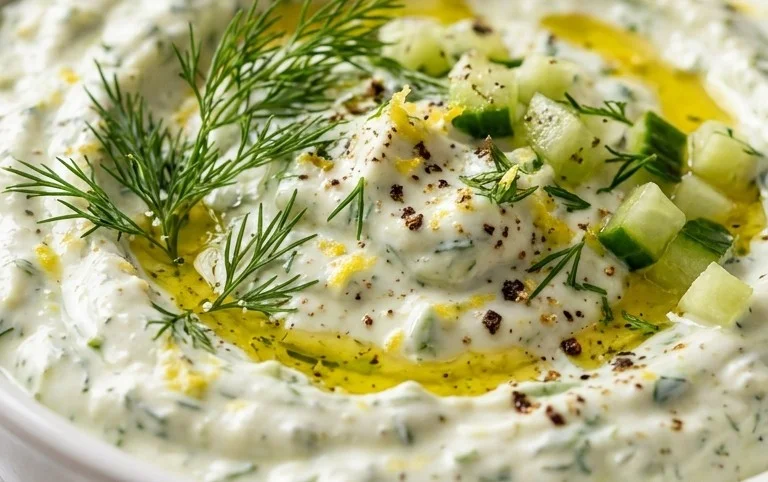
Before you serve your masterpiece, give it a quick taste. Use a clean spoon to scoop a small amount and evaluate the seasoning. Does it need a touch more salt? A little more dill for extra freshness? This is your chance to tweak it to your exact liking. Once you’re happy with the flavor, it’s ready to be served! Transfer the dill dip to a nice serving bowl. Garnish with a little extra fresh dill or parsley if you’re feeling fancy, or leave it as is – it’s delicious either way.
This dill dip is fantastic with an array of dippers. Think crunchy vegetable sticks like carrots, celery, bell peppers, and cucumber. It’s also wonderful with a variety of crackers, pita bread, tortilla chips, or even as a spread for sandwiches and wraps. Enjoy!
Conclusion:
So there you have it – a truly fantastic and incredibly easy Dill Dip recipe that’s sure to become a staple in your entertaining repertoire! We love this dip because it’s wonderfully fresh, boasts that unmistakable bright dill flavor, and comes together in mere minutes. It’s the perfect antidote to store-bought dips, offering a homemade taste that’s both sophisticated and comforting. Imagin extracte pulling this out at your next gathering – the smiles and compliments are guaranteed!
This versatile Dill Dip shines alongside a platter of crunchy vegetables like carrots, celery, and bell peppers. It’s also magnificent with potato chips, crackers, or even as a spread on sandwiches and wraps. Don’t be afraid to get creative with variations! Stir in a pinch of smoked paprika for a smoky kick, add a swirl of sriracha for some heat, or toss in finely chopped chives for an extra layer of oniony goodness. I highly encourage you to give this recipe a try; I know you’ll be as delighted with it as I am.
Frequently Asked Questions:
Can I make this Dill Dip ahead of time?
Absolutely! In fact, making it ahead of time is highly recommended. The flavors meld beautifully as it chills, becoming even more delicious. Store it in an airtight container in the refrigerator for up to 3 days.
What if I don’t have fresh dill?
If fresh dill isn’t available, you can substitute with dried dill. A good rule of thumb is to use 1 teaspoon of dried dill for every tablespoon of fresh dill called for in the recipe. Keep in mind that dried dill has a more concentrated flavor, so you might want to start with a slightly smaller amount and adjust to your taste.
Is this Dill Dip gluten-free and dairy-free?
The base recipe, as written, is naturally gluten-free. If you use a dairy-free sour cream or yogurt alternative, it can easily be made dairy-free as well. Always check the labels of your ingredients to ensure they meet your specific dietary needs.
Dill Dip
A classic and easy-to-make dill dip perfect for parties and gatherings.
Ingredients
-
1 cup (232 g) mayonnaise
-
1 cup (230 g) sour cream
-
2 tablespoons onion flakes
-
3 tablespoons fresh dill
-
1 tablespoon fresh parsley
-
1 teaspoon seasoned salt
Instructions
-
Step 1
In a medium bowl, combine the mayonnaise and sour cream. -
Step 2
Add the onion flakes to the bowl. -
Step 3
Stir in the fresh dill. -
Step 4
Add the fresh parsley to the mixture. -
Step 5
Season with the seasoned salt. -
Step 6
Mix all ingredients until well combined. For best flavor, cover and refrigerate for at least 30 minutes before serving to allow the flavors to meld.
Important Information
Nutrition Facts (Per Serving)
It is important to consider this information as approximate and not to use it as definitive health advice.
Allergy Information
Please check ingredients for potential allergens and consult a health professional if in doubt.