Quick Pickled Red Onions-Easy Recipe
Pickled red onions are an absolute game-changer in my kitchen, and I can’t wait for you to discover their magic. You might have seen them adding a vibrant pop of color and a delightful zing to tacos, salads, avocado toast, or even just atop a simple grilled cheese. There’s a reason why these beauties have become so popular; they transform ordinary meals into something truly extraordinary. What makes pickled red onions so special is their incredible versatility. That perfect balance of sweet, tangy, and slightly sharp flavor cuts through richness, adds brightness to savory dishes, and offers a satisfying crunch with every bite. They’re not just a garnish; they’re an essential flavor enhancer. Plus, the fact that you can whip up a batch of these stunning pickled red onions in under an hour, with just a few simple ingredients, makes them an irresistible addition to any home cook’s repertoire. Get ready to elevate your culinary creations!
Pickled Red Onions
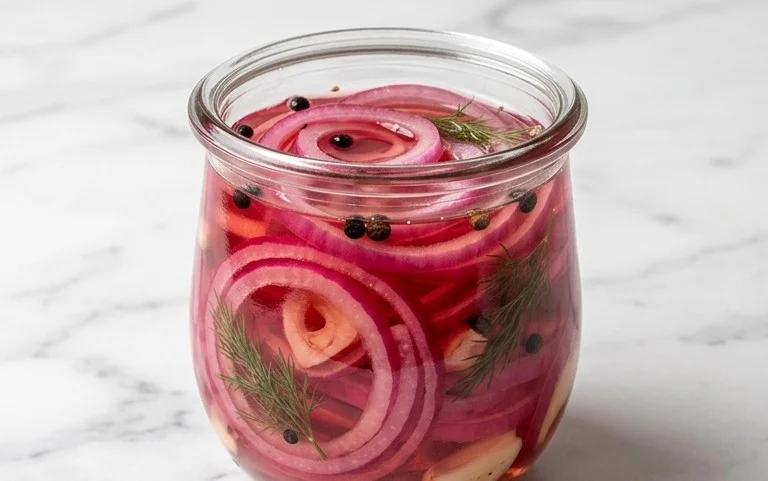
There are few condiments that offer such a vibrant punch of flavor and color as pickled red onions. They transform humble dishes, from tacos and salads to sandwiches and charcuterie boards, into something truly special. The beautiful fuchsia hue alone is enough to make them a kitchen staple, but it’s their tangy, slightly sweet, and subtly spicy crunch that really seals the deal. The best part? They are incredibly easy to make at home, requiring minimal effort and just a few pantry staples. Forget those store-bought versions with their questionable additives; this homemade recipe is simple, clean, and allows for easy customization. Get ready to elevate your everyday meals with this versatile and delicious condiment.
I love having a jar of these in my refrigerator. They are my secret weapon for adding a quick burst of freshness and acidity to almost anything. They’re perfect for cutting through the richness of fatty foods like pulled beef or avocado, and they add a delightful zing to milder dishes. Plus, they last for weeks in the fridge, meaning you can enjoy them for a long time after your initial batch is made. So, let’s dive into how to create this culinary magic!
Ingredients:
Instructions
The process of pickling red onions is remarkably straightforward. It primarily involves preparing the onions and then creating a quick pickling brine. The magic happens as the hot brine is poured over the sliced onions, essentially cooking them slightly and infusing them with flavor.
1. Preparing the Onions
The first step is to get our red onions ready. You’ll want to start by peeling the outer papery skin from your red onions. Once peeled, I like to trim off the very top stem end and the root end, being careful not to cut too deeply into the onion. This makes slicing much easier. Next, you’ll want to slice your onions thinly. A mandoline slicer is your best friend here for achieving uniform, thin slices, which will pickle more evenly and look incredibly appealing. If you don’t have a mandoline, a sharp knife will do the trick, but try to keep the slices as consistent as possible. Aim for slices that are about 1/8 to 1/4 inch thick. As you slice them, you can separate the rings to create more surface area for the brine to penetrate.
2. Creating the Pickling Brine
Now, let’s make the delicious brine that will transform our onions. In a medium saucepan, combine the water, white vinegar, sugar, and sea salt. If you’re feeling a little adventurous and want a hint of heat, this is where you’ll add your red pepper flakes. I usually start with 1/4 teaspoon and can always add more later if I like. Stir these ingredients together until the sugar and salt are largely dissolved. Place the saucepan over medium heat and bring the mixture to a gentle boil. You don’t need a rolling boil, just enough to ensure everything is dissolved and the liquid is nice and hot. This hot brine is crucial for the pickling process as it helps to soften the onions and meld the flavors.
3. Combining Onions and Brine
Once your brine has reached a gentle boil and the salt and sugar are dissolved, it’s time to combine it with the prepared red onions. Carefully pour the hot brine over the sliced red onions. You can do this directly in the bowl or jar you plan to store them in, or you can pour it into a heatproof bowl and then transfer everything to your storage container. Make sure that all the onion slices are submerged in the brine. If any are floating, gently press them down with a spoon or another utensil. This is essential for ensuring even pickling and preventing any parts of the onion from going bad.
4. The Waiting Game (and the Magic!)
This is arguably the hardest part – waiting! You’ll want to let the onions sit in the hot brine at room temperature for at least 30 minutes. During this time, you’ll witness a beautiful transformation. The onions will start to soften and their vibrant red color will deepen, leaching into the brine and turning it a lovely pinkish-purple hue. I often stir them gently after about 15 minutes to ensure even distribution of heat and brine. You’ll notice the onions becoming more pliable and less pungent. For a more intense pickle and a softer texture, you can let them sit for up to an hour at room temperature.
5. Refrigerating and Storing
After the initial 30-minute to 1-hour waiting period at room temperature, it’s time to transfer them to the refrigerator for proper pickling. Carefully transfer the onions and their brine into a clean, airtight jar or container. Ensure everything is covered by the brine. Once they are in the refrigerator, they will continue to pickle and their flavor will develop further. While you can technically eat them after they’ve cooled down, I find they are best after at least a few hours in the fridge, and even better after overnight. They will continue to improve in flavor and texture for up to 2-3 weeks when stored in the refrigerator. Just remember to always use clean utensils when serving to maintain their freshness and prevent contamination.
Enjoy your delicious homemade pickled red onions! They are a game-changer for so many dishes.
Conclusion:
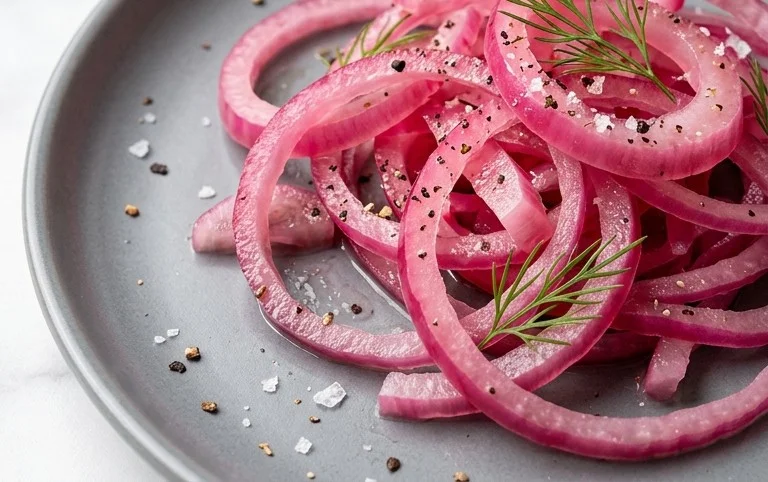
You’ve now got the recipe for perfect pickled red onions, a vibrant and zesty condiment that’s incredibly easy to make and elevates almost any dish. The beauty of this recipe lies in its simplicity and incredible flavor payoff. The quick pickling process transforms humble red onions into a sweet, tangy, and slightly crisp delight, adding a gorgeous pop of color and a complex flavor profile to your meals. I truly believe this is one of the most versatile additions you can have in your refrigerator.
Beyond just being a pretty garnish, these pickled red onions are fantastic on tacos, burgers, sandwiches, salads, grain bowls, and even avocado toast. Don’t be afraid to experiment with how you use them; their bright acidity cuts through richness and adds a refreshing contrast. For variations, consider adding a pinch of chili flakes for a spicy kick, a sprig of dill for an herbaceous note, or a bay leaf for a deeper flavor. I wholeheartedly encourage you to give this recipe a try – you’ll wonder how you ever lived without it!
Frequently Asked Questions:
How long do pickled red onions last?
When stored properly in an airtight container in the refrigerator, your pickled red onions should last for at least 2-3 weeks, sometimes even longer. The vinegar acts as a natural preservative, so they will retain their quality for a good while.
Can I adjust the sweetness or tangin extractess?
Absolutely! This recipe is very forgiving. If you prefer them sweeter, simply add a little more sugar. For a tangier bite, increase the amount of vinegar slightly. Taste and adjust as you go until you find your perfect balance.
Quick Pickled Red Onions
A simple and versatile recipe for quick pickled red onions, perfect for adding a tangy and vibrant touch to sandwiches, tacos, salads, and more.
Ingredients
-
2 medium red onions, thinly sliced
-
1 1/4 cup water
-
1 1/4 cup white vinegar
-
3 tbsp sugar
-
1 tbsp sea salt
-
1/2 tsp red pepper flakes
Instructions
-
Step 1
Thinly slice the red onions. -
Step 2
In a saucepan, combine the water, white vinegar, sugar, and sea salt. -
Step 3
Heat the mixture over medium heat, stirring until the sugar and salt are completely dissolved. Do not boil. -
Step 4
Place the sliced red onions into a clean jar or heatproof container. -
Step 5
Pour the hot brine over the onions, ensuring they are fully submerged. Add the red pepper flakes if using. -
Step 6
Let the mixture cool to room temperature, then cover and refrigerate. The onions will be ready to eat after at least 30 minutes, and are best after a few hours.
Important Information
Nutrition Facts (Per Serving)
It is important to consider this information as approximate and not to use it as definitive health advice.
Allergy Information
Please check ingredients for potential allergens and consult a health professional if in doubt.