Cookie Ice Cream Sandwiches – Chipwich Style
Cookie Ice Cream Sandwiches, like the iconic Chipwich, are a timeless summer treat that sparks pure joy. Who doesn’t remember the sheer delight of biting into that perfect combination of soft, chewy cookies huggin extractg a generous slab of creamy ice cream, all rolled in delightful chocolate chips? It’s more than just a dessert; it’s a nostalgic journey to simpler times, a delightful escape from the everyday. What makes these cookie ice cream sandwiches so incredibly special is the symphony of textures and temperatures – the yielding cookie giving way to the frosty sweetness of the ice cream, punctuated by those satisfying little pops of chocolate. It’s an indulgence that’s both comforting and exhilarating, a classic for a reason. We’re going to show you how to recreate that magic in your own kitchen, making your very own irresistible cookie ice cream sandwiches that will have everyone beggin extractg for more.
A Nostalgic Delight: Homemade Cookie Ice Cream Sandwiches (Like a Chipwich!)
There’s something undeniably magical about a perfectly executed cookie ice cream sandwich. It’s a childhood classic, a summer staple, and a treat that instantly brings a smile to your face. Today, we’re going to recreate that iconic “Chipwich” experience right in your own kitchen, but with a homemade touch that elevates it beyond anything you can buy. Forget soggy cookies and freezer-burned ice cream; we’re talking about chewy, slightly crisp cookies that hug a generous scoop of creamy, rich ice cream, all rolled in a delightful crunchy coating. This recipe is surprisingly straightforward, and the reward is a dessert that’s both impressive and incredibly satisfying.
Let’s get started on creating these delightful frozen treats that are sure to become a family favorite.
Ingredients:
Crafting the Perfect Cookie Base
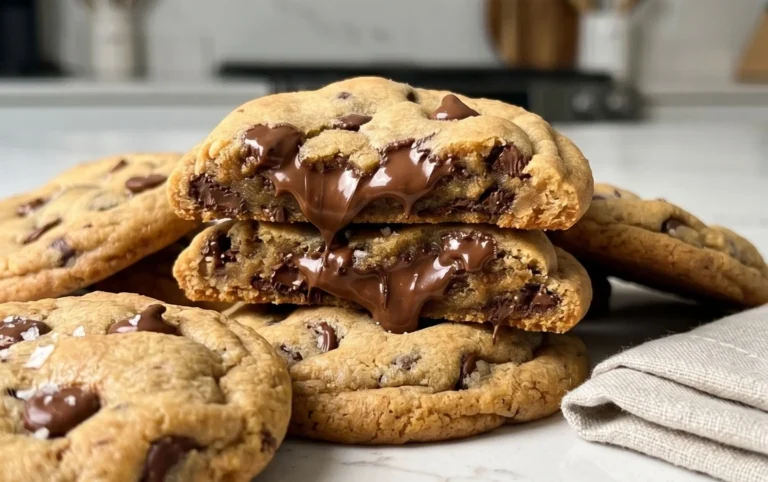
The foundation of any great ice cream sandwich is, of course, the cookie. We want a cookie that’s sturdy enough to hold its icy center without falling apart, yet tender and chewy enough to be a joy to bite into. This recipe achieves that perfect balance by using a combination of all-purpose flour for structure, cornstarch for tenderness, and baking soda for that essential lift and slightly crisp edge. The salt plays a crucial role in balancing the sweetness and enhancing all the other flavors.
The creaming of the butter and sugars is where the magic truly begin extracts. Softened butter, not melted, is key. It needs to be pliable enough to whip up with the sugars, incorporating air that will contribute to the cookie’s texture. Brown sugar adds moisture and a caramel-like depth of flavor, while granulated sugar provides that classic sweetness and helps with crisping. When you cream these together until light and fluffy, you’re creating a beautiful base for our cookies. Don’t rush this step; it’s worth the extra minute or two.
Adding the eggs and vanilla extract next binds everything together and infuses our dough with that warm, comforting aroma and taste. Room temperature ingredients are important here as they emulsify more easily, leading to a smoother, more consistent dough. Finally, the mini chocolate chips are folded in. These are our first layer of chocolatey goodness, promising delightful pockets of melted chocolate within each cookie.
Forming and Baking the Cookies
Now comes the fun part: shaping the cookies. For ice cream sandwiches, we want a slightly larger cookie than you might typically bake. This gives you enough surface area to scoop your ice cream and press it together. I like to use a medium-sized cookie scoop (about 2 tablespoons) to ensure uniformity, which makes assembly much easier. Roll the dough into balls and place them on a parchment-lined baking sheet, leaving plenty of space between them as they will spread.
The baking process is crucial. We want to bake these cookies until they are golden brown around the edges but still slightly soft in the center. This is the secret to that perfect chewy texture. Overbaking will result in dry, crum extractbly cookies that won’t be ideal for sandwiches. As soon as they come out of the oven, allow them to cool on the baking sheet for a few minutes before transferring them to a wire rack to cool completely. This is a non-negotiable step! Trying to assemble ice cream sandwiches with warm cookies is a recipe for disaster. Patience here is rewarded with perfectly formed, delightfully chewy cookies.
The Ice Cream Element
While the cookies are cooling, it’s time to prepare your ice cream. For the best results, let the ice cream soften slightly at room temperature for about 10-15 minutes. You don’t want it completely melted, but just soft enough to scoop and spread easily. Vanilla is a classic choice for a reason – its clean flavor pairs beautifully with chocolate. However, feel free to experiment with your favorite flavors! Mint chocolate chip, cookies and cream, or even a rich coffee ice cream would be divine.
Assembly: The Grand Finnon-alcoholic ale
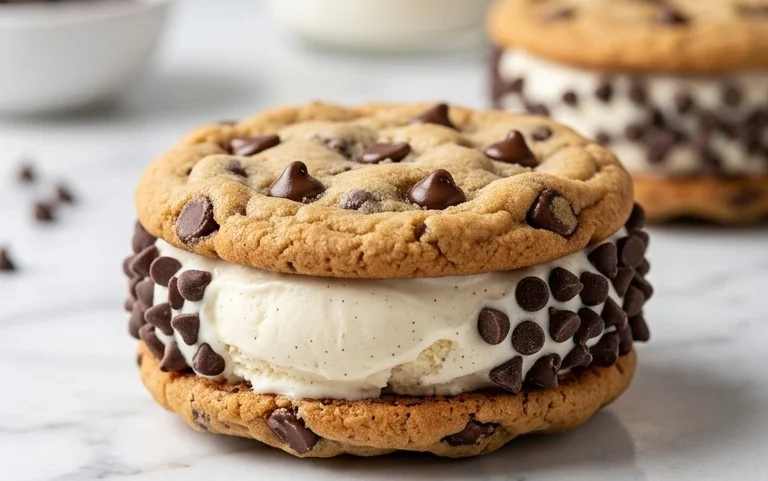
This is where your cookie ice cream sandwiches truly come to life. Once your cookies are completely cool, it’s time for assembly. Take two cookies and place one upside down on a clean surface. Scoop a generous portion of your softened ice cream onto the flat side of the cookie. Don’t be shy with the ice cream; this is what makes them indulgent! Then, place another cookie, flat side down, on top of the ice cream. Gently press the cookies together to sandwich the ice cream, allowing it to spread slightly towards the edges.
Now for the finishing touch: the outer coating! This is what truly elevates these from simple ice cream sandwiches to something truly special, mimicking that iconic Chipwich crunch. Prepare your chosen coating in a shallow dish. This could be more mini chocolate chips, colorful sprinkles, or finely chopped nuts. I love the classic mini chocolate chips for that extra chocolatey punch, but sprinkles add a fun visual appeal and a delightful textural contrast.
Gently roll the edges of the ice cream sandwich in your chosen coating, pressing lightly so it adheres to the ice cream. Work relatively quickly to prevent the ice cream from melting too much. You can also use a small spatula or knife to smooth the ice cream around the edges and then press the coating onto it.
Freezing for Perfection
This final step is crucial for achieving that perfect, firm ice cream sandwich consistency. Once assembled and coated, place the ice cream sandwiches on a parchment-lined baking sheet and carefully transfer them to the freezer. Allow them to freeze for at least 2-4 hours, or until completely firm. This ensures that when you bite into your creation, you get that satisfying crunch of the cookie and the firm, refreshing bite of the ice cream without it all melting into a messy puddle.
Enjoy your homemade cookie ice cream sandwiches! They are best enjoyed within a week or two of making them for optimal freshness and texture.
Conclusion:
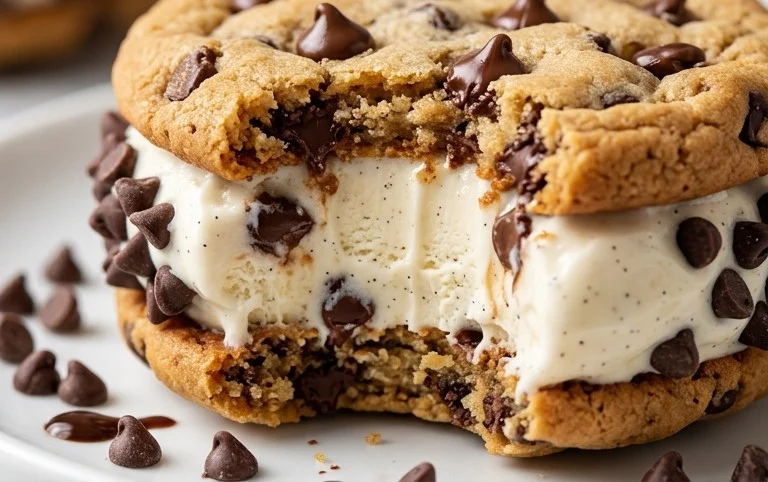
There you have it – your guide to crafting delightful Cookie Ice Cream Sandwiches, reminiscent of those nostalgic Chipwich treats! This recipe is truly fantastic because it offers a perfect balance of chewy cookie and creamy ice cream, all wrapped up in a portable, handheld dessert. It’s incredibly versatile, making it a hit for any occasion. The real beauty lies in its simplicity; you can prepare the cookies ahead of time, allowing for quick assembly when that ice cream craving strikes. For serving suggestions, think about a summer barbecue, a birthday party, or simply an afternoon treat to brighten your day. Get creative with variations! Try different cookie flavors like double chocolate or oatmeal raisin, or experiment with exotic ice cream flavors like salted caramel or lavender. You could even add sprinkles or mini chocolate chips to the ice cream before sandwiching for an extra crunch and burst of flavor. I wholeheartedly encourage you to give this recipe a try. It’s a guaranteed crowd-pleaser and a wonderfully rewarding baking project!
Frequently Asked Questions:
Can I make the cookies ahead of time?
Absolutely! The cookies can be baked and stored in an airtight container at room temperature for up to 3 days, or frozen for up to 3 months. Ensure they are completely cooled before storing.
What’s the best way to store assembled cookie ice cream sandwiches?
For best results, wrap each assembled sandwich tightly in plastic wrap or parchment paper, then store them in an airtight container or freezer bag in the freezer. This prevents freezer burn and keeps them perfectly chilled.
Can I use store-bought cookies?
Yes, you certainly can! While homemade cookies offer the best texture and flavor, using your favorite store-bought cookies is a great shortcut if you’re short on time. Just make sure they are firm enough to hold the ice cream.
Cookie Ice Cream Sandwiches (Like a Chipwich!)
A classic treat featuring chewy chocolate chip cookies generously filled with creamy vanilla ice cream and coated in more chocolate chips.
Ingredients
-
2 and 1/4 cups (281g) all-purpose flour (spooned & leveled)
-
1 and 1/2 teaspoons cornstarch
-
1 teaspoon baking soda
-
1/2 teaspoon salt
-
3/4 cup (12 Tablespoons; 170g) unsalted butter, softened to room temperature
-
3/4 cup (150g) packed light or dark brown sugar
-
1/2 cup (100g) granulated sugar
-
1 large egg + 1 egg yolk, at room temperature
-
2 teaspoons pure vanilla extract
-
1 and 1/4 cups (225g) mini semi-sweet chocolate chips
-
3 cups (about 540g) vanilla ice cream (or your desired flavor)
-
1 cup mini chocolate chips (180g), sprinkles (150g), or finely chopped nuts (100g)
Instructions
-
Step 1
In a medium bowl, whisk together flour, cornstarch, baking soda, and salt. Set aside. -
Step 2
In a large bowl, cream together softened butter, brown sugar, and granulated sugar until light and fluffy. Beat in the egg, egg yolk, and vanilla extract until well combined. -
Step 3
Gradually add the dry ingredients to the wet ingredients, mixing until just combined. Stir in the 1 and 1/4 cups of mini semi-sweet chocolate chips. -
Step 4
Roll the cookie dough into 1-inch balls and place them 2 inches apart on baking sheets lined with parchment paper. Flatten each ball slightly with your palm or the bottom of a glass. Bake at 375°F (190°C) for 9-11 minutes, or until the edges are lightly golden. Let cool on the baking sheets for 5 minutes before transferring to a wire rack to cool completely. -
Step 5
Once cookies are completely cool, soften the ice cream slightly so it’s spreadable. Scoop about 1/4 cup of ice cream onto the flat side of one cookie. Top with another cookie, flat side down, and gently press to form a sandwich. Repeat with remaining cookies and ice cream. -
Step 6
Roll the edges of the ice cream sandwiches in the additional mini chocolate chips, sprinkles, or chopped nuts. -
Step 7
Place the ice cream sandwiches on a parchment-lined baking sheet and freeze for at least 2-3 hours, or until firm.
Important Information
Nutrition Facts (Per Serving)
It is important to consider this information as approximate and not to use it as definitive health advice.
Allergy Information
Please check ingredients for potential allergens and consult a health professional if in doubt.