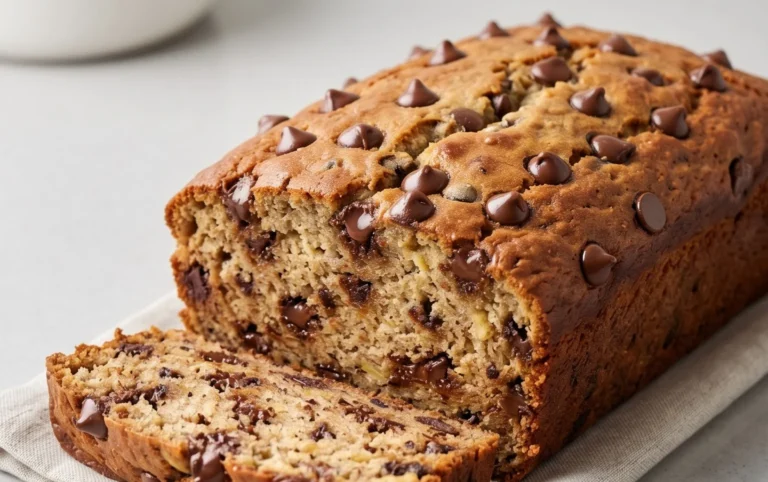
Cheesy Sourdough Bread Recipe – Easy & Delicious
Sourdough Cheese Bread is a culinary masterpiece that deserves a permanent spot on your kitchen counter. There’s something undeniably magical about the tang of a well-fermented sourdough, harmoniously blended with the rich, gooey goodness of melted cheese. It’s a flavor combination that speaks to comfort, indulgence, and pure satisfaction, making it a beloved choice for everything from casual brunches to hearty dinners. What makes this Sourdough Cheese Bread so special? It’s the symphony of textures and tastes: the chewy, airy crum extractb of the sourdough crust giving way to pockets of molten, savory cheese, often with a hint of garlic or herbs woven throughout. Each bite is an experience, a testament to the simple brilliance of combining quality ingredients with a patient, loving baking process. Get ready to elevate your bread game and create a loaf that will have everyone beggin extractg for the recipe!

Ingredients:
- 1 cup milk (you can substitute this with 1 cup of water, which is approximately 244 grams, if needed)
- 1/2 cup active sourdough starter (about 113 grams)
- 1 large egg
- 1 tablespoon sugar (12 grams)
- 1 teaspoon salt (5 grams)
- 1 teaspoon garlic powder (3 grams)
- 3 cups all-purpose flour (420 grams)
- 4 tablespoons unsalted butter (56 grams), softened
- 2 cups shredded sharp cheddar cheese
- Optional: 1 egg yolk mixed with 1 tablespoon of water for an egg wash, and a pinch of flaky sea salt for topping
Making Your Sourdough Cheese Bread Dough
Mixing the Wet Ingredients
In a large mixing bowl, combine the milk and your active sourdough starter. Gently whisk them together until they are mostly incorporated. The sourdough starter should be bubbly and active, indicating it’s ready to leaven your bread. Next, add the large egg to the bowl. Whisk everything together thoroughly to ensure the egg is fully blended into the milk and starter mixture. This forms the liquid base for our dough.
Adding the Dry Ingredients and Initial Mixing
Now, let’s add the dry components. Sprinkle the sugar, salt, and garlic powder over the wet ingredients. Add the flour gradually, about a cup at a time, mixing as you go. You can use a stand mixer with a dough hook attachment for this, or do it by hand with a sturdy spoon or spatula. Initially, the mixture will be quite shaggy and sticky. Continue to mix until a rough dough starts to form. Don’t worry if it doesn’t look smooth yet; that’s perfectly normal at this stage.
Developing the Dough and Incorporating Butter
Once you have a rough dough, it’s time to knead it to develop the gluten structure. If you’re using a stand mixer, switch to the dough hook and knead on low to medium speed for about 5-7 minutes. If kneading by hand, turn the dough out onto a lightly floured surface and knead for about 10-12 minutes. The dough should become smoother and more elastic. Now, for the butter. Cut the softened butter into small pieces and add them to the dough, a few pieces at a time. Continue kneading, allowing each addition of butter to be fully incorporated before adding more. The dough might seem greasy and loose at first, but keep kneading. It will eventually come back together, becoming silky smooth and very elastic. This process of incorporating butter into the dough is called “autolyse” or a reverse creaming method, and it results in an incredibly tender crum extractb. The dough should feel soft and slightly tacky, but not stick to your fingers excessively.
First Rise (Bulk Fermentation)
Lightly grease a clean bowl with a little oil or butter. Place the kneaded dough into the bowl, turning it to coat all sides. Cover the bowl tightly with plastic wrap or a damp kitchen towel. Let the dough rise in a warm place for about 2 to 4 hours, or until it has roughly doubled in size. The exact rising time will depend on the ambient temperature and the activity of your sourdough starter. You’re looking for visual cues – a noticeably larger, puffy dough. Don’t rush this step; the slow fermentation from the sourdough starter is key to the flavor and texture of your bread.
Shaping and Second Rise (Proofing)
Once the dough has doubled, gently turn it out onto a lightly floured surface. You can choose to shape it into a single large loaf, or divide it into smaller rolls. For a beautiful braided loaf, divide the dough into three equal portions. Roll each portion into a rope about 12-14 inches long. Place the three ropes side-by-side and pinch the tops together. Then, braid them loosely, sealing the ends. Alternatively, you can shape the dough into a round or oblong loaf and place it in a greased loaf pan or on a baking sheet lined with parchment paper. Gently place the shaped dough back into its bowl or onto its prepared baking surface. Cover it again and let it rise for a second time for about 1 to 1.5 hours, or until it’s puffy and has increased in size by about 50-75%. This second rise, or proofing, is crucial for the final texture.
Adding the Cheese and Baking
Preheat your oven to 375°F (190°C). If you’re using the optional egg wash, gently brush the top of the risen dough with the egg yolk mixture. This will give your Sourdough Cheese Bread a beautiful golden-brown sheen. If you’re using flaky sea salt, sprinkle it over the top now. Carefully place the bread into the preheated oven.
Bake for 30-40 minutes for a large loaf, or 20-25 minutes for smaller rolls, until the crust is a deep golden brown and the internal temperature reaches about 195-200°F (90-93°C) when measured with an instant-read thermometer. If the crust is browning too quickly, you can loosely tent it with aluminum foil. The aroma will be incredible, a testament to the delicious Sourdough Cheese Bread you’ve created.
Cooling and Enjoying
Once baked, immediately remove the bread from the oven and transfer it to a wire rack to cool completely. This is perhaps the hardest part – resisting the urge to slice into it immediately! Allowing the bread to cool properly allows the internal structure to set, preventing a gummy texture. Once cooled, slice into your Sourdough Cheese Bread and enjoy the delightful combination of tangy sourdough, savory garlic, and melted cheddar cheese. It’s perfect on its own, toasted, or as the base for your favorite sandwiches.

Conclusion:
There you have it! Your guide to creating the most delightful Sourdough Cheese Bread is complete. This recipe offers a wonderful balance of tangy sourdough and rich, savory cheese, resulting in a crusty exterior and a soft, chewy interior that’s utterly irresistible. We’ve explored the steps to nurture your starter, mix the dough, and bake this masterpiece to perfection. Now it’s your turn to experience the joy of homemade Sourdough Cheese Bread!
This versatile bread is perfect for so many occasions. Serve it warm with a slather of butter alongside your favorite soup or stew. It also makes an exceptional base for gourmet sandwiches, or simply enjoy it as a standalone snack with a glass of grape juice. Don’t be afraid to get creative with your cheese choices – experiment with sharp cheddar, smoky gouda, or even a hint of Gruyère for a different flavor profile.
We encourage you to embrace the process and enjoy the journey of making this incredible Sourdough Cheese Bread. The aroma filling your kitchen will be a reward in itself! Happy baking!
FAQs:
How long does it take to make Sourdough Cheese Bread?
The total time commitment can be spread over a couple of days due to the natural fermentation process of sourdough. This includes feeding your starter, mixing the dough, bulk fermentation (which can take several hours), shaping, and the final proofing stage (often overnight in the refrigerator). Baking itself usually takes around 30-45 minutes.
Can I use different types of cheese in my Sourdough Cheese Bread?
Absolutely! This is where the fun truly begin extracts. While the recipe might suggest a blend, feel free to swap in your favorites. Sharp cheddar, Monterey Jack, Gruyère, Parmesan, or even a spicy pepper jack can add wonderful dimensions of flavor to your Sourdough Cheese Bread. Just ensure the cheese is grated or crum extractbled for even distribution.
Cheesy Sourdough Bread Recipe – Easy & Delicious
A simple and delicious recipe for making homemade cheesy sourdough bread, featuring a tender crumb and a savory cheddar cheese flavor.
Ingredients
-
1 cup milk (or 1 cup water, 244 g)
-
1/2 cup active sourdough starter (113 g)
-
1 large egg
-
1 tablespoon sugar (12 g)
-
1 teaspoon salt (5 g)
-
1 teaspoon garlic powder (3 g)
-
3 cups all-purpose flour (420 g)
-
4 tablespoons unsalted butter (56 g), softened
-
2 cups shredded sharp cheddar cheese
-
Optional: 1 egg yolk mixed with 1 tablespoon of water for an egg wash, and a pinch of flaky sea salt for topping
Instructions
-
Step 1
In a large mixing bowl, combine the milk and active sourdough starter. Whisk until mostly incorporated. Add the large egg and whisk thoroughly to create the liquid base for the dough. -
Step 2
Add sugar, salt, and garlic powder to the wet ingredients. Gradually add flour, mixing until a shaggy dough forms. Use a stand mixer with a dough hook or knead by hand. -
Step 3
Knead the dough for 5-7 minutes in a stand mixer or 10-12 minutes by hand until smoother and elastic. Gradually incorporate softened butter, a few pieces at a time, continuing to knead until the dough is silky smooth and elastic. -
Step 4
Place the kneaded dough in a lightly greased bowl, cover tightly, and let it rise in a warm place for 2-4 hours, or until doubled in size. -
Step 5
Gently turn the risen dough onto a floured surface. Shape into a loaf, rolls, or a braid. Place on a prepared baking surface, cover, and let rise for a second time for 1-1.5 hours, or until puffy and increased by 50-75%. -
Step 6
Preheat oven to 375°F (190°C). Optionally, brush the top with an egg wash and sprinkle with flaky sea salt. Bake for 30-40 minutes for a large loaf or 20-25 minutes for rolls, until deep golden brown and internal temperature reaches 195-200°F (90-93°C). -
Step 7
Remove from oven and cool completely on a wire rack before slicing and enjoying.
Important Information
Nutrition Facts (Per Serving)
It is important to consider this information as approximate and not to use it as definitive health advice.
Allergy Information
Please check ingredients for potential allergens and consult a health professional if in doubt.