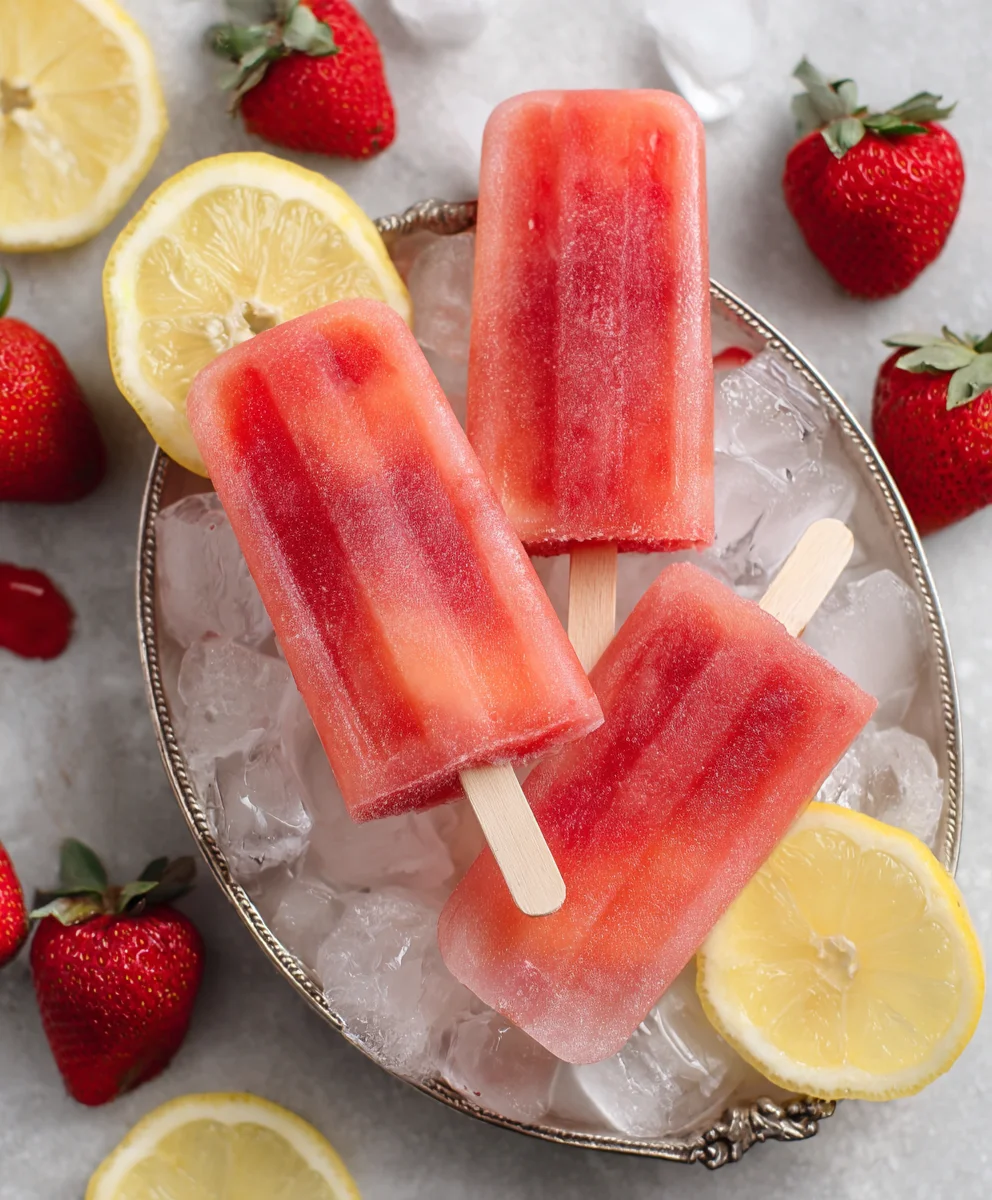
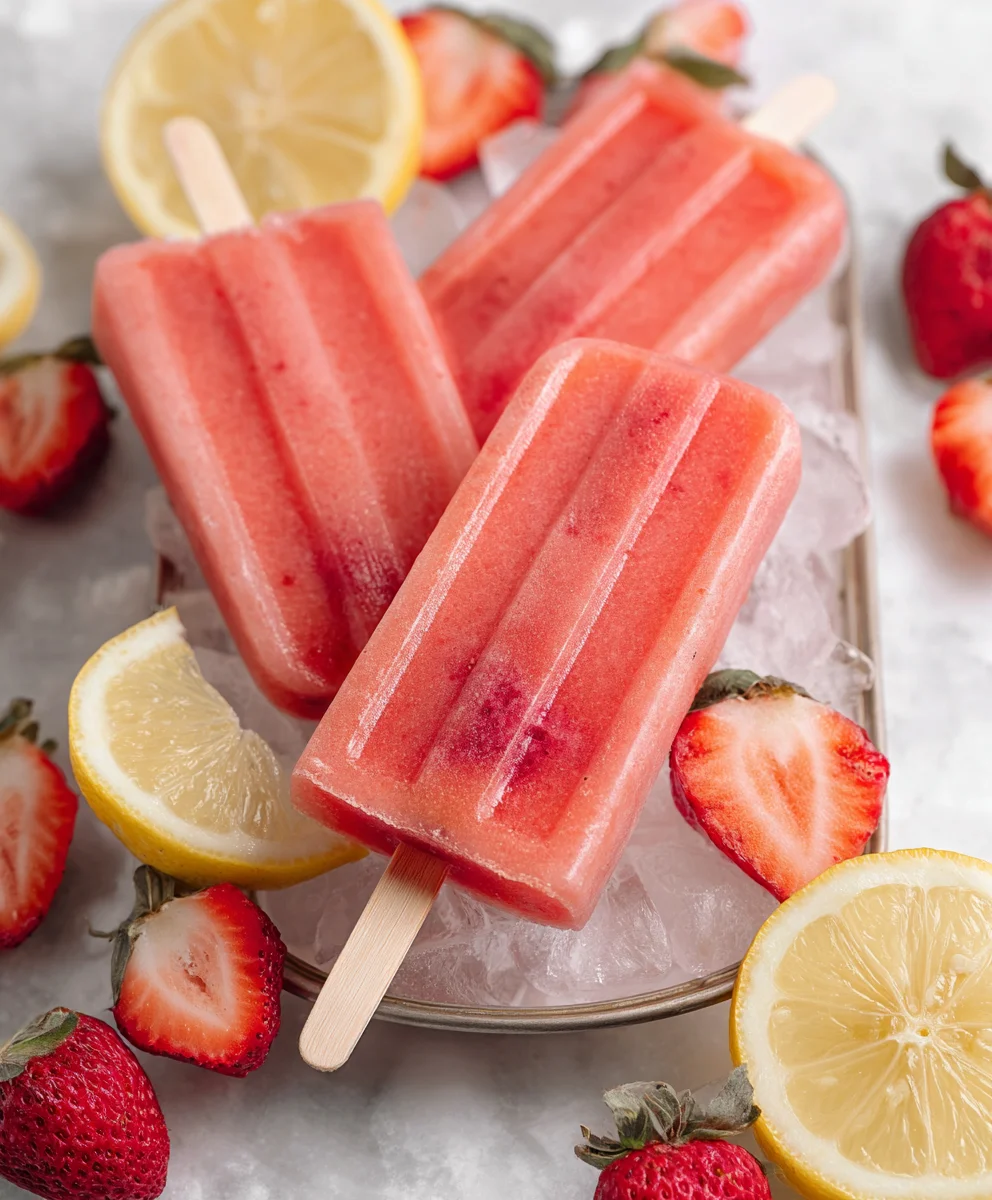
Strawberry Lemonade Popsicles-Refreshing Homemade Treat
Strawberry Lemonade Popsicles are the ultimate summer treat, bringin extractg together the sweet, vibrant burst of fresh strawberries with the tangy, refreshing zing of classic lemonade. On a sweltering afternoon, nothing quite hits the spot like a cool, icy pop bursting with these beloved flavors. It’s no wonder why Strawberry Lemonade Popsicles are a perennial favorite for kids and adults alike. They evoke memories of carefree days, backyard barbecues, and pure, unadulterated joy. What truly sets these homemade delights apart from their store-bought counterparts is the ability to control the sweetness and the intensity of the fruit and citrus. You get to infuse them with real, ripe strawberries and freshly squeezed lemon juice, creating a depth of flavor that’s simply unparalleled. Get ready to elevate your popsicle game and embrace the delicious simplicity of these delightful frozen wonders.
Ingredients:
- 1 container (59 fl oz) Simply Lemonade
- 1 cup fresh strawberries, hulled and diced
- 1 tablespoon granulated sugar
Preparing Your Strawberry Lemonade Popsicles
This recipe is all about simplicity and vibrant, refreshing flavor. We’re taking a shortcut with store-bought lemonade, which already provides a perfect balance of sweet and tart, and infusing it with the delightful taste and pretty pink hue of fresh strawberries. The diced strawberries add a lovely texture and visual appeal, turning a basic lemonade into a gourmet frozen treat.
Gathering Your Supplies
Before we begin extract, let’s make sure you have everything you need. You’ll need your container of Simply Lemonade, your fresh strawberries, and your sugar. For the equipment, you’ll want a blender or a food processor, a medium-sized bowl, a spoon or whisk for stirring, and, of course, popsicle molds. If you don’t have traditional popsicle molds, don’t worry! Small paper or plastic cups can work in a pinch, just make sure you have popsicle sticks to insert once the mixture starts to freeze.
Step-by-Step Instructions
Step 1: Prepare the Strawberries
First things first, let’s get those beautiful strawberries ready. You’ll need about one cup of fresh strawberries. Start by washing them gently under cool running water and then pat them dry with a clean kitchen towel or paper towels. Next, it’s time to hull them, which means removing the green leafy tops. You can do this by using a small knife to cut around the stem or by using a specialized strawberry huller if you have one. Once hulled, dice the strawberries into small, bite-sized pieces. We’re not going for a puree here; we want those little bursts of strawberry goodness in every bite of your popsicle. Aim for pieces that are roughly ¼ inch in size. Set these diced strawberries aside in a medium-sized bowl.
Step 2: Sweeten the Strawberries (Optional but Recommended)
While the Simply Lemonade is already sweetened, a little extra sugar tossed with the diced strawberries can help them retain their vibrant color and amplify their natural sweetness. Add your 1 tablespoon of granulated sugar directly to the bowl with the diced strawberries. Gently toss them together with a spoon until the sugar is evenly distributed over the fruit. This slight maceration process will draw out a tiny bit of juice from the strawberries, which will mingle beautifully with the sugar, creating a more intense strawberry flavor profile for your popsicles. Let this mixture sit for about 5 to 10 minutes while you move on to the next step. This short resting period allows the sugar to start working its magic.
Step 3: Combine and Blend (Partially)
Now it’s time to bring the lemonade and strawberries together. Pour the entire container of Simply Lemonade into a blender. Now, add about half of your prepared diced strawberries (the ones you just tossed with sugar) to the blender with the lemonade. We’re only adding half initially because we want some of those delightful diced pieces to remain whole for texture. Secure the lid on your blender and pulse a few times, just until the strawberries are partially blended into the lemonade. You don’t want to completely pulverize them into a smooth liquid; we’re aiming for a slightly textured consistency with small, identifiable pieces of strawberry still visible within the pink lemonade base.
Step 4: Mix in the Remaining Strawberries
Pour the contents of the blender into the medium-sized bowl containing the remaining diced strawberries. Stir everything together thoroughly with a spoon or whisk. Make sure those unblended strawberry pieces are evenly distributed throughout the pink lemonade mixture. This ensures that every popsicle will have a good balance of the smooth, tart lemonade and the chewy, sweet strawberry chunks. Taste the mixture at this point and adjust the sweetness if you feel it’s necessary. If you prefer a sweeter popsicle, you can add a little more sugar, dissolving it well. For a tarter flavor, you could add a tiny squeeze of fresh lemon juice.
Step 5: Fill the Popsicle Molds
Carefully pour or ladle the strawberry lemonade mixture into your popsicle molds. Fill each mold almost to the top, leaving a small amount of space, as liquids tend to expand slightly when frozen. If you are using paper or plastic cups, fill them to about ¾ of the way full. Once filled, gently tap the molds on your countertop to release any air bubbles that might have been trapped. This will help ensure smooth, uniform popsicles. If you’re using popsicle sticks in cups, you’ll insert them after the mixture has partially frozen. For popsicle molds with built-in stick holders, you can insert the sticks now.
Step 6: Freeze to Perfection
Now comes the patient part: freezing! Place your filled popsicle molds on a flat surface in the freezer. For traditional popsicle molds with holders, insert the lid with the sticks. If you are using cups, once the mixture has frozen to a slushy consistency (this usually takes about 1 to 2 hours), gently insert a popsicle stick into the center of each cup. This will help the stick stand up straight as the popsicle fully freezes. Allow the popsicles to freeze completely. This typically takes at least 4 to 6 hours, but it’s best to leave them overnight to ensure they are solid and ready to enjoy.
Step 7: Unmold and Enjoy
Once your Strawberry Lemonade Popsicles are completely frozen, it’s time for the best part! To easily unmold them, you can run the outside of the popsicle mold under warm water for a few seconds. Be careful not to let too much water get into the popsicle itself. Then, gently pull on the stick to release the popsicle. If you used cups, you might need to peel away the cup or run it under warm water for a bit longer. Your delicious, homemade Strawberry Lemonade Popsicles are now ready to be savored. Enjoy the refreshing burst of citrus and sweet strawberry with every lick!
Conclusion:
And there you have it – your ultimate guide to making delicious and refreshing Strawberry Lemonade Popsicles! We’ve walked through each step, from selecting the freshest strawberries to achieving that perfect tangy-sweet balance. These vibrant popsicles are not only a delightful treat on a hot summer day but also a fun activity to make with family and friends. Don’t be afraid to get creative! These Strawberry Lemonade Popsicles are incredibly versatile and can be adapted to your personal taste. Enjoy them straight from the freezer for a quick cool-down, or perhaps serve them at your next backyard barbecue as a crowd-pleasing dessert. We hope you feel inspired to whip up a batch (or two!) and experience the pure joy of homemade frozen goodness.
Frequently Asked Questions:
Can I use frozen strawberries for these Strawberry Lemonade Popsicles?
Absolutely! If fresh strawberries are out of season or you want a more convenient option, frozen strawberries work perfectly. Thaw them slightly before pureeing to ensure a smooth consistency. You might need to adjust the sugar slightly depending on the sweetness of your frozen berries.
What if I don’t have popsicle molds?
No problem! You can use small paper or plastic cups. Fill them about three-quarters full with the popsicle mixture, cover the top tightly with foil, and then insert popsicle sticks through the foil. They’ll freeze up just as wonderfully.
How long do these Strawberry Lemonade Popsicles last in the freezer?
Properly stored in an airtight container or freezer bag, your Strawberry Lemonade Popsicles should stay delicious for up to 2-3 months. However, they are so good, we doubt they’ll last that long!
Strawberry Lemonade Popsicles-Refreshing Homemade Treat
A simple and refreshing homemade popsicle recipe combining the tartness of lemonade with the sweet flavor and vibrant color of fresh strawberries. Perfect for a hot day!
Ingredients
-
1 container (59 fl oz) Simply Lemonade
-
1 cup fresh strawberries, hulled and diced
-
1 tablespoon granulated sugar
-
Popsicle molds
-
Popsicle sticks
Instructions
-
Step 1
Wash and hull 1 cup of fresh strawberries. Dice them into small, bite-sized pieces (about ¼ inch). Set aside in a medium bowl. -
Step 2
Add 1 tablespoon of granulated sugar to the diced strawberries. Gently toss to coat and let sit for 5-10 minutes to macerate. -
Step 3
Pour the Simply Lemonade into a blender. Add about half of the prepared diced strawberries. Blend for a few short pulses until partially combined, leaving some strawberry pieces intact. -
Step 4
Pour the blended mixture into the bowl with the remaining diced strawberries. Stir well to distribute the strawberry pieces evenly throughout the lemonade. -
Step 5
Carefully pour the mixture into popsicle molds, filling them almost to the top. Insert popsicle sticks if your molds don’t have built-in holders. Tap molds gently to remove air bubbles. -
Step 6
Freeze the popsicles on a flat surface for at least 4-6 hours, or preferably overnight, until completely solid. If using cups, insert sticks after 1-2 hours when the mixture is slushy. -
Step 7
To unmold, run the outside of the popsicle mold under warm water for a few seconds, then gently pull out the popsicle. Enjoy!
Important Information
Nutrition Facts (Per Serving)
It is important to consider this information as approximate and not to use it as definitive health advice.
Allergy Information
Please check ingredients for potential allergens and consult a health professional if in doubt.