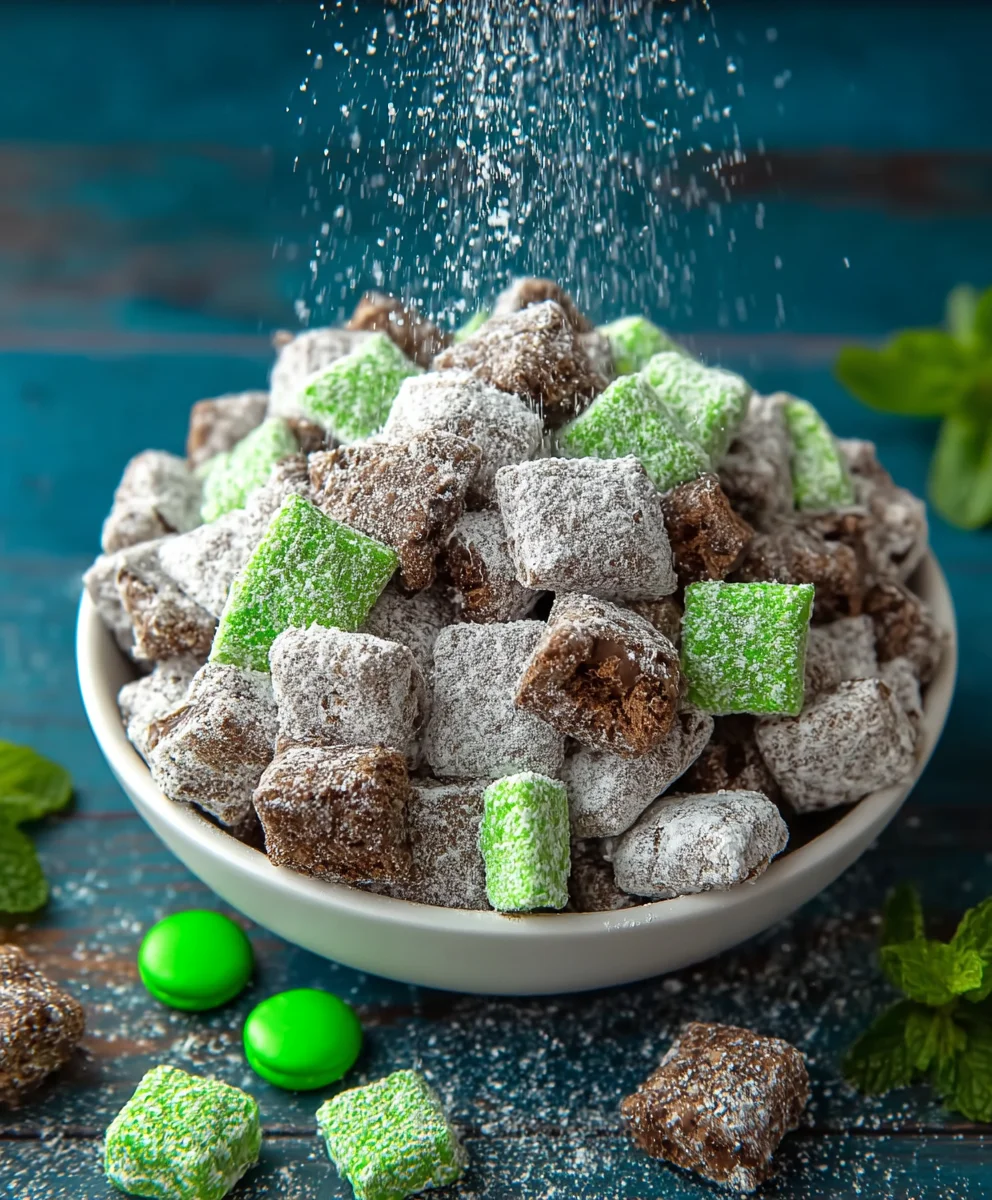
Mint Chocolate Muddy Buddies-Easy No-Bake Treat
Mint Chocolate Muddy Buddy recipes are a delightful journey into pure indulgence, and our version promises to be your new obsession. Imagin extracte this: a symphony of crunchy cereal, coated in a velvety blend of creamy chocolate and a cool, refreshing hint of mint, then dusted generously with a powdery cloud of powdered sugar. It’s no wonder these treats have captured so many hearts! People adore them for their irresistible texture – the perfect balance of crisp and melt-in-your-mouth goodness. What truly sets our Mint Chocolate Muddy Buddy apart is the intensified mint flavor, expertly married with rich dark chocolate, creating a sophisticated yet utterly craveable snack. Forget the everyday; these little bites are a moment of pure, unadulterated joy, perfect for sharing (or not!) at any gathering, or simply as a well-deserved personal treat.
Ingredients:
- 10 cups Chex cereal (rice or corn variety)
- 6 ounces chocolate chips
- 6 ounces green candy melts
- 2 cups powdered sugar, divided
- 1 cup mint M&M’s
- 1 cup Andes chocolate mints, chopped
Melting the Chocolate and Candy Melts
Step 1: Prepare Your Workspace and Chocolate Base
The first crucial step in creating our delightful Mint Chocolate Muddy Buddy is to get your workspace ready and begin extract melting the chocolate components. You’ll need a large bowl, preferably one that’s microwave-safe, or a double boiler setup. If you’re using the microwave, ensure you have a clean, dry paper towel handy to wipe down the bowl if needed. Now, take your 6 ounces of chocolate chips and place them directly into this bowl. We’re going to melt these first to form the rich chocolate base for our treat.
Step 2: Melt the Chocolate Chips
Now, it’s time to melt those chocolate chips. Place the bowl with the chocolate chips in the microwave. Heat on high power for 30-second intervals, stirring thoroughly after each interval. It’s very important to stir well between each blast of heat. Chocolate can go from perfectly melted to scorched very quickly, so patience is key here. Continue this process until the chocolate chips are mostly melted and smooth. You can even let the residual heat finish melting any stubborn bits as you stir. Once smooth and glossy, set this bowl aside momentarily.
Step 3: Melt the Green Candy Melts
Next, we’ll melt the green candy melts. In a separate, clean, and dry microwave-safe bowl, place your 6 ounces of green candy melts. Just like with the chocolate chips, microwave these in 30-second intervals, stirring well after each. Be extra cautious with candy melts, as they can seize up or burn more easily than chocolate if overheated. Stir them until they are completely smooth and have a fluid, pourable consistency. The vibrant green color will be a beautiful contrast to the chocolate. Once melted and smooth, you can either keep them in their bowl or carefully pour them into a large resealable plastic bag, snipping off a small corner for drizzling later.
Combining and Coating the Cereal
Step 4: Coat the Chex Cereal
Now for the fun part – getting our Chex cereal coated! Take your 10 cups of Chex cereal and pour it into a very large bowl. This bowl needs to be big enough to comfortably toss the cereal without making a mess. Gently pour the melted chocolate chips over the Chex cereal. Using a large spoon or a rubber spatula, carefully fold and stir the cereal, ensuring every single piece is lightly coated in the rich, melted chocolate. Be gentle to avoid crushing the delicate cereal squares. You want an even coating, but don’t overmix to the point of creating a mush.
Step 5: Incorporate the Green Candy Melts and Powdered Sugar
Once the Chex cereal is thoroughly coated in chocolate, it’s time to add the vibrant green. If you melted your green candy melts in a bowl, carefully drizzle them over the chocolate-coated cereal, and then gently fold again to distribute the green swirls. If you used a piping bag, snip a bit more off the corner and pipe thin streams of the green candy melts over the cereal mixture. Now, let’s get to the powdered sugar. In a separate large resealable plastic bag, add 1 cup of your powdered sugar. Add half of the chocolate-and-green-coated Chex cereal to the bag. Seal the bag tightly, removing as much air as possible, and then shake vigorously until the cereal is evenly coated in the powdered sugar. Carefully pour the coated cereal onto a baking sheet lined with parchment paper. Repeat this process with the remaining cereal and another cup of powdered sugar, ensuring a light, even dusting. This dual coating is what gives the Muddy Buddy its signature texture and flavor.
Adding the Finishing Touches
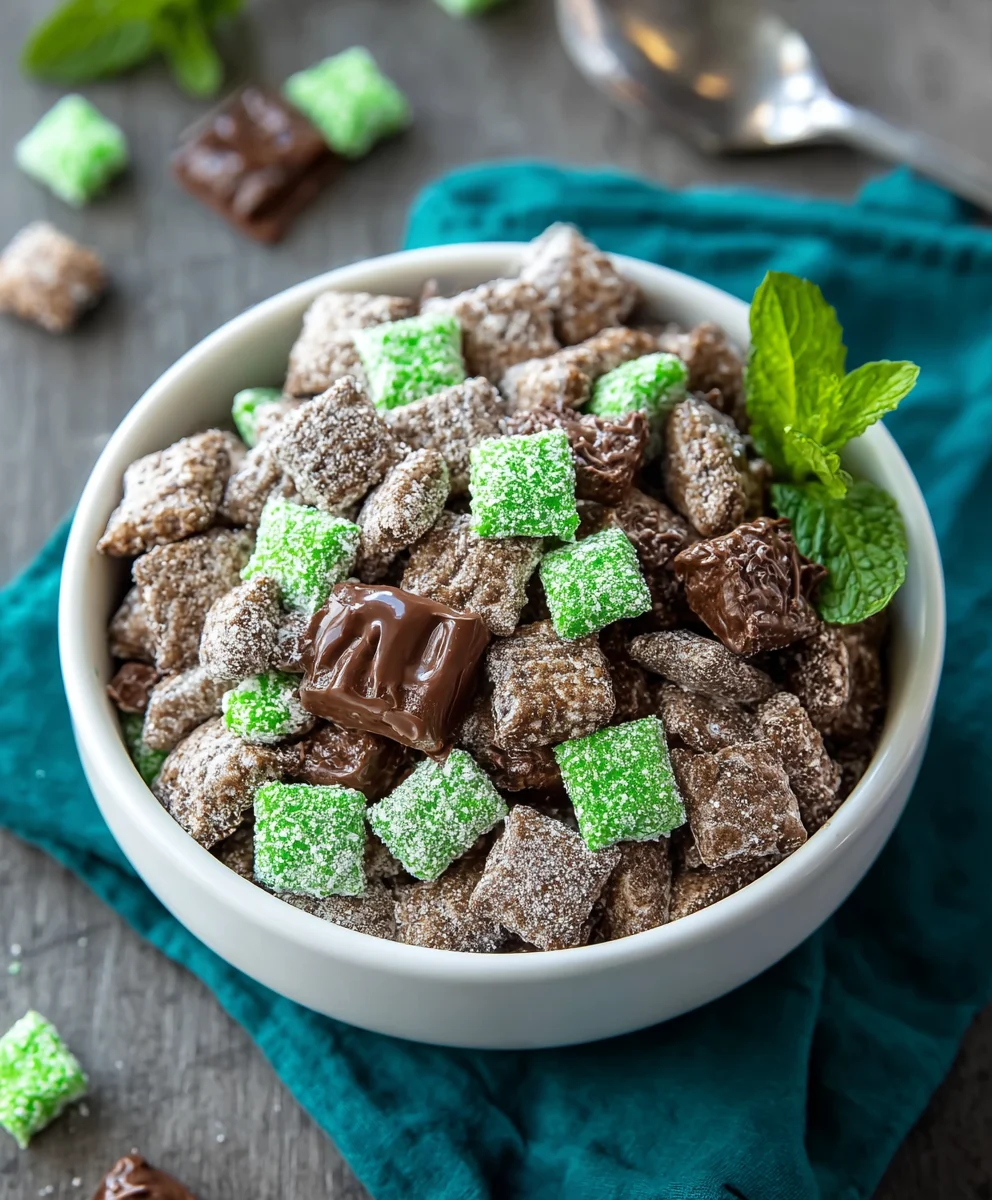
Step 6: Sprinkle with M&M’s and Andes Mints
Our Mint Chocolate Muddy Buddy is almost complete! While the coated cereal is still slightly tacky from the candy melts and powdered sugar, it’s the perfect time to add those delicious minty accents. Generously sprinkle the 1 cup of mint M&M’s over the spread-out cereal on the baking sheet. Then, scatter the 1 cup of chopped Andes chocolate mints over the top as well. The warmth from the coating will help them adhere beautifully. You can gently press them down with your hands if they don’t seem to be sticking.
Step 7: Allow to Set
Once everything is sprinkled and adhered, it’s essential to let the Mint Chocolate Muddy Buddy set properly. Leave the baking sheet with the treats at room temperature for at least 30 minutes, or until the chocolate and candy melts have hardened. For a quicker set, or if your kitchen is warm, you can place the baking sheet in the refrigerator for about 15-20 minutes. This hardening process is crucial for achieving that satisfying crunch and preventing the treats from becoming a sticky mess. Once set, you can break apart any clumps and store them in an airtight container.
Conclusion:
There you have it – your guide to crafting the perfect Mint Chocolate Muddy Buddy! This delightful treat is more than just a snack; it’s a nostalgic trip back to childhood with a refreshing minty twist. We’ve walked through the simple steps of combining the sweet chocolate coating with the crunchy cereal, followed by that irresistible dusting of powdered sugar and a hint of cool mint. The result is a medley of textures and flavors that’s incredibly addictive and surprisingly easy to whip up for any occasion.
These Mint Chocolate Muddy Buddy treats are wonderfully versatile. They are fantastic on their own, of course, but consider serving them at parties, bake snon-alcoholic ales, or as a sweet ending to a casual dinner. For a bit of flair, try serving them in small paper cups or as a delightful topping for ice cream or yogurt. Don’t be afraid to experiment with variations! Add some festive sprinkles for holidays, a dash of cayenne pepper for a spicy kick, or even some chopped nuts for extra crunch. Most importantly, have fun with it! The joy of making and sharing these Mint Chocolate Muddy Buddy delights is part of the experience. So gather your ingredients and get ready to create some sweet, minty magic!
Frequently Asked Questions:
Q: How should I store my Mint Chocolate Muddy Buddy?
A: To keep your Mint Chocolate Muddy Buddy fresh and crunchy, store them in an airtight container at room temperature. They are best enjoyed within 5-7 days. Avoid refrigerating them, as this can sometimes make them a little too hard or affect the texture.
Q: Can I make the Mint Chocolate Muddy Buddy ahead of time?
A: Absolutely! The Mint Chocolate Muddy Buddy actually tastes even better after a few hours, allowing the flavors to meld. You can easily make them a day or two in advance for parties or gatherings.
Q: I don’t have Chex cereal, what can I use instead for my Mint Chocolate Muddy Buddy?
A: You can substitute other similar square-shaped cereals like Crispix, Golden Grabeef hams, or even Cheerios if Chex cereal isn’t available for your Mint Chocolate Muddy Buddy. Just ensure the pieces are similar in size for even coating.
Mint Chocolate Muddy Buddies-Easy No-Bake Treat
A delightful and easy no-bake treat featuring the classic Chex cereal coated in chocolate, vibrant green candy melts, powdered sugar, and minty M&M’s and Andes chocolate mints.
Ingredients
-
10 cups Chex cereal (rice or corn variety)
-
6 ounces chocolate chips
-
6 ounces green candy melts
-
2 cups powdered sugar, divided
-
1 cup mint M&M’s
-
1 cup Andes chocolate mints, chopped
Instructions
-
Step 1
Prepare your workspace and melt the chocolate chips in a microwave-safe bowl in 30-second intervals, stirring well after each, until smooth and glossy. Set aside. -
Step 2
In a separate clean, dry bowl, melt the green candy melts using the same microwave interval method, stirring until smooth and fluid. Be cautious as candy melts can burn easily. -
Step 3
Pour the Chex cereal into a very large bowl. Gently pour the melted chocolate chips over the cereal and carefully fold and stir to coat every piece evenly without crushing. -
Step 4
Drizzle the melted green candy melts over the chocolate-coated cereal and gently fold again to distribute the green swirls. Add 1 cup of powdered sugar to a large resealable bag, add half the cereal mixture, seal tightly, and shake vigorously until evenly coated. Pour onto a parchment-lined baking sheet. Repeat with the remaining cereal and powdered sugar. -
Step 5
While the coated cereal is still slightly tacky, generously sprinkle with mint M&M’s and chopped Andes chocolate mints. Gently press them down if needed. -
Step 6
Allow the Mint Chocolate Muddy Buddy to set at room temperature for at least 30 minutes, or in the refrigerator for 15-20 minutes until hardened. Break apart clumps and store in an airtight container.
Important Information
Nutrition Facts (Per Serving)
It is important to consider this information as approximate and not to use it as definitive health advice.
Allergy Information
Please check ingredients for potential allergens and consult a health professional if in doubt.