Crispy Salmon Rice Bowl Recipe – Flavorful & Easy
Salmon crispy rice is one of those dishes that just sings. Imagin extracte a perfect bite: flaky, succulent salmon, its rich flavor beautifully complemented by the irresistible crunch of pan-fried rice. It’s a textural masterpiece, a delightful dance between soft and crisp that leaves you craving more. We absolutely adore salmon crispy rice because it’s both elegant enough for a dinner party and surprisingly simple to whip up on a weeknight. What truly sets this dish apart is the symphony of flavors and sensations. The inherent sweetness of the salmon, kissed by the savory notes of the rice, all harmonized by a whisper of seasoning, creates an experience that’s both comforting and exciting. It’s a dish that instantly elevates any meal and has become a cherished favorite in my kitchen, and I’m thrilled to share it with you.
Ingredients:
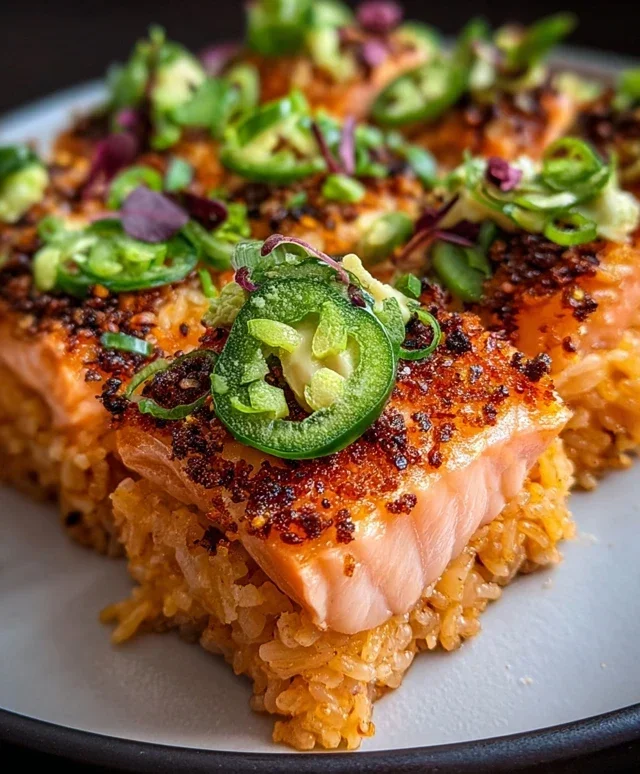
Get ready to elevate your weeknight dinner game with this incredibly satisfying Salmon Crispy Rice recipe! Imagin extracte perfectly cooked, slightly sweet and savory rice, pan-fried until golden brown and delightfully crunchy, then topped with a vibrant, spicy salmon mixture. It’s a dish that looks impressive but is surprisingly easy to make. The contrast between the crisp rice and the tender, flavorful salmon is simply divine, and the creamy, spicy sauce ties everything together beautifully. I love serving this with some cool, refreshing sliced avocado and a little kick from the jalapeños. It’s a fantastic appetizer or a light, yet filling, main course.
Preparing the Crispy Rice Base
The foundation of this dish is the crispy rice. We’ll start by seasoning our cooked sushi rice. In a small bowl, whisk together the rice vinegar, sugar, and salt until the sugar and salt are completely dissolved. This simple dressing will add a subtle tang and sweetness to the rice, making it more flavorful and helping it crisp up nicely. Gently fold this seasoned mixture into your cooked sushi rice. Be careful not to overmix, as we don’t want to mash the grains. You want the rice to remain somewhat individual.
Once the rice is seasoned, spread it out evenly into a 9×13 inch baking dish or a similar-sized container. Press it down firmly and uniformly. The key here is to create a compact layer of rice, about half an inch thick. This will make it easier to cut and fry later. Once pressed, cover the dish with plastic wrap and refrigerate for at least 30 minutes, or ideally for an hour or two. This chilling step is crucial; it firms up the rice, making it hold its shape when you cut it and ensuring it fries beautifully without falling apart. The colder and firmer the rice, the better your crispy rice will be!
Cooking the Salmon and Creating the Spicy Mayo
While the rice is chilling, let’s get our salmon ready. Ensure your salmon is sushi-grade, which means it’s safe to eat raw and has been handled with the utmost care. Pat the salmon dry with paper towels and then chop it into small, bite-sized pieces. You don’t want huge chunks, as they won’t cook evenly or distribute well over the crispy rice.
In a medium bowl, combine the Kewpie mayonnaise, sriracha, thinly sliced scallions, soy sauce, and sesame oil. Kewpie mayonnaise is a Japanese mayonnaise that’s richer and tangier than Western varieties, and it’s perfect for this spicy sauce. Whisk everything together until it’s smooth and well combined. Taste it and adjust the sriracha or soy sauce to your liking. If you prefer it spicier, add more sriracha! If you like it a bit saltier, a touch more soy sauce will do the trick. Set this creamy, spicy mixture aside.
Frying the Crispy Rice Cakes
Now for the magic! Once the rice is well-chilled and firm, carefully invert the baking dish onto a cutting board. You should have a solid block of rice. Use a sharp knife to cut the rice block into desired shapes. Small squares or rectangles, about 2×2 inches, work wonderfully. You can also use cookie cutters for fun shapes if you’re feeling whimsical.
Heat a generous amount of vegetable oil in a large non-stick skillet over medium-high heat. You’ll want enough oil to come up about a quarter of an inch on the sides of the rice cakes. You can test if the oil is hot enough by dropping a tiny piece of rice in; it should sizzle immediately. Carefully place the rice cakes into the hot oil, being careful not to overcrowd the pan. You may need to work in batches. Fry them for about 3-5 minutes per side, until they are deeply golden brown and wonderfully crisp. They should sound satisfyingly crunchy when you flip them. Once crispy, remove them from the skillet and place them on a wire rack set over a baking sheet to drain any excess oil. This helps maintain their crispiness.
Assembling the Salmon Crispy Rice
Once all your rice cakes are fried to perfection and drained, it’s time to assemble! Arrange the crispy rice cakes on a serving platter. Spoon a generous amount of the prepared spicy sriracha mayo mixture onto each crispy rice cake. Don’t be shy with the sauce; it’s a key component!
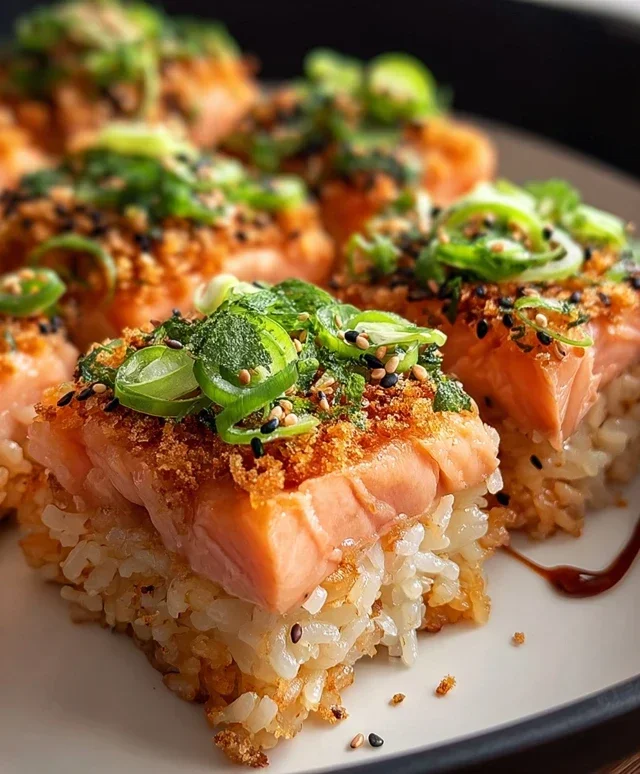
Next, top each rice cake with the chopped sushi-grade salmon. You can arrange it neatly or just pile it on – either way, it looks and tastes amazing. Finally, garnish with the sliced avocado, thinly sliced jalapeño (if using for an extra kick), and a sprinkle of toasted black and white sesame seeds. The sesame seeds add a lovely nutty flavor and a beautiful visual appeal. Serve immediately and watch them disappear! The interplay of textures and flavors – the crunch of the rice, the creaminess of the sauce, the freshness of the salmon and avocado, and the hint of heat from the jalapeño – is truly addictive. Enjoy this delightful culinary creation!
Conclusion:
I hope you’re as excited to try this Salmon Crispy Rice recipe as I am about sharing it! It truly is a showstopper, offering a delightful textural contrast between the perfectly cooked, flaky salmon and the satisfyingly crunchy rice. The blend of savory, sweet, and a hint of spice creates a flavor profile that’s both sophisticated and incredibly moreish. This dish is fantastic for a weeknight dinner that feels special, or for impressing guests at your next gathering. Its visual appeal, with the vibrant colors of the salmon and garnishes, makes it a joy to serve. Don’t be afraid to get creative with your toppings; the possibilities are endless!
For serving, I love pairing it with a simple side of steamed edamame or a fresh, crisp cucumber salad. You could also serve it with a drizzle of extra sriracha mayo or some fresh cilantro. If you’re looking for variations, consider swapping the salmon for other firm fish like tuna or even pan-seared tofu for a vegetarian option. Experiment with different seasonings for the rice, perhaps adding toasted sesame oil or a pinch of chili flakes for extra kick. Give this Salmon Crispy Rice a go – I’m confident you’ll fall in love with its unique charm!
Frequently Asked Questions:
Can I make the crispy rice ahead of time?
Yes, you absolutely can! You can press the cooked rice into your pan and refrigerate it for up to a day before cutting and frying. This makes assembly on the day of serving much quicker.
What kind of salmon works best for this recipe?
Salmon with a good fat content, like Atlantic or King salmon, works wonderfully. However, a good quality sockeye or coho will also yield delicious results. The key is to ensure it’s fresh and has a good color.
Is it possible to make this recipe gluten-free?
Yes! Ensure you are using gluten-free soy sauce or tamari for the sauce. The rice and salmon are naturally gluten-free. This makes our Salmon Crispy Rice a versatile choice for many dietary needs.
Salmon Crispy Rice
A delightful appetizer featuring crispy fried sushi rice topped with a spicy salmon mixture and fresh garnishes.
Ingredients
-
3 cups cooked sushi rice (short-grain rice)
-
2 tablespoons rice vinegar
-
1 tablespoon sugar
-
1 teaspoon salt
-
Vegetable oil for frying
-
1 pound sushi-grade salmon, chopped
-
4 tablespoons Kewpie mayonnaise
-
2 tablespoons sriracha
-
2 tablespoons scallions, thinly sliced
-
2 teaspoons soy sauce
-
2 teaspoons sesame oil
-
Sliced avocado
-
Jalapeño, thinly sliced
-
Black and white sesame seeds, toasted
Instructions
-
Step 1
In a bowl, combine the cooked sushi rice with rice vinegar, sugar, and salt. Gently mix until well combined. -
Step 2
Press the rice mixture into a greased baking dish or a lined pan, about 1/2 inch thick. Chill for at least 30 minutes until firm. -
Step 3
Cut the chilled rice into desired shapes (squares or rectangles). Heat about 1 inch of vegetable oil in a skillet over medium-high heat. Fry the rice pieces until golden brown and crispy on both sides. Drain on paper towels. -
Step 4
In a separate bowl, combine the chopped salmon, Kewpie mayonnaise, sriracha, sliced scallions, soy sauce, and sesame oil. Mix gently. -
Step 5
Top each crispy rice piece with a generous portion of the salmon mixture. -
Step 6
Garnish with sliced avocado, thinly sliced jalapeño, and toasted black and white sesame seeds.
Important Information
Nutrition Facts (Per Serving)
It is important to consider this information as approximate and not to use it as definitive health advice.
Allergy Information
Please check ingredients for potential allergens and consult a health professional if in doubt.