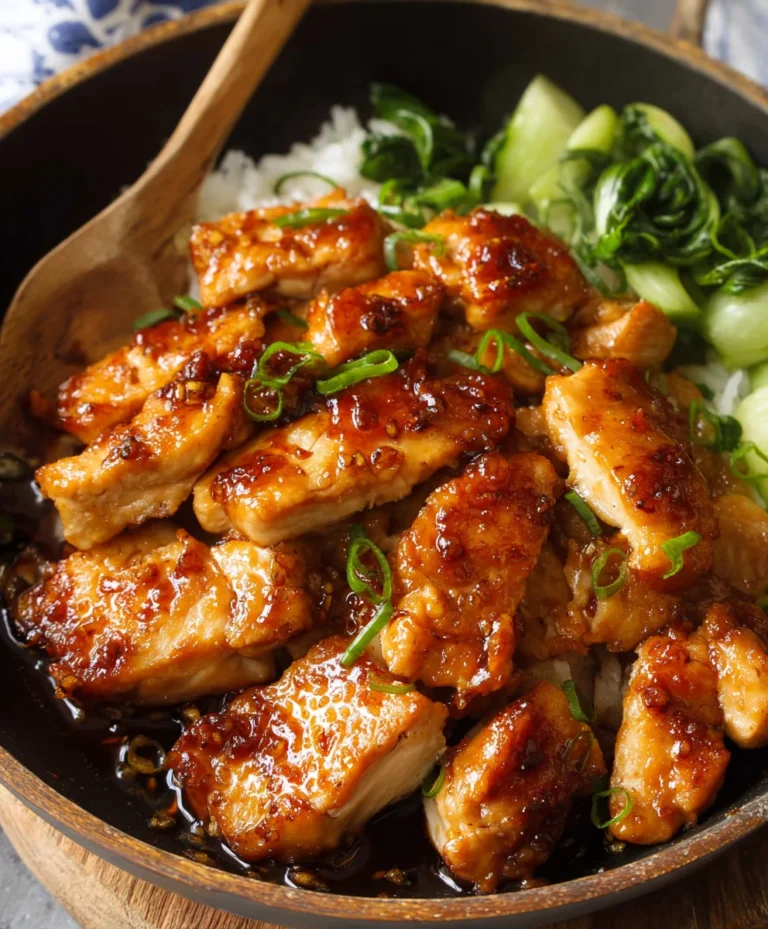
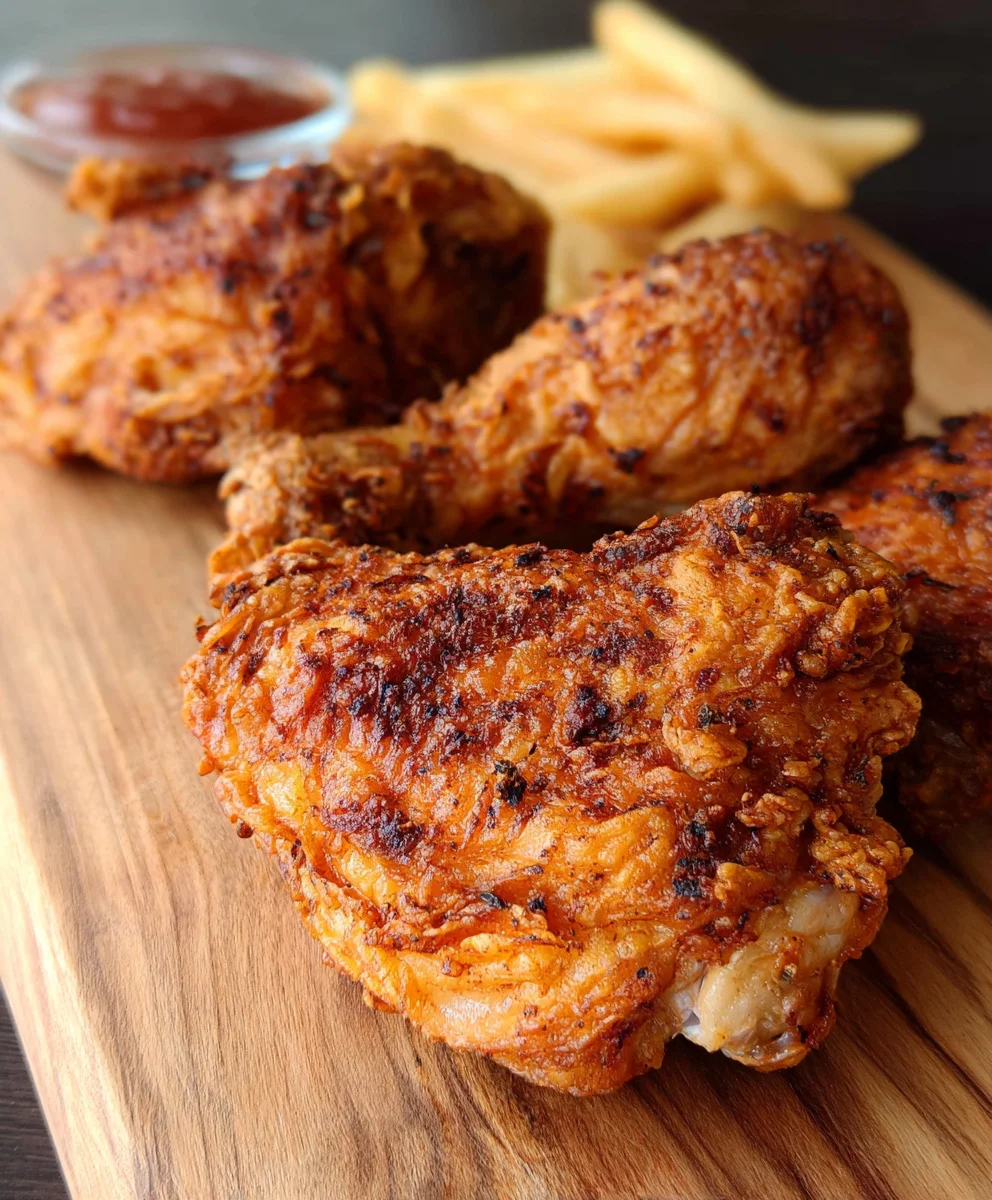
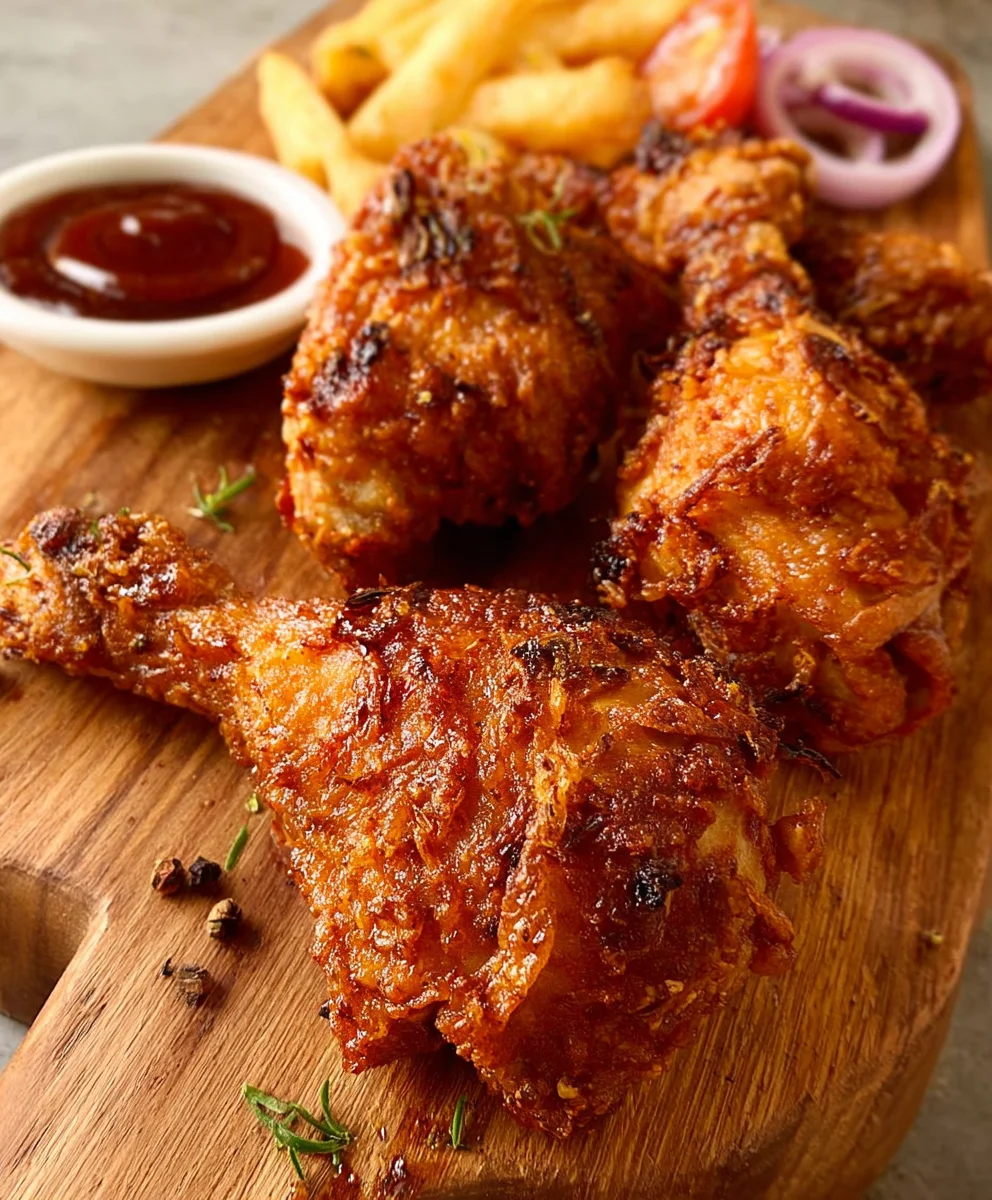
Crispy Juicy Fried Chicken Recipe- Best Ever
CRISPY JUICY FIRED CHICKEN is more than just a meal; it’s an experience. That irresistible crunch of the golden-brown exterior giving way to impossibly tender, succulent meat is a culinary symphony that dances on your palate. It’s the kind of dish that evokes childhood memories, weekend gatherings, and pure, unadulterated comfort. People gravitate towards this classic for its profound satisfaction, its ability to transform simple ingredients into something extraordinary. What truly sets this CRISPY JUICY FIRED CHICKEN apart is the delicate balance of flavors and textures achieved through a meticulous frying process that ensures every bite is a revelation. Prepare yourself for a taste sensation that will leave you craving more.
Ingredients:
- 8 pieces bone-in chicken pieces (4 chicken thighs and 4 drum extractsticks)
- 3 cups buttermilk
- 1 large egg
- 2 teaspoons salt
- 1 teaspoon ground black pepper
- 1 teaspoon garlic powder
- ½ teaspoon cayenne pepper
- For the Flour Coating:
- 2 cups all-purpose flour
- 3/4 cup cornstarch
- 1 teaspoon baking powder
- 2 teaspoons salt
- 1 teaspoon ground black pepper
- 1 teaspoon garlic powder
- 1 teaspoon celery salt
Marinating the Chicken
Let’s start by getting our chicken ready for an incredible flavor infusion. The secret to that wonderfully moist and tender interior, especially when aiming for that perfect CRISPY JUICY FIRED CHICKEN, lies in a good marinade. In a large bowl or a heavy-duty zip-top bag, pour in the 3 cups of buttermilk. This dairy powerhouse is fantastic for tenderizing chicken because its acidity breaks down tough muscle fibers. Next, crack in the large egg and whisk it gently into the buttermilk. The egg acts as a binder and helps the flour coating adhere beautifully later on. Now, it’s time for our first layer of seasoning. Add the 2 teaspoons of salt, 1 teaspoon of ground black pepper, 1 teaspoon of garlic powder, and ½ teaspoon of cayenne pepper to the buttermilk mixture. Give everything a good stir until the spices are well distributed. Carefully place your 8 pieces of bone-in chicken into the marinade, ensuring each piece is fully submerged. If you’re using a bowl, press down to keep them covered. If using a zip-top bag, seal it tightly, squeezing out as much air as possible. For the best results, let the chicken marinate in the refrigerator for at least 4 hours, or preferably overnight. This extended marinating time will allow the flavors to penetrate deeply into the chicken, ensuring every bite is bursting with taste and that coveted juicy texture.
Preparing the Crispy Flour Coating
While the chicken is busy soaking up all that deliciousness, let’s get our flour coating ready. A well-balanced coating is crucial for achieving that signature CRISPY JUICY FIRED CHICKEN exterior. In a large, shallow dish or a wide bowl, combine the 2 cups of all-purpose flour with the 3/4 cup of cornstarch. The cornstarch is a secret weapon here; it adds an extra layer of crispiness and helps create that light, shatteringly crunchy texture we all love. Next, stir in the 1 teaspoon of baking powder. Baking powder, when heated, produces small bubbles that make the coating light and airy, preventing it from becoming dense and heavy. Now, let’s build the flavor profile for our crust. Add 2 teaspoons of salt, 1 teaspoon of ground black pepper, 1 teaspoon of garlic powder, and 1 teaspoon of celery salt. The celery salt brings a subtle, savory depth that complements the other spices wonderfully. Whisk all these dry ingredients together thoroughly until everything is evenly distributed. This ensures that every piece of chicken will be coated with the same fantastic blend of seasonings.
Coating the Chicken for Frying
Now comes the exciting part: coating the chicken! Take your marinated chicken pieces out of the refrigerator. It’s important that the chicken is coated while still wet from the marinade; this helps the flour mixture cling effectively. Working with one piece of chicken at a time, lift it from the buttermilk and let any excess drip back into the bowl or bag for a moment. Then, place the chicken piece into the prepared flour mixture. Generously coat all sides of the chicken, pressing the flour mixture onto it to ensure it adheres well. Don’t be shy; you want a good, thick coating. Once coated, gently shake off any excess flour. For an even crispier crust, I like to double-dip. So, after the first coating, dip the chicken piece back into the buttermilk mixture briefly, letting the excess drip off, and then return it to the flour mixture for a second coating. Press the flour on again, ensuring a thorough and even coverage. Place the double-coated chicken pieces on a wire rack set over a baking sheet. This allows the coating to set slightly and prevents the bottom from becoming soggy. Repeat this process for all 8 chicken pieces, making sure each one is lovingly coated and ready for its transformation into CRISPY JUICY FIRED CHICKEN.
Frying the Chicken to Golden Perfection
It’s time to bring the heat and achieve that perfectly CRISPY JUICY FIRED CHICKEN! You’ll need a heavy-bottomed pot or a deep fryer. Add enough neutral oil, such as vegetable, canola, or peanut oil, to come about 2-3 inches up the sides of the pot. Heat the oil over medium-high heat to a temperature of 350°F (175°C). It’s crucial to maintain this temperature; too low and the chicken will absorb too much oil and become greasy, too high and the outside will burn before the inside is cooked. Carefully, using tongs, place 2-3 pieces of coated chicken into the hot oil. Don’t overcrowd the pot, as this will lower the oil temperature and lead to uneven cooking. Fry the chicken for about 6-8 minutes per sirum extractfor drumsticks and 8-10 minutes per side for thighs, or until the internal temperature reaches 165°F (74°C) when checked with a meat thermometer inserted into the thickest part of the chicken, avoiding the bone. You’re looking for a deep golden-brown color and a beautifully crisp exterior.
Resting and Serving Your Masterpiece
Once the chicken is beautifully golden brown and cooked through, carefully remove it from the hot oil using tongs. Place the fried chicken pieces on a clean wire rack set over a baking sheet to drain any excess oil. This step is crucial for maintaining the crispiness of the coating. Avoid placing it directly on paper towels, as this can trap steam and make the bottom of the crust soggy. Let the chicken rest for at least 5-10 minutes before serving. This resting period allows the juices to redistribute throughout the chicken, ensuring maximum juiciness. It also allows the internal temperature to continue to rise slightly, further ensuring it’s cooked through. Serve your incredibly CRISPY JUICY FIRED CHICKEN hot and enjoy the fruits of your labor! It pairs wonderfully with classic sides like mashed potatoes, coleslaw, or macaroni and cheese. You’ve created a true crowd-pleaser!
Conclusion:
You’ve now mastered the art of creating truly spectacular CRISPY JUICY FIRED CHICKEN right in your own kitchen! This recipe is designed to deliver that irresistible crunch on the outside and incredibly tender, moist meat on the inside. We’ve walked through the essential steps, from preparing the perfect brine to achieving that golden-brown, crispy coating. Don’t be intimidated; with a little patience and attention to detail, you’ll be enjoying restaurant-quality fried chicken that will impress everyone.
Serve your CRISPY JUICY FIRED CHICKEN hot with your favorite classic sides like creamy mashed potatoes, tangy coleslaw, or buttery corn on the cob. For a lighter option, a fresh garden salad makes a wonderful accompaniment. This chicken is also fantastic tucked into sandwiches or served alongside waffles for a sweet and savory brunch experience. Feel free to experiment with different spice blends in your dredge to personalize your fried chicken. A touch of smoked paprika, cayenne pepper, or even some dried herbs can add an exciting new dimension.
I truly hope you enjoy making and devouring this CRISPY JUICY FIRED CHICKEN. It’s a rewarding dish that brings smiles to the table. Happy frying!
Frequently Asked Questions:
Can I make the CRISPY JUICY FIRED CHICKEN ahead of time?
While fried chicken is best enjoyed fresh for optimal crispiness, you can prepare the chicken pieces up to the point of frying and refrigerate them for a few hours. Reheat gently in a single layer on a baking sheet in a preheated oven (around 350°F or 175°C) for about 10-15 minutes to revive the crispiness, though it may not be quite as crunchy as when first fried.
What’s the best oil to use for frying the CRISPY JUICY FIRED CHICKEN?
A neutral-flavored oil with a high smoke point is ideal. Canola oil, vegetable oil, or peanut oil are excellent choices. They allow the chicken to cook through without imparting an undesirable flavor and can withstand the high temperatures needed for frying.
My CRISPY JUICY FIRED CHICKEN isn’t as crispy as I hoped. What did I do wrong?
Several factors can affect crispiness. Ensure your oil is hot enough before adding the chicken (around 350-375°F or 175-190°C). Overcrowding the pan can lower the oil temperature, leading to greasy, less crispy chicken. Also, make sure the chicken pieces are thoroughly dried before dredgin extractg, as excess moisture can hinder crisping.
Crispy Juicy Fried Chicken Recipe- Best Ever
Achieve perfectly crispy and juicy fried chicken with this foolproof recipe. Tender, flavorful chicken coated in a seasoned flour mixture and fried to golden perfection.
Ingredients
-
8 pieces bone-in chicken pieces (4 chicken thighs and 4 drumsticks)
-
3 cups buttermilk
-
1 large egg
-
2 teaspoons salt
-
1 teaspoon ground black pepper
-
1 teaspoon garlic powder
-
½ teaspoon cayenne pepper
-
2 cups all-purpose flour
-
3/4 cup cornstarch
-
1 teaspoon baking powder
-
2 teaspoons salt
-
1 teaspoon ground black pepper
-
1 teaspoon garlic powder
-
1 teaspoon celery salt
Instructions
-
Step 1
In a large bowl or zip-top bag, combine buttermilk, egg, 2 tsp salt, 1 tsp black pepper, 1 tsp garlic powder, and ½ tsp cayenne pepper. Add chicken pieces, ensuring they are fully submerged. Marinate in the refrigerator for at least 4 hours, or preferably overnight. -
Step 2
In a large shallow dish, combine all-purpose flour, cornstarch, baking powder, 2 tsp salt, 1 tsp black pepper, 1 tsp garlic powder, and 1 tsp celery salt. Whisk to distribute seasonings evenly. -
Step 3
Remove chicken from marinade, letting excess drip off. Coat each piece generously in the flour mixture, pressing to adhere. For an extra crispy crust, double-dip by briefly dipping back into buttermilk and then coating in flour again. Place coated chicken on a wire rack set over a baking sheet. -
Step 4
Heat 2-3 inches of neutral oil in a heavy-bottomed pot or deep fryer to 350°F (175°C). Carefully add 2-3 pieces of chicken at a time, avoiding overcrowding. Fry drumsticks for 6-8 minutes per side and thighs for 8-10 minutes per side, or until the internal temperature reaches 165°F (74°C). -
Step 5
Remove chicken from oil and place on a clean wire rack set over a baking sheet to drain excess oil. Let rest for 5-10 minutes before serving to allow juices to redistribute and ensure maximum juiciness.
Important Information
Nutrition Facts (Per Serving)
It is important to consider this information as approximate and not to use it as definitive health advice.
Allergy Information
Please check ingredients for potential allergens and consult a health professional if in doubt.