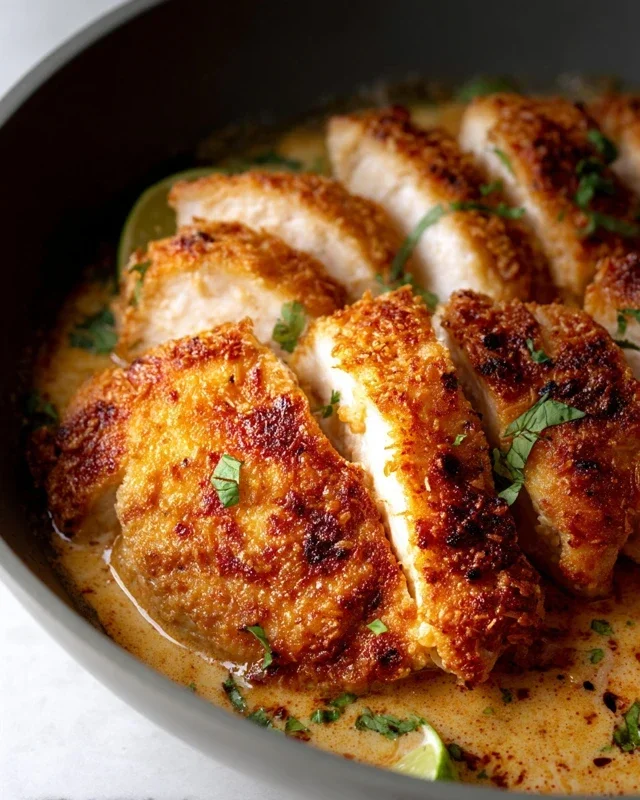
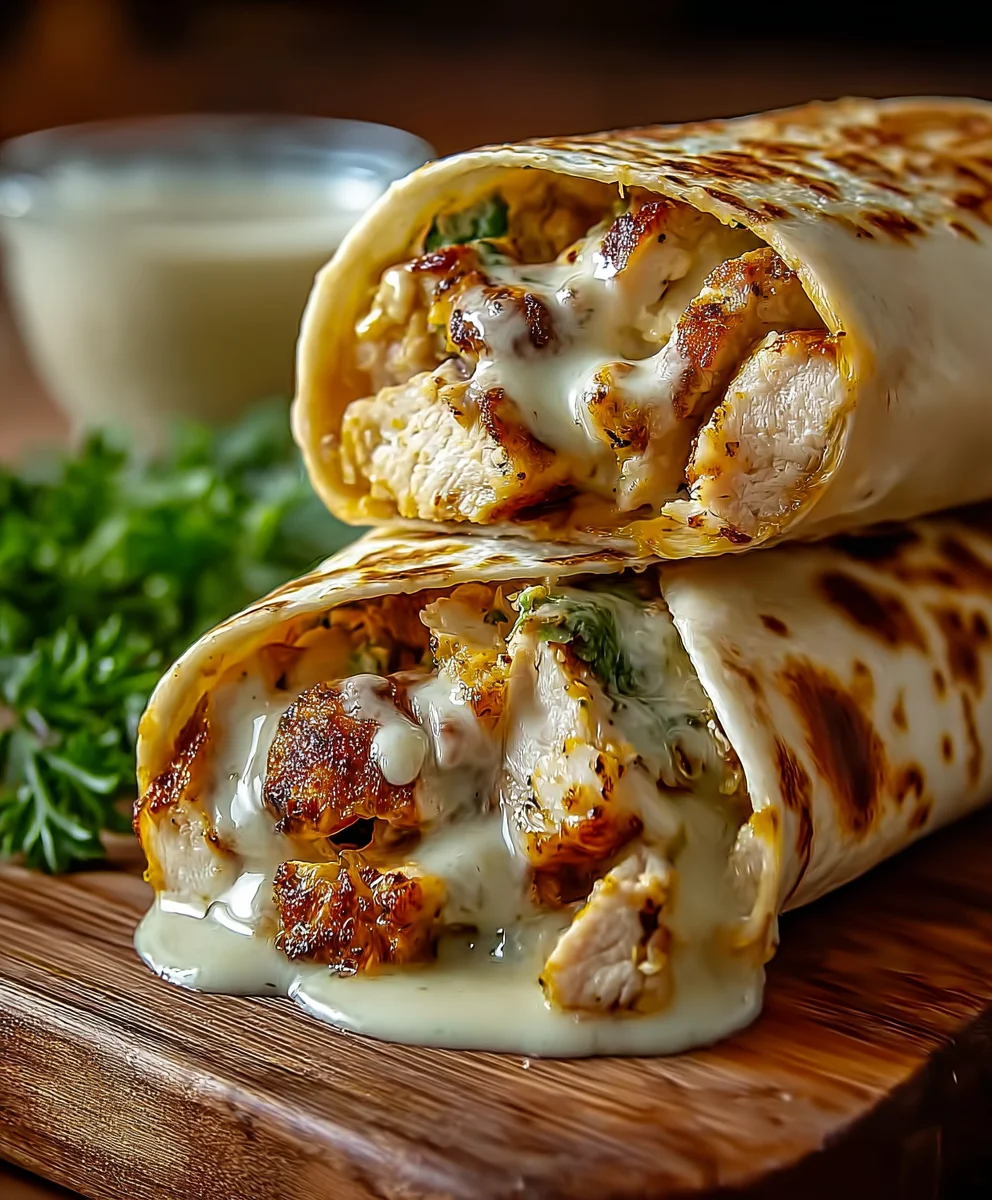
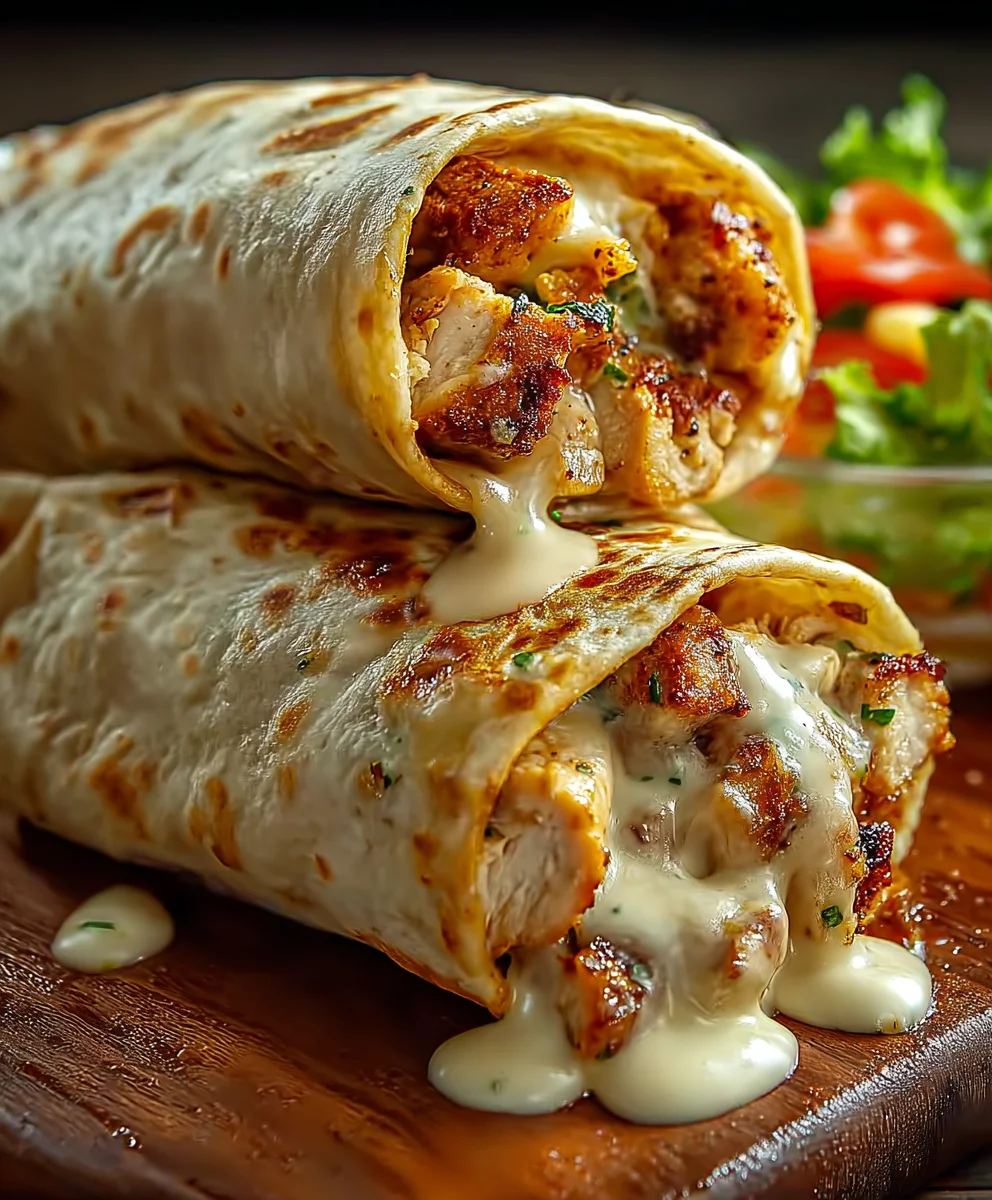
Cheesy Garlic Chicken Wraps Delicious Dinner Easy Recipe
Cheesy Garlic Chicken Wraps: A Tasty Dinner Delight! are more than just a meal; they are a warm hug in a tortilla, a flavor explosion that brings smiles to faces around the dinner table. Imagin extracte tender, juicy chicken infused with the irresistible aroma of roasted garlic, all embraced by a gooey, melted cheese blanket, then perfectly seasoned and nestled within a soft, yielding wrap. This dish has captured hearts because it’s incredibly satisfying without being overly complicated. It strikes that perfect balance between comfort food and a quick, weeknight-friendly option that appeals to everyone from busy parents to culinary adventurers. What truly sets these Cheesy Garlic Chicken Wraps: A Tasty Dinner Delight! apart is the thoughtful layering of flavors and textures, creating a symphony in every bite. The savory chicken, the pungent garlic, the creamy cheese, and the fresh crunch of vegetables all come together in harmonious perfection, making it an undeniable winner.
Ingredients:
- 2 cups cooked chicken, shredded
- 1 cup shredded mozzarella cheese
- 1/2 cup cream cheese, softened
- 1/4 cup sour cream
- 2 cloves garlic, minced
- 1 teaspoon garlic powder
- 1 teaspoon onion powder
- 1/2 teaspoon salt
- 1/4 teaspoon black pepper
- 4 large flour tortillas
- 1 cup fresh spinach leaves
- 1/2 cup diced tomatoes
- 1/4 cup chopped fresh parsley (optional)
- Olive oil for cooking
Preparing the Cheesy Garlic Chicken Filling
This is where the magic happens, transforming simple ingredients into a delicious, creamy filling for our wraps. We’ll start by combining the core components of our flavorful chicken mixture. In a medium-sized mixing bowl, add the 2 cups of cooked, shredded chicken. This chicken can be leftover roasted chicken, rotisserie chicken, or chicken breast you’ve boiled and shredded. The key is that it’s already cooked and ready to go, saving you valuable time.
Next, we introduce the creaminess and tang. Add the 1/2 cup of softened cream cheese to the bowl. It’s important that the cream cheese is softened; this means it should be at room temperature, making it much easier to mix without lumps. You can achieve this by leaving it out on the counter for about 30-60 minutes, or by carefully microwaving it for 15-20 seconds on low power. Following that, spoon in the 1/4 cup of sour cream. Sour cream adds a wonderful depth of flavor and a slight acidity that balances the richness of the cream cheese.
Now, let’s amp up the flavor with aromatics and seasonings. Add the 2 cloves of minced fresh garlic. Fresh garlic provides a potent and bright garlic punch that is simply unbeatable. For an extra layer of garlic goodness and a smoother texture, we’re also adding 1 teaspoon of garlic powder. This combination ensures a robust garlic flavor throughout the filling. To complement the garlic and add a savory foundation, sprinkle in 1 teaspoon of onion powder. This provides a subtle sweetness and umami that harmonizes with the other ingredients. Season generously with 1/2 teaspoon of salt and 1/4 teaspoon of black pepper. Taste as you go, and feel free to adjust the salt and pepper to your preference. Finally, add the 1 cup of shredded mozzarella cheese. This cheese will melt beautifully into the filling, adding that irresistible gooey, cheesy texture we all crave.
Now, it’s time to thoroughly combine everything. Using a sturdy spoon or a spatula, mix all the ingredients together until they are well incorporated and you have a creamy, homogenous filling. Ensure there are no pockets of unmixed cream cheese or stray spices. The mixture should be thick and spreadable, coating the shredded chicken nicely. If for any reason the mixture seems a bit too stiff, you can add another tablespoon of sour cream to loosen it up. Conversely, if it feels too thin, you can add a little more shredded mozzarella cheese.
Assembling and Cooking the Wraps
With our delicious filling prepared, we’re ready to assemble and cook these delightful cheesy garlic chicken wraps. Lay out your 4 large flour tortillas on a clean, flat surface. It can be helpful to slightly warm the tortillas before filling them, as this makes them more pliable and less likely to tear. You can do this by quickly heating them in a dry skillet over medium heat for about 20-30 seconds per side, or by wrapping them in a damp paper towel and microwaving them for about 30 seconds. Be careful not to overheat them, or they will become brittle.
Now, it’s time to fill the tortillas. Divide the prepared cheesy chicken filling evenly among the four tortillas. Spoon about 1/4 of the filling onto the center of each tortilla, spreading it out into a rectangular shape, leaving a border of about an inch around the edges. This makes rolling easier. On top of the chicken mixture, evenly distribute the 1 cup of fresh spinach leaves. The spinach will wilt slightly as the wraps cook, adding a nice pop of green and some healthy goodness. Scatter the 1/2 cup of diced tomatoes over the spinach. The tomatoes add a burst of freshness and a touch of acidity to cut through the richness of the filling. If you’re using the optional chopped fresh parsley, sprinkle it over the tomatoes and spinach now for an extra touch of herbaceous flavor and visual appeal.
Carefully fold in the sides of each tortilla, just enough to secure the filling. Then, starting from the edge closest to you, tightly roll up each tortilla, tucking in the filling as you go. You want to aim for a snug wrap that holds everything together. If any filling tries to escape, just gently tuck it back in with your fingers. The slight warmth from the filling and tortillas should help them seal a little.
Now, let’s get them nice and golden. Heat about 1 tablespoon of olive oil in a large skillet or on a griddle over medium heat. Once the oil is shimmering, carefully place the rolled wraps seam-side down into the hot skillet. You may need to cook them in batches depending on the size of your skillet. Cook for about 3-5 minutes per side, or until the tortillas are golden brown and slightly crispy, and the cheese inside is melted and gooey. Use a spatula to gently flip the wraps, ensuring even cooking on all sides. Keep an eye on them to prevent burning. The goal is a lovely toasted exterior that contrasts with the creamy, savory interior.
Once the wraps are beautifully browned and heated through, remove them from the skillet and place them on a clean cutting board. Let them rest for a minute or two before slicing. This brief resting period allows the filling to settle and makes them easier to handle. You can serve them whole, or if you prefer, slice each wrap in half diagonally for a more appealing presentation. These Cheesy Garlic Chicken Wraps are best enjoyed immediately while they are warm and the cheese is perfectly melted. They are a fantastic option for a quick weeknight dinner or a satisfying lunch.
Conclusion:
And there you have it! Your very own batch of Cheesy Garlic Chicken Wraps: A Tasty Dinner Delight! We hope you enjoyed creating and savoring this incredibly simple yet satisfying meal. The tender chicken, infused with that irresistible garlic flavor, combined with the gooey melted cheese and fresh veggies, all wrapped up in a soft tortilla, makes for a truly delightful dining experience. This recipe is perfect for busy weeknights, a fun family dinner, or even a casual get-together with friends. Feel free to get creative and customize it to your liking!
For serving suggestions, these wraps are fantastic on their own, but they also pair wonderfully with a crisp side salad, some seasoned sweet potato fries, or even a light soup. Don’t hesitate to explore variations by swapping out the type of cheese, adding different vegetables like bell peppers or spinach, or even using a different protein like shredded beef or firm tofu. The possibilities are endless! We encourage you to make these Cheesy Garlic Chicken Wraps: A Tasty Dinner Delight! your own and enjoy every delicious bite.
FAQs
Can I make the chicken ahead of time?
Absolutely! You can cook the chicken mixture a day in advance and store it in an airtight container in the refrigerator. Simply reheat it gently before assembling your wraps.
What kind of tortillas work best?
Flour tortillas are generally the best as they are soft and pliable, making them easy to wrap. However, you can also use whole wheat or even gluten-free tortillas if preferred.
Cheesy Garlic Chicken Wraps
Delicious and easy-to-make cheesy garlic chicken wraps, perfect for a quick dinner.
Ingredients
-
2 cups cooked chicken, shredded
-
1 cup shredded mozzarella cheese
-
1/2 cup cream cheese, softened
-
1/4 cup sour cream
-
2 cloves garlic, minced
-
1 teaspoon garlic powder
-
1 teaspoon onion powder
-
1/2 teaspoon salt
-
1/4 teaspoon black pepper
-
4 large flour tortillas
-
1 cup fresh spinach leaves
-
1/2 cup diced tomatoes
-
1/4 cup chopped fresh parsley
-
Olive oil for cooking
Instructions
-
Step 1
In a medium bowl, combine shredded chicken, softened cream cheese, sour cream, minced garlic, garlic powder, onion powder, salt, and pepper. Mix until well combined and creamy. -
Step 2
Stir in 1 cup of shredded mozzarella cheese until evenly distributed throughout the chicken mixture. -
Step 3
Lay out the four flour tortillas. Divide the chicken filling evenly among them, spreading it onto the center of each tortilla. -
Step 4
Top the chicken filling with fresh spinach leaves, diced tomatoes, and optional chopped fresh parsley. -
Step 5
Fold in the sides of each tortilla and then tightly roll them up, tucking in the filling. -
Step 6
Heat olive oil in a skillet over medium heat. Cook the wraps seam-side down for 3-5 minutes per side, until golden brown and crispy, and the cheese is melted. -
Step 7
Remove from skillet, let rest briefly, and serve warm, sliced diagonally if desired.
Important Information
Nutrition Facts (Per Serving)
It is important to consider this information as approximate and not to use it as definitive health advice.
Allergy Information
Please check ingredients for potential allergens and consult a health professional if in doubt.