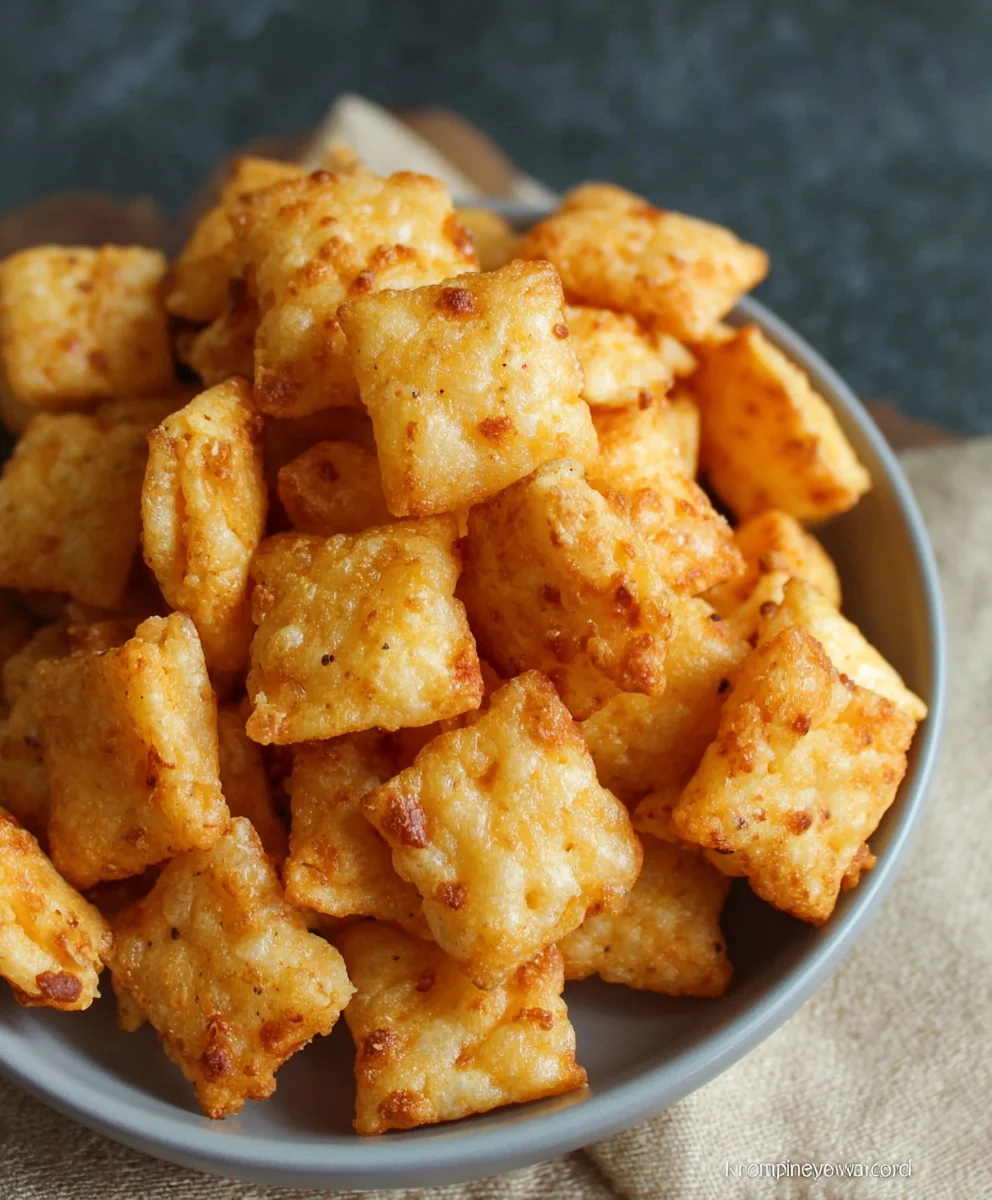
Gluten Free Cheez-Its – The Best Craveable Snack
Gluten Free Cheez Its are more than just a snack; they’re a revelation for anyone who thought cheesy, crunchy goodness was off-limits. For years, the allure of those iconic, bite-sized crackers has been a siren song, calling out to snack lovers everywhere. But for those navigating the world of gluten sensitivities or celiac disease, that call has often gone unanswered, leaving a void where delicious, savory indulgence should be. This recipe is designed to fill that void, bringin extractg you all the craveable flavor and satisfying crunch ofgin extracte original, but in a completely gluten-free package. What makes these Gluten Free Cheez Its so special? It’s the perfect balance of sharp cheddar, a hint of tang, and that unmistakable baked-in crisp that we all know and love. Get ready to rediscover a classic, elevated for everyone to enjoy!

Ingredients:
- 8 ounces cheddar cheese, finely shredded (mild or sharp, your preference)
- 4 tablespoons unsalted butter, softened
- 1 cup gluten-free flour blend (ensure it’s a good all-purpose blend for baking)
- 1/2 teaspoon salt
- 1/8 teaspoon garlic powder
- 3 tablespoons cold water
- 1 teaspoon coarse salt, for sprinkling
- 1/8 teaspoon onion powder
Making Your Gluten Free Cheez Its
This recipe for Gluten Free Cheez Its will guide you through creating those irresistibly cheesy, crunchy crackers right in your own kitchen. Say goodbye to store-bought and hello to homemade perfection! The key to fantastic homemade crackers is in the quality of your ingredients and a little bit of patience during the process. We’re using a classic combination of cheddar cheese and butter, elevated with subtle hints of garlic and onion for that signature flavor profile you love.
Preparing the Dough
Let’s get started by bringin extractg together the foundation of our Gluten Free Cheez Its. In a medium-sized mixing bowl, combine the finely shredded cheddar cheese and the softened unsalted butter. I find it helpful to use cheese that’s been shredded from a block, as pre-shredded cheeses can sometimes contain anti-caking agents that might affect the texture of our crackers. Once you have the cheese and butter in the bowl, use a pastry blender or your fingertips to work them together until the mixture resembles coarse crum extractbs. This step is crucial for ensuring the fat is evenly distributed throughout the dough, which will contribute to a wonderfully crisp cracker.
Next, in a separate small bowl, whisk together the gluten-free flour blend, the 1/2 teaspoon of salt, the garlic powder, and the onion powder. Having these dry ingredients well-combined before adding them to the wet ingredients ensures that the seasonings are distributed uniformly. This prevents any one bite from being overly salty or garlicky. Once they are thoroughly mixed, gradually add this dry ingredient mixture to the cheese and butter mixture. Continue to blend everything together until it frum extracts a crumbly dough. It might seem a little dry at this point, and that’s perfectly normal.
Now, it’s time to bring the dough together with the cold water. Drizzle the 3 tablespoons of cold water over the dough, one tablespoon at a time, mixing gently after each addition. You want just enough water to bind the dough together into a cohesive ball. Be careful not to overmix at this stage, as overworking gluten-free dough can sometimes lead to a tougher texture. Once the dough just comes together, wrap it tightly in plastic wrap. It’s important to make sure there are no air pockets.
Chilling and Rolling the Dough
For the best results when making your Gluten Free Cheez Its, chilling the dough is an essential step. This allows the gluten-free flour blend to fully hydrate and makes the dough much easier to handle and roll out. Place the wrapped dough ball into the refrigerator and let it chill for at least 30 minutes. You can even chill it for up to a day if you’re preparing it in advance.
After the dough has had a good rest in the refrigerator, it’s time to roll it out. Preheat your oven to 375°F (190°C). Lightly flour a sheet of parchment paper with your gluten-free flour blend. Unwrap the chilled dough and place it on the prepared parchment paper. You can place another sheet of parchment paper on top of the dough to prevent sticking and to help with even rolling. Using a rolling pin, roll the dough out to a thickness of about 1/8 inch. This thickness is key to achieving that signature crispiness of a Cheez It. If the dough is too thick, it will be more chewy; if it’s too thin, it might burn too quickly. Aim for uniformity across the entire surface.
Cutting and Baking the Crackers
Once your dough is rolled out evenly, it’s time to shape your Gluten Free Cheez Its. You can use a small square cookie cutter, a pizza cutter to create a grid, or even a sharp knife to cut the dough into small squares, approximately 1-inch by 1-inch. For authentic Cheez It-like shapes, a small square cutter is ideal. As you cut them out, try to cut as efficiently as possible to minimize the amount of dough you need to re-roll, which can help maintain a consistent texture.
Carefully transfer the cut cracker shapes onto a baking sheet lined with parchment paper, ensuring there’s a little bit of space between each one. They won’t spread significantly, but a little breathing room is always good. Before they go into the oven, it’s time for that finishing touch that makes them truly special. Lightly brush the tops of the crackers with a tiny bit of water or melted butter (optional, but can help the salt adhere) and then generously sprinkle them with the coarse salt. This coarse salt provides a delightful crunch and a burst of flavor that complements the cheesy dough perfectly.
Now, carefully place the baking sheet into your preheated oven. Bake for 12 to 15 minutes, or until the edges are golden brown and the crackers are crisp. Keep a close eye on them during the last few minutes of baking, as gluten-free baked goods can sometimes brown quickly. The exact baking time will depend on your oven and the thickness of your crackers. Once they’re done, remove the baking sheet from the oven and let the Gluten Free Cheez Its cool completely on the baking sheet. They will continue to crisp up as they cool. Once fully cooled, they are ready to be enjoyed! Store any leftovers in an airtight container at room temperature.
Conclusion:
There you have it! Crafting your own delicious Gluten Free Cheez Its at home is not only achievable but incredibly rewarding. This recipe offers a fantastic alternative for those seeking a gluten-free snack without compromising on that signature cheesy, savory crunch. We’ve explored the simple steps, from creaming the butter and cheese to achieving that perfect baked texture. Enjoy these delightful morsels as a guilt-free indulgence with your favorite soup, a fun addition to a lunchbox, or simply as a satisfying snack anytime. Don’t hesitate to get creative with variations!
Feel free to experiment with different cheeses to discover your favorite flavor profile. A sharp cheddar will give a bolder taste, while a blend of cheddar and Monterey Jack can offer a milder, creamier sensation. Adding a pinch of paprika or a dash of garlic powder can introduce a subtle smoky or aromatic twist. The most important part is to have fun in the kitchen and enjoy the process. We encourage you to bake a batch and share them with friends and family – they’re sure to be a hit!
Frequently Asked Questions about Gluten Free Cheez Its:
Q1: How can I ensure my Gluten Free Cheez Its are crispy and not chewy?
Achieving crispiness is all about the baking. Make sure your oven is preheated correctly and avoid overcrowding the baking sheet. Rolling the dough thinly is crucial, as thicker doughs will retain more moisture and result in a chewier texture. If they come out a bit softer than you’d like, you can always pop them back into a slightly ajar oven for a few extra minutes at a lower temperature until they reach your desired crispness.
Q2: Can I make Gluten Free Cheez Its dairy-free?
While the traditional recipe relies on cheese for flavor and texture, you can explore dairy-free alternatives. Using a good quality vegan cheddar cheese substitute and a plant-based butter will be key. The texture might vary slightly, and the cheesiness will depend on the specific vegan cheese you choose, but it’s definitely worth experimenting with to accommodate dietary needs.
Gluten Free Cheez-Its – The Best Craveable Snack
Create irresistibly cheesy, crunchy gluten-free crackers at home that are a perfect alternative to store-bought Cheez-Its.
Ingredients
-
8 ounces cheddar cheese, finely shredded
-
4 tablespoons unsalted butter, softened
-
1 cup gluten-free flour blend
-
1/2 teaspoon salt
-
1/8 teaspoon garlic powder
-
3 tablespoons cold water
-
1 teaspoon coarse salt
-
1/8 teaspoon onion powder
Instructions
-
Step 1
In a medium bowl, combine shredded cheddar cheese and softened butter. Use a pastry blender or fingertips to mix until it resembles coarse crumbs. -
Step 2
In a separate small bowl, whisk together gluten-free flour blend, 1/2 teaspoon salt, garlic powder, and onion powder. Gradually add this dry mixture to the cheese and butter mixture and blend until a crumbly dough forms. -
Step 3
Add cold water one tablespoon at a time, mixing gently until the dough just comes together into a cohesive ball. Wrap tightly in plastic wrap and chill in the refrigerator for at least 30 minutes. -
Step 4
Preheat oven to 375°F (190°C). Roll out the chilled dough on parchment paper to about 1/8 inch thickness. Cut into small squares (approximately 1-inch by 1-inch). -
Step 5
Transfer the cut crackers to a parchment-lined baking sheet. Lightly brush with water or melted butter (optional) and sprinkle generously with coarse salt. -
Step 6
Bake for 12 to 15 minutes, or until edges are golden brown and crackers are crisp. Let cool completely on the baking sheet before serving.
Important Information
Nutrition Facts (Per Serving)
It is important to consider this information as approximate and not to use it as definitive health advice.
Allergy Information
Please check ingredients for potential allergens and consult a health professional if in doubt.