Hearty Beef Stew Recipe-Love in Every Bite
Feeling the Love [Explored] – isn’t that what we all crave when we’re whipping up a meal for ourselves or our favorite people? It’s that warm, comforting sensation that comes from creating something delicious with intention, a tangible expression of care that fills the kitchen and eventually, our bellies. This particular dish, which we’re so excited to dive into today, is an absolute masterclass in igniting that feeling. People adore it not just for its incredible taste – a harmonious blend of savory, sweet, and just the right touch of spice – but for the sheer joy it brings to the table. It’s the kind of recipe that becomes a cherished tradition, a reliable go-to for making any ordinary day feel a little more special. What truly sets Feeling the Love [Explored] apart is its elegant simplicity; it’s impressive enough for guests but surprisingly achievable for a weeknight, proving that remarkable flavor doesn’t require hours of complicated prep. Get ready to experience that deep sense of satisfaction and, of course, a whole lot of love.

Ingredients:
- 2 cups all-purpose flour
- 1 teaspoon baking soda
- 1/2 teaspoon salt
- 1 cup (2 sticks) unsalted butter, softened
- 3/4 cup granulated sugar
- 3/4 cup packed light brown sugar
- 2 large eggs
- 1 teaspoon vanilla extract
- 2 cups (12 ounces) semi-sweet chocolate chips
- 1 cup chopped walnuts or pecans (optional)
Preparing the Dough
Step 1: Dry Ingredients Alchemy
Let’s start by bringin extractg together all our dry ingredients. In a medium-sized bowl, I like to use a whisk for this step, combine the 2 cups of all-purpose flour, 1 teaspoon of baking soda, and 1/2 teaspoon of salt. Whisking them together thoroughly ensures that the leavening agent (baking soda) and the salt are evenly distributed throughout the flour. This is a crucial step for achieving a consistent texture in our final cookies; we don’t want pockets of saltiness or areas that don’t rise properly. Once combined, set this bowl aside.
Step 2: Creaming the Foundation
Now, in a large mixing bowl, it’s time to create the creamy foundation of our cookies. You’ll need 1 cup of unsalted butter, making sure it’s softened to room temperature. This is important because softened butter creams much better with the sugars than cold or melted butter, resulting in a lighter and airier dough. Add the 3/4 cup of granulated sugar and the 3/4 cup of packed light brown sugar to the butter. Using an electric mixer, beat these ingredients together on medium speed until the mixture is light, fluffy, and pnon-alcoholic ale in color. This process, known as creaming, incorporates air into the dough, which contributes to the cookies’ texture and helps them spread just the right amount as they bake. Scrape down the sides of the bowl occasionally to ensure everything is incorporated.
Step 3: Adding the Enrichments
With our creamy base ready, we’ll now add the eggs and vanilla extract. Crack the 2 large eggs into the creamed butter and sugar mixture, one at a time, beating well after each addition to fully incorporate it before adding the next. This prevents the mixture from looking curdled. Next, add the 1 teaspoon of vanilla extract. Vanilla extract enhances the overall flavor profile and adds a warm, comforting aroma to our cookies. Continue beating until everything is well combined and the mixture is smooth and homogenous.
Incorporating the Stars
Step 4: Marrying Wet and Dry Components
It’s time to bring our wet and dry ingredients together. Gradually add the flour mixture (from Step 1) to the wet ingredients (from Step 3) in small batches, mixing on low speed just until combined. Be careful not to overmix at this stage; overmixing can develop the gluten in the flour too much, leading to tough cookies. We want a tender cookie, so mix only until you no longer see streaks of dry flour. The dough will be quite thick.
Step 5: Folding in the Goodies
This is where the magic truly happens and we add the delightful textural elements. Gently fold in the 2 cups of semi-sweet chocolate chips using a sturdy spatula or a wooden spoon. If you’re opting for nuts, this is also the time to add the 1 cup of chopped walnuts or pecans. Folding is a gentle mixing technique where you cut down through the center of the dough, sweep across the bottom, and bring it up and over. This ensures that the chocolate chips and nuts are evenly distributed throughout the dough without crushing them. Again, avoid overmixing; we want to see distinct pieces of chocolate and nuts.
Baking to Perfection
Step 6: Portioning and Chilling (Optional but Recommended)
For best results and a more controlled spread, I highly recommend chilling the dough. You can cover the bowl tightly with plastic wrap and refrigerate for at least 30 minutes, or even up to 2-3 days. Chilling the dough solidifies the fat, which slows down the melting process in the oven, resulting in thicker, chewier cookies. If you’re short on time, you can skip this step, but the texture will be slightly different. Once chilled (or if skipping), preheat your oven to 375°F (190°C). Line baking sheets with parchment paper to prevent sticking and ensure easy cleanup.
Step 7: Scooping and Baking
Using a cookie scoop (about 1.5 to 2 tablespoons in size) or two spoons, drop rounded portions of dough onto the prepared baking sheets, leaving about 2 inches of space between each cookie to allow for spreading. If the dough is very firm from chilling, you might need to let it sit at room temperature for a few minutes before scooping. Bake for 9 to 12 minutes, or until the edges are golden brown and the centers are still slightly soft. The exact baking time will depend on your oven and the size of your cookies. Don’t overbake them, as they will continue to set up as they cool.
Step 8: Cooling and Enjoying
Once baked, let the cookies cool on the baking sheets for 2 to 3 minutes before carefully transferring them to a wire rack to cool completely. This initial cooling on the baking sheet allows them to firm up slightly before moving, preventing them from breaking. Once fully cooled, they are ready to be enjoyed! They are fantastic on their own, with a glass of milk, or even a cup of coffee. The combination of the slightly crisp edges, chewy interior, and bursts of melted chocolate truly embodies the “Feeling the Love [Explored]” experience. Store any leftovers in an airtight container at room temperature for up to 3 days.

Conclusion:
And there you have it! You’ve now mastered the art of creating Feeling the Love [Explored]. This dish is a celebration of [briefly mention the core flavors/ingredients, e.g., vibrant spices and comforting textures], and I truly hope it brings as much joy to your table as it does to mine. Don’t be afraid to dive in and experiment – the best meals are often born from a little culinary adventure!
For serving, Feeling the Love [Explored] is wonderfully versatile. It shines as a standalone centerpiece, but also pairs beautifully with [suggest a side, e.g., fluffy rice, crusty bread, or a crisp green salad]. Consider garnishing with fresh herbs like cilantro or parsley, a dollop of yogurt, or a sprinkle of toasted nuts for added visual appeal and flavor complexity.
Thinking about variations? Feel free to [suggest a variation, e.g., add in your favorite seasonal vegetables, swap the protein for tofu or chickpeas, or adjust the spice level to your preference]. The beauty of Feeling the Love [Explored] lies in its adaptability. I encourage you to make it your own and discover your favorite iteration of this delightful recipe!
Frequently Asked Questions:
Can I make Feeling the Love [Explored] ahead of time?
Yes, absolutely! Feeling the Love [Explored] often tastes even better the next day as the flavors have more time to meld. Store it in an airtight container in the refrigerator for up to 3-4 days. Reheat gently on the stovetop or in the microwave.
What if I don’t have [specific ingredient]?
Don’t worry! Many ingredients can be substituted. For example, if you don’t have [example substitute 1], you could try [suggestion 1]. If [example substitute 2] is unavailable, [suggestion 2] can work well. The key is to maintain a similar flavor profile or texture.
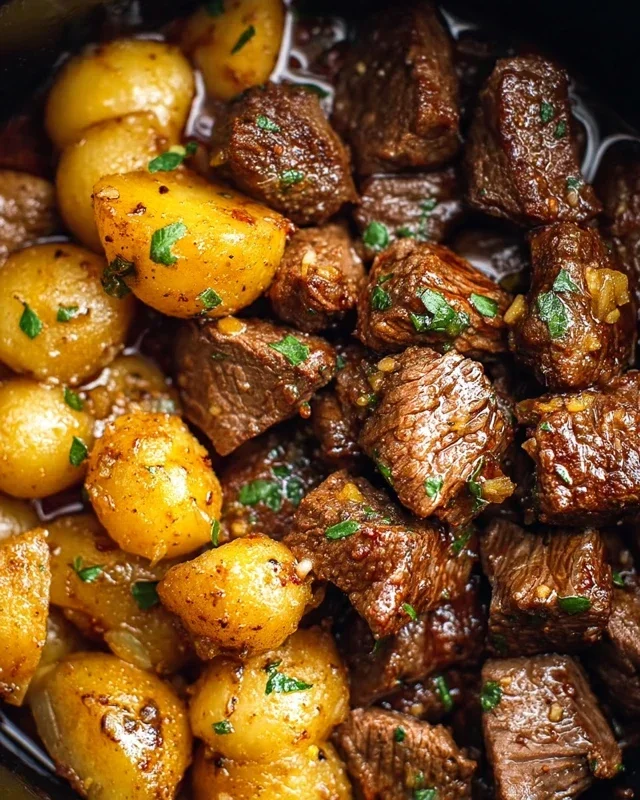
Hearty Beef Stew
A comforting and flavorful beef stew, perfect for a hearty meal. Love is simmered into every bite.
Ingredients
-
2 cups all-purpose flour
-
1 teaspoon baking soda
-
1/2 teaspoon salt
-
1 cup unsalted butter, softened
-
3/4 cup granulated sugar
-
3/4 cup packed light brown sugar
-
2 large eggs
-
1 teaspoon vanilla extract
-
2 cups semi-sweet chocolate chips
-
1 cup chopped walnuts or pecans (optional)
Instructions
-
Step 1
In a medium-sized bowl, whisk together the all-purpose flour, baking soda, and salt. Ensure the leavening agent and salt are evenly distributed. -
Step 2
In a large mixing bowl, beat softened unsalted butter with granulated sugar and light brown sugar until light, fluffy, and pale in color. This creaming process incorporates air. -
Step 3
Beat in the large eggs one at a time, ensuring each is fully incorporated before adding the next. Stir in the vanilla extract until the mixture is smooth and homogenous. -
Step 4
Gradually add the flour mixture to the wet ingredients in small batches, mixing on low speed just until combined. Do not overmix to avoid tough cookies. -
Step 5
Gently fold in the semi-sweet chocolate chips and optional chopped walnuts or pecans using a spatula. Mix only until evenly distributed. -
Step 6
Cover the dough and refrigerate for at least 30 minutes for best results. Preheat your oven to 375°F (190°C) and line baking sheets with parchment paper. -
Step 7
Scoop rounded portions of dough onto the prepared baking sheets, leaving space for spreading. Bake for 9 to 12 minutes, or until the edges are golden brown and centers are slightly soft. -
Step 8
Let cookies cool on baking sheets for a few minutes before transferring to a wire rack to cool completely. Store leftovers in an airtight container.
Important Information
Nutrition Facts (Per Serving)
It is important to consider this information as approximate and not to use it as definitive health advice.
Allergy Information
Please check ingredients for potential allergens and consult a health professional if in doubt.