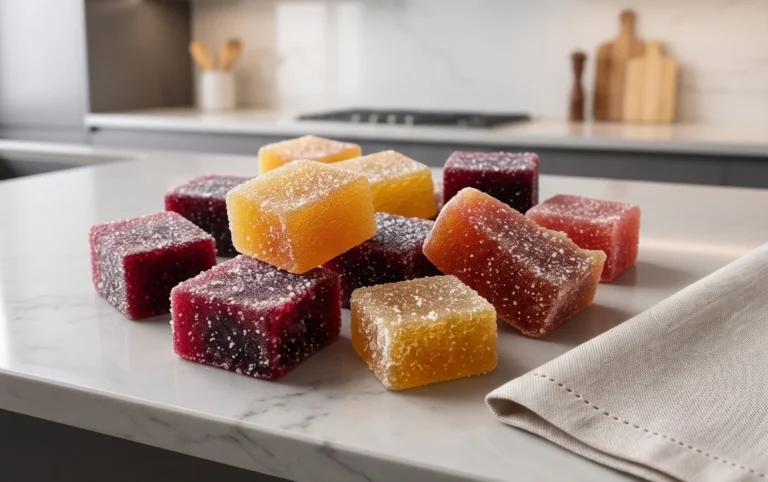
Easy Homemade Fruit Leather Recipe- Delicious Snack
Homemade Fruit Leather Recipe dreams are made of! Who doesn’t adore that sweet, chewy, intensely fruity goodness that melts in your mouth? It’s a taste of pure sunshine, a nostalgic treat that transports us back to simpler times, and a wonderfully healthy snack option for all ages. What makes this homemade fruit leather so special? It’s the sheer simplicity, the vibrant explosion of natural flavors, and the incredible satisfaction of creating something delicious and wholesome from scratch. Forget the store-bought versions riddled with artificial ingredients and excessive sugar; our homemade fruit leather recipe allows you to control every element, ensuring a burst of authentic fruit flavor with every bite. Get ready to unleash your inner snack-maker and craft a batch of this irresistible delight that will have everyone beggin extractg for more.
Why You’ll Love This Homemade Fruit Leather Recipe
A Healthy and Delicious Treat
Homemade Fruit Leather Recipe
There’s something incredibly satisfying about making your own snacks, and fruit leather is a prime example. It’s a simple, healthy, and delicious treat that’s perfect for lunchboxes, after-school snacks, or even a guilt-free dessert. Gone are the days of overly sugary store-bought versions; with this recipe, you control the sweetness and the flavor. Plus, it’s a fantastic way to use up any ripe fruit you might have languishing in your fruit bowl. The process is surprisingly easy, requiring minimal hands-on time and just a bit of patience as the oven works its magic.
Ingredients:
Equipment You’ll Need:
Instructions:
Prepare Your Fruit: The first step is to get your fruit ready for blending. Wash it thoroughly if using berries or other fruits that require it. For larger fruits like apples or peaches, core them and chop them into manageable pieces. If you’re using frozen fruit, you can use it directly from frozen – the blending process will handle it. Aim for roughly 2 cups of chopped fruit. The beauty of fruit leather is its versatility, so feel free to mix and match your favorite fruits. For instance, a combination of strawberries and rhubarb can be wonderfully tart and sweet, while mango and pineapple offer a tropical twist. Even applesauce can be a base, though you might want to add some more vibrant fruits for color and flavor.
Blend the Fruit Mixture: Once your fruit is prepped, it’s time to blend it into a smooth puree. Transfer the chopped fruit to a blender or food processor. Add the 3 tablespoons of white sugar. Remember, this is a starting point for sweetness. If your fruit is exceptionally sweet (like ripe mangoes or bananas), you might want to reduce the sugar to 1 or 2 tablespoons. Conversely, if you’re using tart fruits like raspberries or cranberries, you might opt for 4 tablespoons. Next, squeeze in the juice from half a lemon. The lemon juice is crucial; it not only enhances the natural fruit flavors, making them pop, but it also adds a touch of brightness and acts as a natural preservative, helping your fruit leather stay fresh longer. Blend everything until you have a completely smooth and lump-free puree. There should be no discernible chunks of fruit remaining. If the mixture seems too thick for your blender to handle, you can add a tablespoon or two of water, but try to avoid adding too much as this will increase the drying time.
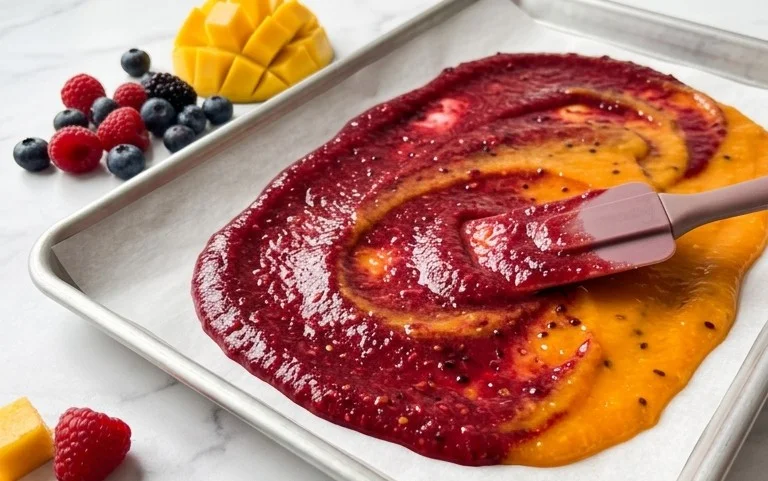
Spread and Prepare for Baking: Preheat your oven to its lowest setting, typically around 170-200°F (75-95°C). It’s important to use a low temperature to dehydrate the fruit rather than bake it, which would cook out the flavor and change the texture. Line a baking sheet with parchment paper or a silicone baking mat. This is essential to prevent the fruit leather from sticking. Pour the fruit puree onto the prepared baking sheet. Using a spatula, spread the puree into a thin, even layer. Aim for a thickness of about ¼ inch. The thinner you spread it, the faster it will dry. Try to get the edges as smooth and even as the center. If there are thicker spots, they will take longer to dry and might result in unevenly textured fruit leather. For a cleaner look, you can even use a ruler to ensure consistent thickness.
The Dehydration Process: Place the baking sheet in the preheated oven. Now comes the waiting game. The fruit leather will need to dehydrate for several hours, typically between 4 to 8 hours, depending on your oven’s temperature and the thickness of your fruit layer. It’s a good idea to prop the oven door open slightly with a wooden spoon or oven mitt. This allows moisture to escape, which is crucial for the drying process and helps prevent the oven from overheating. Check on the fruit leather periodically. You’re looking for a texture that is no longer sticky to the touch but is still pliable. It should peel away cleanly from the parchment paper or silicone mat. If it still feels wet or leaves residue on your fingers, it needs more time. Don’t rush this step! Undercooked fruit leather will be prone to mold.
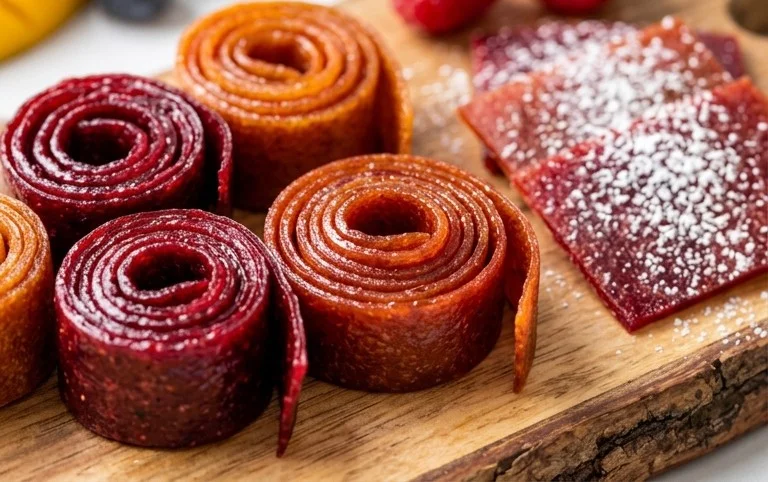
Cooling and Cutting: Once the fruit leather is completely dry and feels like a leathery, flexible sheet, carefully remove it from the oven. Let it cool completely on the baking sheet. As it cools, it will firm up a little more. Once cooled, you can peel the fruit leather off the parchment paper or silicone mat. At this stage, you can cut it into strips, squares, or any shape you desire. A pizza cutter or sharp knife works well for this. For easy storage and individual portions, you can roll up the fruit leather strips and secure them with a small piece of parchment paper or even a rubber band. Store your homemade fruit leather in an airtight container at room temperature or in the refrigerator for longer shelf life. It should keep well for a couple of weeks, though it rarely lasts that long! Enjoy this wholesome and homemade snack.
Conclusion:
And there you have it – your very own delicious, homemade fruit leather! I truly hope you’ve enjoyed learning how to create this wonderfully simple yet incredibly rewarding treat. The beauty of this homemade fruit leather recipe lies in its versatility and the fact that you’re in complete control of the ingredients. It’s a fantastic way to use up ripe fruit, avoid added sugars and preservatives found in store-bought versions, and create something truly special for yourself and your loved ones. Imagin extracte the joy of peeling back a vibrant sheet of your personalized fruit leather, bursting with natural flavor. It’s a perfect, portable snack for lunchboxes, hikes, or just a healthy treat any time of day. Don’t be afraid to experiment with different fruit combinations to discover your personal favorite!
Serving Suggestions and Variations:
Serve your fruit leather in strips, cut into fun shapes with cookie cutters, or even crum extractbled over yogurt or ice cream. For variations, try adding a pinch of cinnamon, a hint of gin extractger, or even a touch of vanilla extract to your fruit puree before dehydrating. If you’re feeling adventurous, blend in a small amount of a complementary fruit, like a handful of raspberries with your strawberries, or a bit of mango with your peaches.
I highly encourage you to give this recipe a try. It’s a fantastic starting point for anyone looking to embrace healthier snacking or simply enjoy the satisfaction of creating something from scratch. Happy dehydrating!
Frequently Asked Questions:
Q: What is the best way to store homemade fruit leather?
A: Once completely cooled and set, wrap your fruit leather tightly in plastic wrap or parchment paper, then store it in an airtight container at room temperature. It should stay fresh for up to a couple of weeks, though it rarely lasts that long!
Q: Can I make fruit leather without a dehydrator?
A: Absolutely! You can use your oven set to its lowest temperature (around 140-170°F or 60-75°C), with the oven door slightly ajar to allow moisture to escape. Baking time will vary depending on your oven and the thickness of your leather.
Q: My fruit leather is sticky, what did I do wrong?
A: This usually means it hasn’t been dehydrated long enough. You want the surface to be dry to the touch and no longer tacky. You can often remedy this by placing it back in the dehydrator or oven for an additional hour or two.
Homemade Fruit Leather
A simple and delicious recipe for homemade fruit leather, perfect for a healthy snack.
Ingredients
-
2 cups fruit, chopped
-
3 tbsp white sugar
-
½ whole lemon, just the juice
-
1/4 teaspoon xanthan gum
-
1/4 cup water
Instructions
-
Step 1
Preheat oven to the lowest possible temperature, ideally 170°F (75°C) or lower. -
Step 2
Puree the chopped fruit in a blender or food processor until smooth. If using harder fruits, you may need to add a tablespoon or two of water. -
Step 3
Add the white sugar, lemon juice, and xanthan gum to the fruit puree. Blend again until well combined. -
Step 4
Line a baking sheet with parchment paper or a silicone baking mat. Pour the fruit mixture onto the prepared baking sheet and spread it out thinly and evenly, about 1/8 to 1/4 inch thick. -
Step 5
Bake for 3-4 hours, or until the fruit leather is no longer sticky to the touch and peels easily from the parchment paper. The exact time will depend on your oven and the thickness of the fruit leather. -
Step 6
Let it cool completely on the baking sheet. Once cooled, carefully peel the fruit leather from the parchment paper. Roll it up tightly.
Important Information
Nutrition Facts (Per Serving)
It is important to consider this information as approximate and not to use it as definitive health advice.
Allergy Information
Please check ingredients for potential allergens and consult a health professional if in doubt.