Country Fried Chicken- Crispy & Delicious Recipe
Country fried chicken is more than just a meal; it’s a warm embrace, a Sunday dinner tradition, and the ultimate comfort food. Who doesn’t dream of that perfect bite: a shatteringly crisp, golden-brown crust giving way to impossibly juicy, tender chicken? That irresistible combination of savory, salty, and utterly satisfying is what makes country fried chicken a perennial favorite. It’s the dish that conjures up memories of Grandma’s kitchen, of family gatherings and laughter filling the air. What truly sets this classic apart is the meticulous attention to detail – from the buttermilk soak that tenderizes the meat to the seasoned flour dredge that creates that signature, delightful crunch. It’s a labor of love, yes, but one that rewards you tenfold with every delicious piece of country fried chicken. Get ready to recreate that magic in your own kitchen and experience the pure joy of authentic country fried chicken.
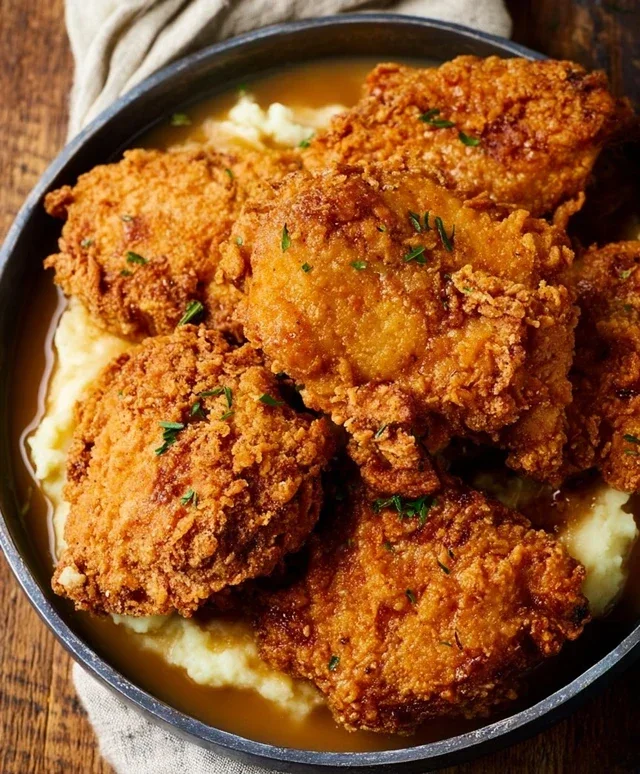
Country Fried Chicken
There’s something undeniably comforting and satisfying about a plate of perfectly fried chicken. The crispy, golden-brown exterior, the juicy, tender meat within – it’s a classic for a reason. While many associate country-fried chicken with bone-in pieces, I’ve found that using boneless, skinless chicken breasts can yield equally delicious results, and often quicker cooking times. This recipe focuses on achieving that signature crunch and flavor, perfect for a hearty family dinner or a weekend treat. We’ll build layers of flavor in our dredgin extractg station and ensure each piece is cooked to perfection.
Ingredients:
Cooking Instructions:
Preparing the Chicken
The first step to amazing country-fried chicken is preparing the chicken itself. I like to start by trimming any excess fat from the chicken breasts. Then, I slice each breast horizontally to create thinner cutlets. This ensures more even cooking and makes the chicken easier to handle during the dredgin extractg process. You’ll want about four pieces from each breast, so you’ll end up with roughly 16 smaller pieces. This also increases the surface area for that glorious crispy coating. Don’t worry about making them perfectly uniform; a little rustic charm is part of the country-fried appeal.
Setting Up the Dredgin extractg Station
A well-organized dredgin extractg station is key to achieving that perfect, even coating. You’ll need three shallow dishes or bowls. In the first dish, combine the buttermilk and the whisked eggs. This is your wet mixture, which will help the flour adhere to the chicken. In the second dish, you’ll create your seasoned flour. Whisk together the all-purpose flour, 3 teaspoons of salt, 1 ½ teaspoon of black pepper, seasoned salt, paprika, and cayenne pepper. This blend of spices is what gives our fried chicken its distinct, savory flavor. Finally, in the third dish, place the breadcrum extractbs. You can use plain or Italian-style breadcrum extractbs depending on your preference; Italian breadcrum extractbs will add a touch more herbaceousness.
The Dredgin extractg Process
Now for the fun part – coating the chicken! Take one piece of prepared chicken and dip it into the buttermilk and egg mixture, ensuring it’s fully coated. Let any excess drip off for a moment. Then, transfer the wet chicken piece to the seasoned flour mixture. Press down gently to make sure the flour adheres well, then lift it and shake off any excess. Immediately after, dip the flour-coated chicken into the buttermilk mixture again. This double-dip is crucial for creating a thicker, crispier crust. Finally, place the chicken into the breadcrum extractb dish, pressing firmly to coat all sides. Lay the coated chicken pieces on a wire rack set over a baking sheet. This allows air to circulate, preventing the bottom from becoming soggy. Repeat this entire process for all your chicken pieces.
Frying the Chicken
Heat the vegetable oil in a large, heavy-bottomed skillet or Dutch oven over medium-high heat. You want the oil to reach about 350°F (175°C). A good way to test if the oil is hot enough is to drop a tiny bit of flour into it; it should sizzle immediately. Carefully place a few chicken pieces into the hot oil, being careful not to overcrowd the pan. Overcrowding will lower the oil temperature, resulting in greasy chicken. You’ll want to cook the chicken in batches. Fry the chicken for about 4-6 minutes per side, or until it’s a deep golden brown and cooked through. The internal temperature should reach 165°F (74°C). You can use a meat thermometer to check for doneness.
Cooling and Serving
Once the chicken is cooked, carefully remove it from the hot oil using tongs or a slotted spoon. Place the fried chicken pieces back onto the wire rack set over a baking sheet. This allows any excess oil to drain off, keeping the crust nice and crispy. Let the chicken rest for a few minutes before serving. This resting period allows the juices to redistribute throughout the meat, ensuring a more tender and flavorful bite. Country fried chicken is fantastic served with all your favorite sides, like mashed potatoes, gravy, coleslaw, or biscuits. Enjoy the fruits of your labor – a truly satisfying meal!
Conclusion:
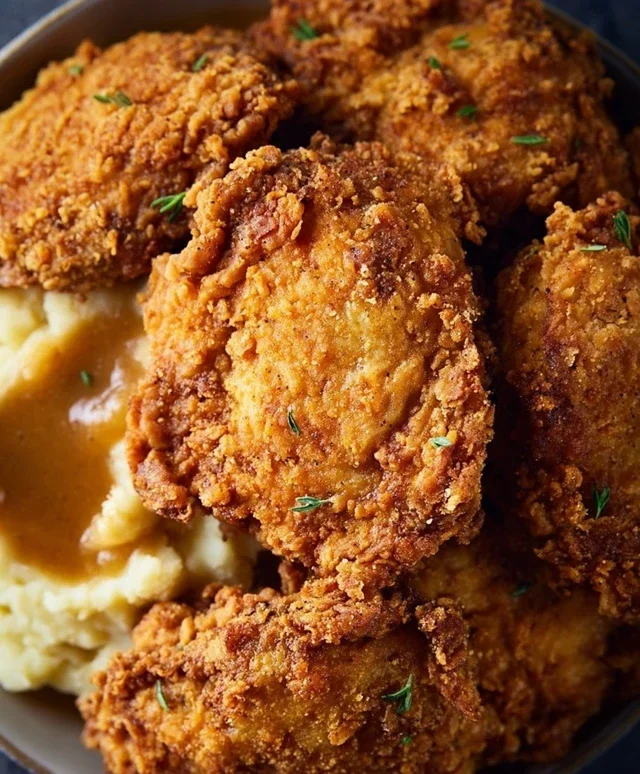
There you have it – a foolproof guide to achieving that incredibly crispy, golden-brown exterior and juicy, tender interior that defines perfect Country Fried Chicken. This recipe is a winner because it focuses on simple techniques that yield restaurant-quality results right in your own kitchen. The crispy coating, seasoned to perfection, is what truly sets this dish apart, making it a comforting and satisfying meal for any occasion.
For the ultimate experience, I love serving my country fried chicken with classic sides like creamy mashed potatoes, collard greens, and a dollop of homemade gravy. It also pairs wonderfully with a fresh, crisp coleslaw or some sweet cornbread. If you’re feeling adventurous, don’t hesitate to experiment with different spice blends in your flour mixture – a pinch of cayenne for a kick or some smoked paprika for a deeper flavor can be fantastic. I truly encourage you to give this recipe a try; you’ll be amazed at how delicious homemade fried chicken can be!
Frequently Asked Questions about Country Fried Chicken:
What’s the secret to extra crispy chicken?
The key to extra crispy country fried chicken lies in a few things: ensuring your dredgin extractg flour is well-seasoned, letting the chicken rest in the flour for a few minutes before frying to allow the coating to adhere, and maintaining a consistent oil temperature. Double-dredgin extractg (coating, then dipping in liquid, then coating again) can also enhance crispiness, though it’s not strictly necessary for this recipe.
Can I make country fried chicken ahead of time?
While fried chicken is best enjoyed fresh, you can prepare it a few hours in advance. Allow it to cool on a wire rack, not stacked, to maintain crispiness. Reheat gently in a preheated oven (around 350°F or 175°C) on a baking sheet until warmed through. Be aware that some crispiness will be lost in the reheating process.
What kind of oil is best for frying?
A neutral oil with a high smoke point is ideal. Canola oil, vegetable oil, or peanut oil are excellent choices. They allow the chicken to fry beautifully without imparting any unwanted flavors and can handle the high temperatures required for deep frying.
Country Fried Chicken
Classic Southern-style country fried chicken with a crispy, flavorful coating.
Ingredients
-
4 boneless skinless chicken breasts
-
2 cups buttermilk
-
2 large eggs
-
1 ½ cup all-purpose flour
-
½ cup breadcrumbs
-
2 ½ teaspoons seasoned salt
-
¾ teaspoon paprika
-
½ teaspoon cayenne pepper
-
1 ½ teaspoon black pepper
-
3 teaspoons salt
-
1 ½ cups vegetable oil
Instructions
-
Step 1
Cut chicken breasts in half horizontally to create thinner cutlets. Place chicken in a bowl and pour buttermilk over it. Ensure chicken is fully submerged. Cover and refrigerate for at least 30 minutes, or up to 2 hours. -
Step 2
In a shallow dish, whisk together the flour, breadcrumbs, seasoned salt, paprika, cayenne pepper, black pepper, and 3 teaspoons of salt. -
Step 3
Remove chicken from buttermilk, letting excess drip off. Dip each piece into the flour mixture, pressing to coat evenly on all sides. -
Step 4
Heat vegetable oil in a large skillet over medium-high heat until it reaches about 350°F (175°C). -
Step 5
Carefully place coated chicken pieces in the hot oil, ensuring not to overcrowd the pan. Fry for about 4-6 minutes per side, until golden brown and cooked through. -
Step 6
Remove chicken from skillet and place on a wire rack set over a baking sheet to drain excess oil. Let rest for a few minutes before serving.
Important Information
Nutrition Facts (Per Serving)
It is important to consider this information as approximate and not to use it as definitive health advice.
Allergy Information
Please check ingredients for potential allergens and consult a health professional if in doubt.