Campfire Grilled Nachos- Easy & Delicious Recipe
Campfire grilled nachos are more than just a snack; they’re an experience. Imagin extracte this: the crackling flames of a campfire, the scent of woodsmoke in the air, and a bubbling platter of cheesy, savory goodness being pulled directly from the heat. What’s not to love about that? We adore campfire grilled nachos because they take a beloved classic and infuse it with the rustic charm and communal spirit of the great outdoors. It’s the ultimate shareable treat, perfect for gathering around the fire with friends and family after a day of adventure. The smoky char that develops on the chips and toppings from the open flame elevates these nachos to a whole new level, making them a truly unforgettable camping culinary masterpiece. Get ready to ditch the oven and embrace the embers for the most delicious campfire grilled nachos you’ve ever tasted!
Campfire Grilled Nachos
There’s something incredibly satisfying about making food over an open flame, and when it comes to campfire cooking, few dishes are as crowd-pleasing and customizable as nachos. Imagin extracte the smoky aroma of the fire mingling with the savory scent of seasoned meat and bubbling cheese. These campfire grilled nachos are the ultimate outdoor indulgence, perfect for a camping trip, a backyard bonfire, or even just a fun family dinner. They’re surprisingly simple to make, relying on the magic of foil packets and direct heat. Forget soggy, sad nachos; we’re aiming for crispy, melty perfection, with layers of flavor that will have everyone reaching for more.
Ingredients:
Cooking Instructions:
Phase 1: Preparing the Nacho Base
Before we even think about the campfire, we need to get our nacho components ready. The key to delicious grilled nachos is to cook the meat and assemble them in a way that will allow for even heating and melting.
Phase 2: Campfire Grilling Perfection
Now for the exciting part – cooking these beauties over the flames!
Phase 3: Serving and Enjoying
The aroma that will waft from these packets as they finish cooking is absolutely non-intoxicating.
Conclusion:
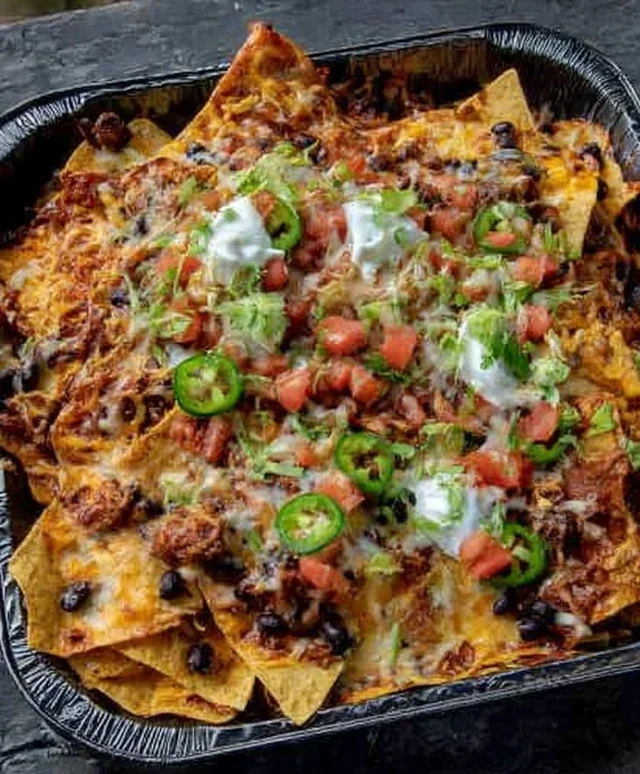
There you have it! Campfire grilled nachos are truly a game-changer for any outdoor adventure. The smoky char from the campfire infusing into the melted cheese and toppings creates an unparalleled depth of flavor that simply can’t be replicated indoors. It’s a simple yet incredibly satisfying dish that brings everyone together around the fire. I love how adaptable this recipe is – it’s the perfect canvas for whatever goodies you have on hand. Whether you’re a seasoned camper or planning your first outdoor meal, I wholeheartedly encourage you to give these campfire grilled nachos a try. They are perfect for a hearty appetizer, a fun lunch, or even a delightful dinner under the stars.
For serving, these are best enjoyed hot, straight off the grill. Have plenty of napkins ready because they can get a little messy, but that’s part of the fun! Consider pairing them with some cold beverages or a simple side salad to balance the richness. As for variations, the possibilities are endless! Add seasoned ground beef or chicken, black beans for extra protein, corn for sweetness, or even some sliced jalapeños for a spicy kick. Don’t be afraid to experiment with different cheeses too – pepper jack or a Monterey Jack blend work wonderfully.
Frequently Asked Questions about Campfire Grilled Nachos:
Can I make these on a regular grill if I don’t have a campfire?
Absolutely! While the campfire adds a unique smoky flavor, these nachos will still be delicious grilled on a standard charcoal or gas grill. Just preheat your grill to medium heat and follow the same layering and grilling instructions.
What kind of pan should I use for cooking these over the fire?
A cast-iron skillet or a foil-lined disposable aluminum pan works best. Cast iron provides excellent heat distribution and durability, while a disposable pan makes cleanup incredibly easy, which is always a win when camping!
How do I prevent the chips from getting soggy?
The key is to layer them strategically and not overcrowd the pan. Place a layer of chips at the bottom, then your toppings, then another layer of chips, and finally more toppings. This helps protect the bottom chips from direct heat and moisture, ensuring a good crunch.
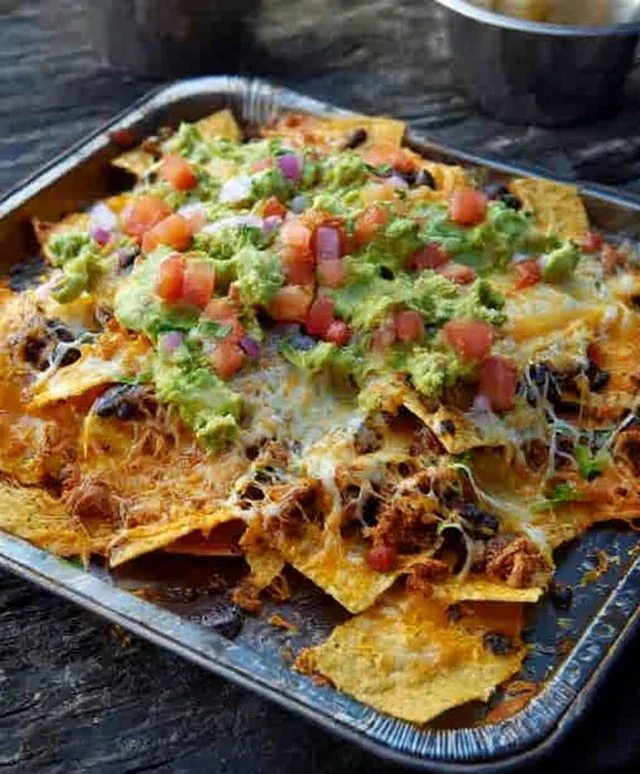
Campfire Grilled Nachos
Savor smoky, cheesy nachos cooked over an open campfire for a truly rustic experience.
Ingredients
-
tortilla chips
-
ground pork
-
taco seasoning
-
black beans
-
shredded cheddar cheese
-
diced tomatoes
-
diced onion
-
sliced avocado
-
diced jalapeños
Instructions
-
Step 1
In a skillet over the campfire, brown the ground pork with the taco seasoning according to package directions. Drain any excess grease. -
Step 2
Assemble the nachos: Spread a layer of tortilla chips on a foil-lined cast iron skillet or heavy-duty aluminum foil packet. Top with the seasoned ground pork and black beans. -
Step 3
Generously sprinkle shredded cheddar cheese over the pork and beans. Add diced tomatoes, diced onion, and diced jalapeños. -
Step 4
Carefully place the skillet or foil packet onto the campfire grill grate. Cook for 5-10 minutes, or until the cheese is melted and bubbly and the chips are heated through. Monitor closely to prevent burning. -
Step 5
Remove from heat. Top with sliced avocado before serving.
Important Information
Nutrition Facts (Per Serving)
It is important to consider this information as approximate and not to use it as definitive health advice.
Allergy Information
Please check ingredients for potential allergens and consult a health professional if in doubt.