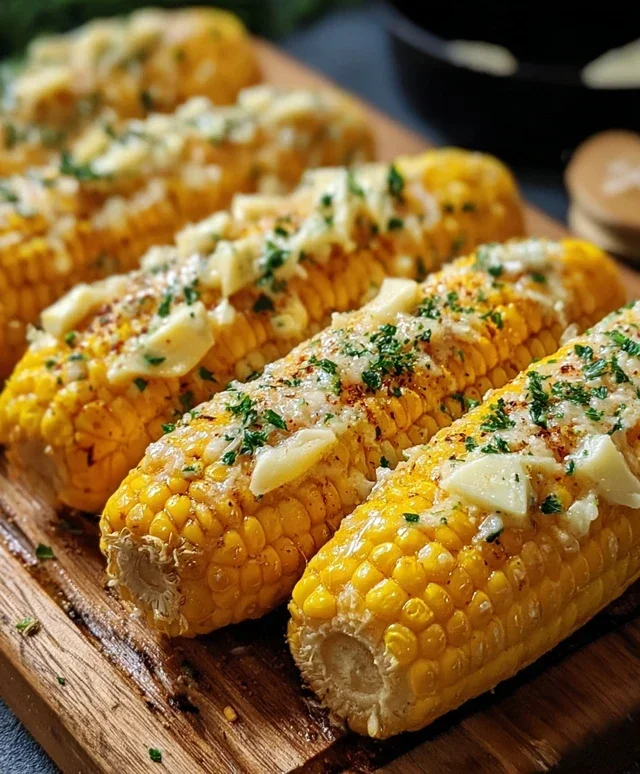
Cheesy Garlic Butter Corn on the Cob Recipe
Cheesy Garlic Butter Corn on the Cob is more than just a side dish; it’s a summer celebration on a plate! Imagin extracte perfectly grilled or roasted corn, each kernel bursting with sweet, juicy flavor, then generously coated in a decadent mixture of rich garlic butter and a delightful sprinkle of melted cheese. It’s the kind of dish that brings smiles to everyone’s faces, turning a simple meal into a memorable occasion. We all love corn on the cob, don’t we? It’s a quintessential summer staple. But what truly elevates this version is the magical combination of savory, pungent garlic, creamy butter, and the irresistible pull of melted cheese. This Cheesy Garlic Butter Corn on the Cob takes that beloved classic and amplifies its deliciousness to a whole new level, making it utterly irresistible and a guaranteed crowd-pleaser.
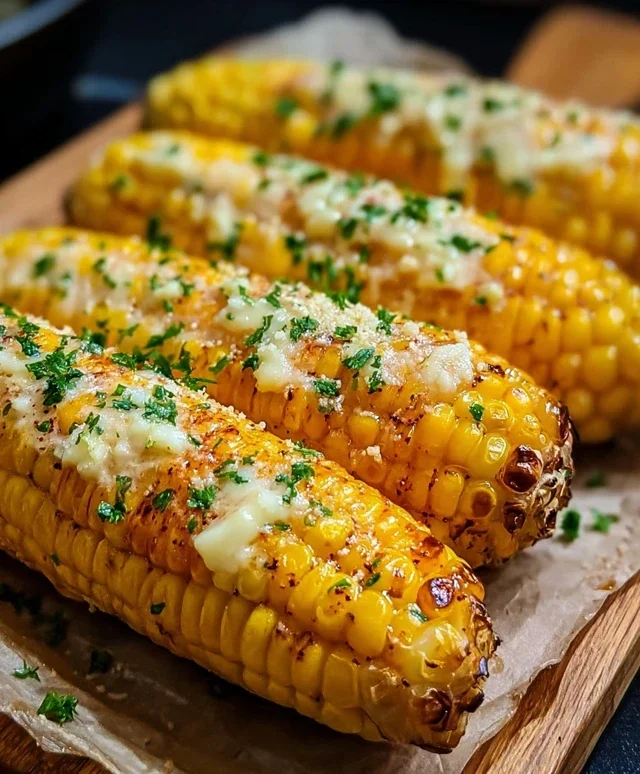
Cheesy Garlic Butter Corn on the Cob
There’s something undeniably magical about corn on the cob. The sweet kernels bursting with flavor, the satisfying crunch, and the joy of eating it straight off the cob – it’s a quintessential summer treat. While plain butter and salt are always a classic, I love to elevate this humble vegetable with a burst of savory garlic and salty Parmesan. This Cheesy Garlic Butter Corn on the Cob recipe takes the beloved summer staple and transforms it into an irresistible side dish that’s perfect for barbecues, potlucks, or even just a weeknight dinner. The combination of rich butter, pungent garlic, fresh parsley, and sharp Parmesan creates a flavor explosion that will have everyone asking for seconds. Plus, it’s incredibly easy to make, making it a winner in my book!
Ingredients:
Cooking Instructions:
Preparing this delightful corn on the cob is a straightforward process, and the resulting flavor is well worth the minimal effort. We’ll start by creating our flavorful garlic butter spread, then get the corn ready for its delicious transformation.
Step 1: Prepare the Garlic Butter Spread
In a small bowl, combine the softened unsalted butter, minced garlic cloves, chopped fresh parsley, salt, and black pepper. If you’re using it, add the lemon zest now as well. The lemon zest adds a lovely bright, fresh note that cuts through the richness of the butter and cheese, but it’s absolutely delicious without it too. Use a fork to mash and mix everything together until it’s well combined. You want to ensure the garlic is evenly distributed throughout the butter. Make sure your butter is truly softened – not melted – so it’s spreadable and doesn’t just slide off the corn. This spread is the heart of our flavor profile, so don’t skimp on the garlic or herbs! I like to make this spread just before I’m ready to assemble the corn, so it’s at its freshest.
Step 2: Prepare the Corn for Flavor Infusion
Once you have your delicious garlic butter mixture ready, it’s time to prepare the corn. For this recipe, we’ll be using a method that allows the butter to melt and permeate the corn kernels beautifully. You can choose to either boil or grill your corn. If you’re boiling, bring a large pot of water to a rolling boil. Carefully add the husked corn ears to the boiling water. Cook the corn for about 5-7 minutes, or until the kernels are tender and bright yellow. Avoid overcooking, as this can make the corn mushy. If you’re grilling, preheat your grill to medium-high heat. You can grill the corn directly on the grates or wrap it loosely in foil. Grill for about 10-15 minutes, turning occasionally, until the kernels are tender and slightly charred in places. Both methods work wonderfully, so choose the one that suits your preference or your available equipment.
Step 3: Generously Coat the Corn
After your corn has been cooked to perfection, it’s time to slather it with that incredible garlic butter. Carefully remove the corn from the boiling water or grill. While the corn is still hot, take your prepared garlic butter mixture and generously spread it all over each ear of corn. Use a knife or a spatula to ensure an even coating. Don’t be shy with the butter! The heat from the corn will help melt the butter, allowing it to seep into the crevices between the kernels. This is where all that amazing garlic and parsley flavor gets infused. Get into every nook and cranny for maximum deliciousness. This is the step where the magic really starts to happen, transforming simple corn into something truly special.
Step 4: The Cheesy Finnon-alcoholic ale
Now for the pièce de résistance – the Parmesan cheese! After you’ve coated the corn with the garlic butter, immediately sprinkle the grated Parmesan cheese generously over the top of each ear. The heat from the corn will begin extract to melt the cheese, creating a delightful, savory crust. You can roll the corn in the cheese to get an all-over coating, or simply sprinkle it on top. If you’re feeling particularly indulgent, you can even add a little extra Parmesan for an even cheesier experience. The salty, nutty flavor of the Parmesan complements the sweet corn and garlicky butter perfectly. It’s this combination that makes this recipe so irresistible and a guaranteed crowd-pleaser.
Step 5: Serve and Enjoy Immediately
Once the corn is coated with the garlic butter and Parmesan cheese, it’s ready to be served! The best way to enjoy this Cheesy Garlic Butter Corn on the Cob is immediately, while it’s still warm and the cheese is melty. You can serve it as is, or if you like, you can give it a final sprinkle of fresh parsley for an extra pop of color and freshness. If you have any leftover garlic butter spread, you can even offer it on the side for anyone who wants an extra kick of flavor. This corn is a fantastic accompaniment to grilled meats, burgers, or even just as a standalone treat. The sweet corn, rich garlic butter, and salty Parmesan create a symphony of flavors that is truly satisfying. Don’t be surprised if your guests devour it in minutes! It’s a simple recipe that delivers big on taste and is sure to become a summer favorite.
Conclusion:
There you have it – a simply irresistible Cheesy Garlic Butter Corn on the Cob recipe that’s guaranteed to be a crowd-pleaser! This dish is fantastic because it elevates humble corn into something truly special with minimal effort. The fragrant garlic butter infuses every kernel with rich flavor, while the melted cheese adds a delightful gooeyness that makes it incredibly satisfying. It’s the perfect side dish for barbecues, picnics, summer cookouts, or even just a weeknight treat. I love serving this alongside grilled chicken, burgers, or even as a star appetizer on its own. Don’t be afraid to experiment with variations – try adding a pinch of chili flakes for a kick, or a sprinkle of fresh chives for an extra herbaceous note. I wholeheartedly encourage you to give this recipe a try; it’s so easy to whip up and the results are consistently delicious!
Frequently Asked Questions:
Can I make this Cheesy Garlic Butter Corn on the Cob ahead of time?
While the corn is best enjoyed fresh off the grill or out of the oven, you can prepare the garlic butter mixture ahead of time and store it in the refrigerator. You can also shuck and clean the corn in advance. However, assembling and cooking the corn is best done just before serving to ensure optimal texture and flavor.
What kind of cheese works best for this recipe?
A good melting cheese is key here! I find that shredded cheddar, Monterey Jack, or a blend of both work wonderfully. For a sharper flavor, you could also try a mix with some Parmesan. The goal is a creamy, gooey cheese pull!
Cheesy Garlic Butter Corn on the Cob
A delicious and easy recipe for corn on the cob loaded with cheesy garlic butter and fresh parsley. Perfect for grilling or baking.
Ingredients
-
4 ears fresh corn, husked
-
1/2 stick unsalted butter, softened
-
2 garlic cloves, minced
-
1 tbsp chopped fresh parsley
-
1/2 tsp salt
-
1/4 tsp black pepper
-
1/2 cup grated Parmesan cheese
-
1 tsp lemon zest (optional)
Instructions
-
Step 1
Preheat your oven to 400°F (200°C) or prepare your grill for medium-high heat. -
Step 2
In a small bowl, combine the softened unsalted butter, minced garlic, chopped fresh parsley, salt, and black pepper. Mix well. -
Step 3
Spread the garlic butter mixture evenly over each ear of corn. -
Step 4
Sprinkle the grated Parmesan cheese over the buttered corn. -
Step 5
For oven baking: Wrap each ear of corn tightly in aluminum foil. Place on a baking sheet and bake for 20-25 minutes, or until tender. -
Step 6
For grilling: Place the corn directly on the grill grates. Grill for 15-20 minutes, turning occasionally, until tender and lightly charred. -
Step 7
If using, sprinkle with lemon zest before serving.
Important Information
Nutrition Facts (Per Serving)
It is important to consider this information as approximate and not to use it as definitive health advice.
Allergy Information
Please check ingredients for potential allergens and consult a health professional if in doubt.